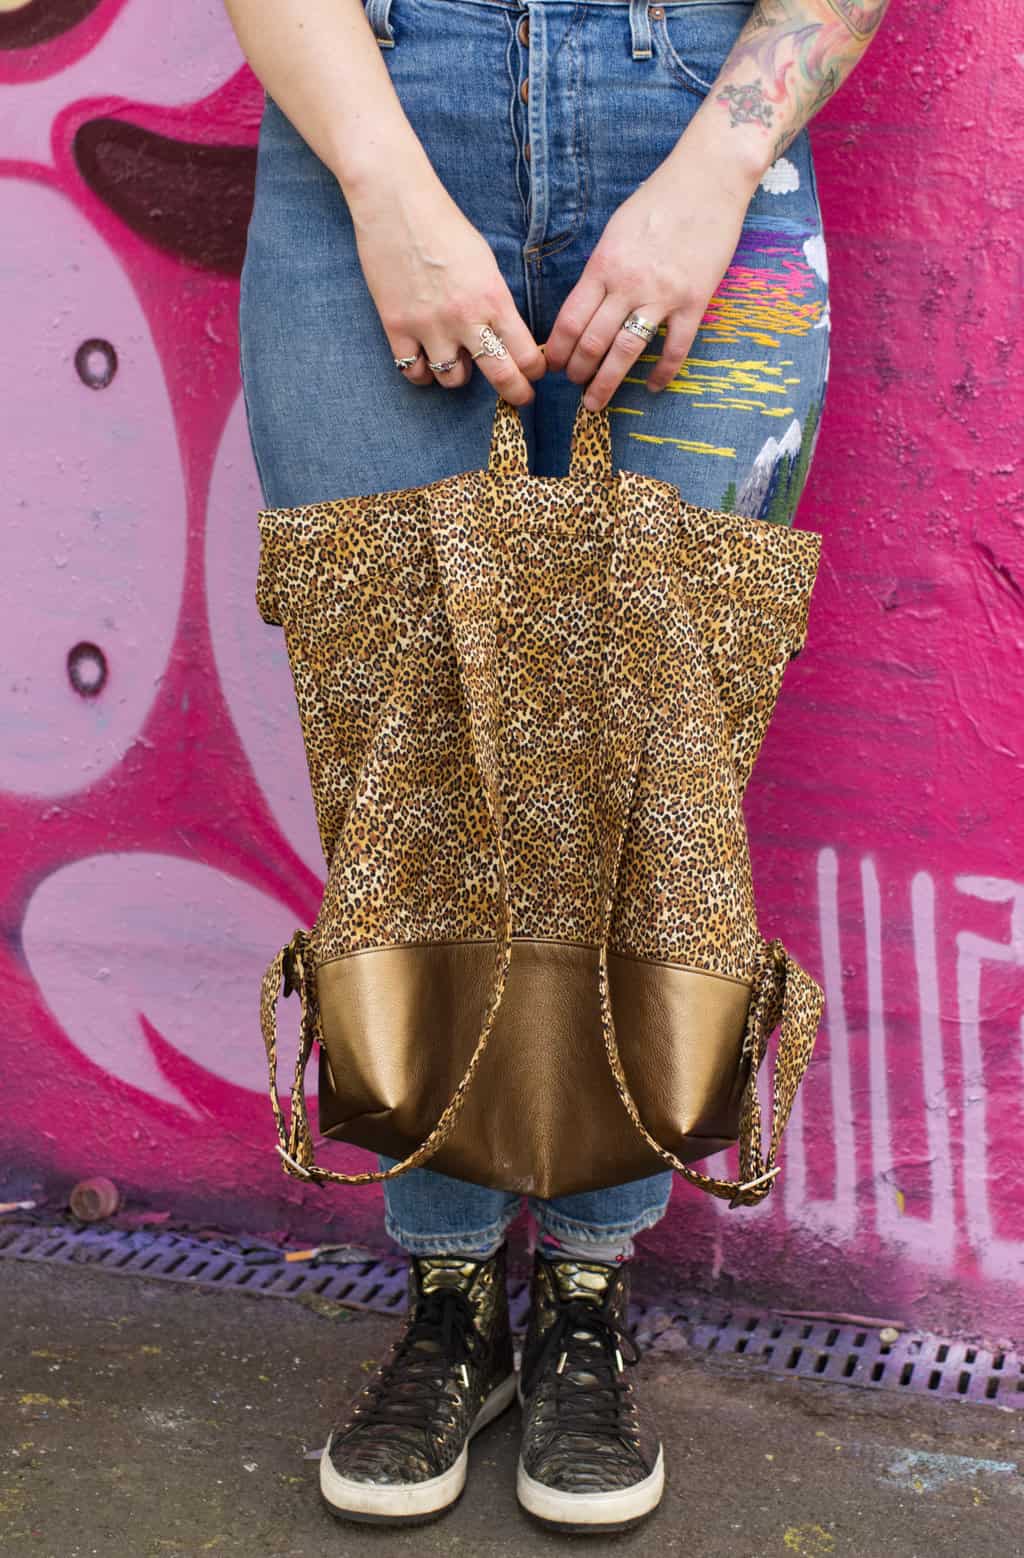
This week’s post is a little somethin’ somethin’ different – I’m taking a break from making clothing to bring you… a backpack. Yah. I made, like, a proper backpack. I bought all the special hardware and everything. Go me ??
And despite it being my first attempt at anything like this, it’s actually turned out pretty damn good.

The pattern I’ve used is the Range Backpack by Noodlehead – this is the same amazeballs designer that dreamed up the Makers Tote that I made previously (and that I have another couple on the way of!) and other cool things such as the Making Backpack which I’m fo sho gonna try out next (how many bags is too many bags? Asking for a friend…)
Here’s the Range Backpack:

And here’s the Making Backpack: Regular readers will remember my post from a few weeks back of the Victory Patterns Madeleine skirt – also known as the skirt with the totes annoying braces. I had a proper whinge about how those braces just DID. NOT. FIT. and just kept on slipping off my shoulders – and I declared my requirement of clothing to be faff-free in order to gain a place in my wardrobe. It seems that this also extends to bags.
I’ve never been much of a handbag kinda gal, personally. Maybe because I’m not really that type of girl that likes to totter down the street with her nice matchy-matchy heels and handbag (you know the sort ?), or the type get herself all dolled up for a night out with one of those tiny handbags that you can barely fit a phone in (someone please tell me the point in those? ??♀️). Bags for me have to be big enough to hold stuff, like proper stuff, and wearable in some way so that I don’t have to physically hold it in my hands. It HAS to be hands-free – there will be no carrying it in my hands or constantly hoiking it up on my shoulder (and how bad is that for your posture anyway?!). Clutch bags are the worst – I mean, you have to actually grip them in your hand, or have them dangle off your wrist on a strap like a child with a mitten. Nah mate. Not having that. Backpacks first, crossbody straps second – anything else doesn’t even get a look in where I’m concerned.

Most – in fact almost all bar one – of my bags are backpacks. And I wear them on both shoulders, looking like I’m out on a school trip or something. But I don’t care – my stuff is out of the way, secure, and I’ve got room for my water bottle and maybe an impromptu purchase of some description without having to use a plastic bag. And if that purchase happens to be something that’s bulky or a weird shape, it’s out of the way on my back rather than under my armpit making me walk like I’ve got a chicken wing.
Winning, right? In all senses. I just can’t see the appeal in these ‘regular’ handbags, so if someone’s got a case for them I’m curious to hear it ???
Annnyyyywayyy. I made a thing. A thing to hold things.
I spent an obscene amount of time choosing fabrics for this bag – it was to be a make for the Minerva Crafts Blogger Network, and they have a pretty large selection of fabrics. The pattern calls for canvas, but if you’re willing to use some interfacing, you can also use quilting cotton. And let’s face it, there’s waaay more quilting cotton out there to choose from than there are canvases – most of the canvasses I found were Cotton and Steel ones, and whilst I like a handful of their past prints, none of their canvas range really jumped out at me.

I eventually settled on a beautiful Robert Kaufman print, which I’d had my eye on for a while but never really made my mind up on what to use it for. It was a beautiful ombré print from the ‘Enchanted Pines’ range. I chose this for the exterior of the bag, with some gold faux leather for the base of the bag. The lining was to be a brown leopard print quilting cotton. I was so excited.

After receiving all the fabrics apart from the ombré (it was on backorder), it came to light that this print I’d been wanting for so long was actually discontinued by the manufacturer. Sad face. Now I was left with the gold leather and the leopard print lining, and no outer fabric. I began my fabric search again.
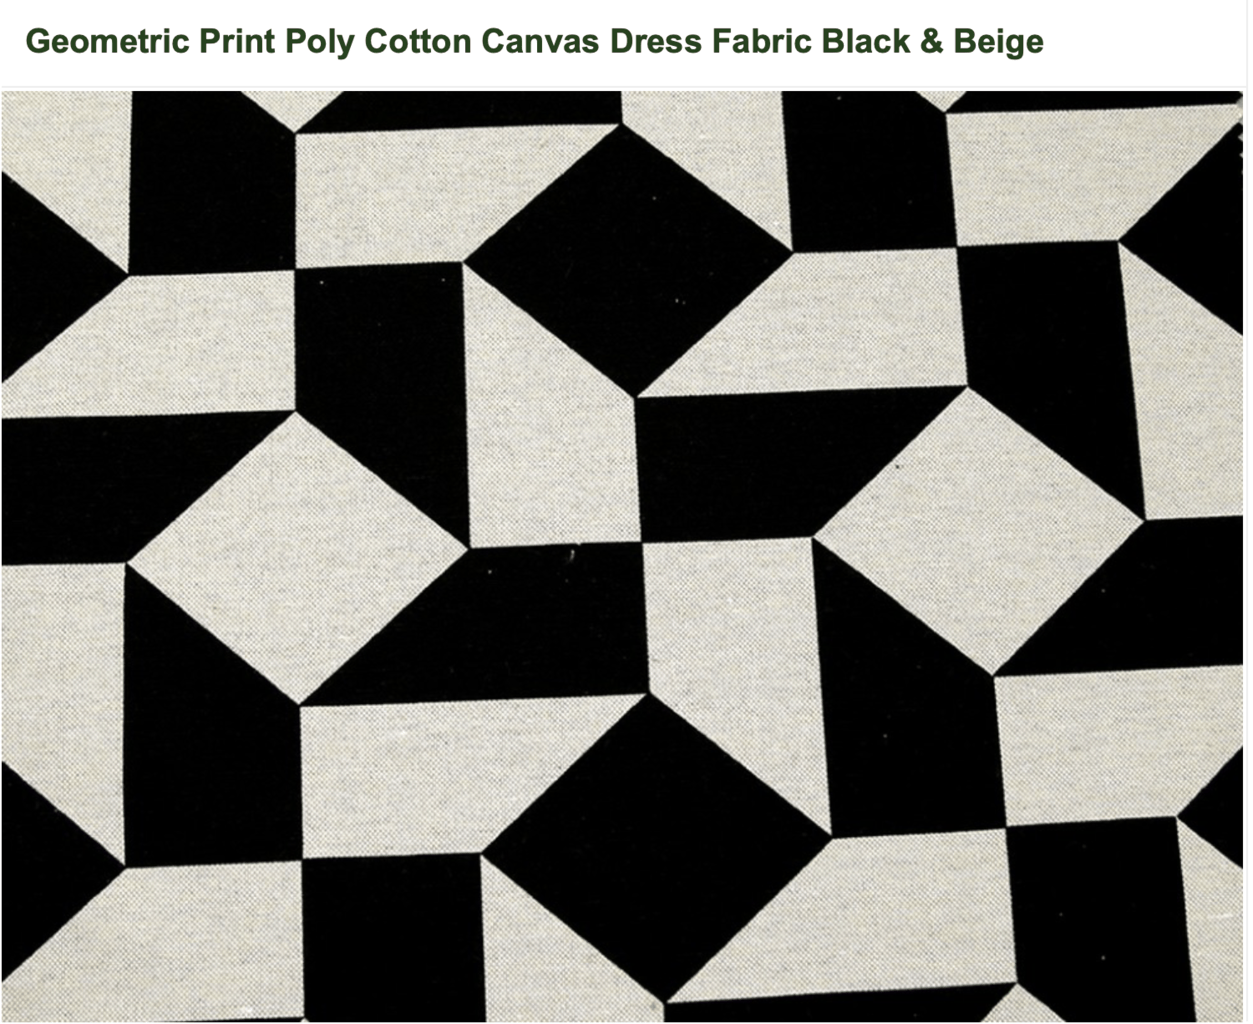
I started with the canvases, just in case anything new had popped up. There were a couple of possibilities, but I didn’t totally get that YES feeling. I go by this feeling a lot and it didn’t appear, so I listened to the silence. There was also a black and white geometric pattern which I thought might go really well with the gold, which I so nearly chose… but again, I just didn’t feel it.
Leopard print is always a safe bet, and I’d seen a Camelot print in pink and purple that caught my eye. I went back to it a couple of times… and thought yes, it’s a good one. Decision made – otherwise I’d have been deliberating forevermore.
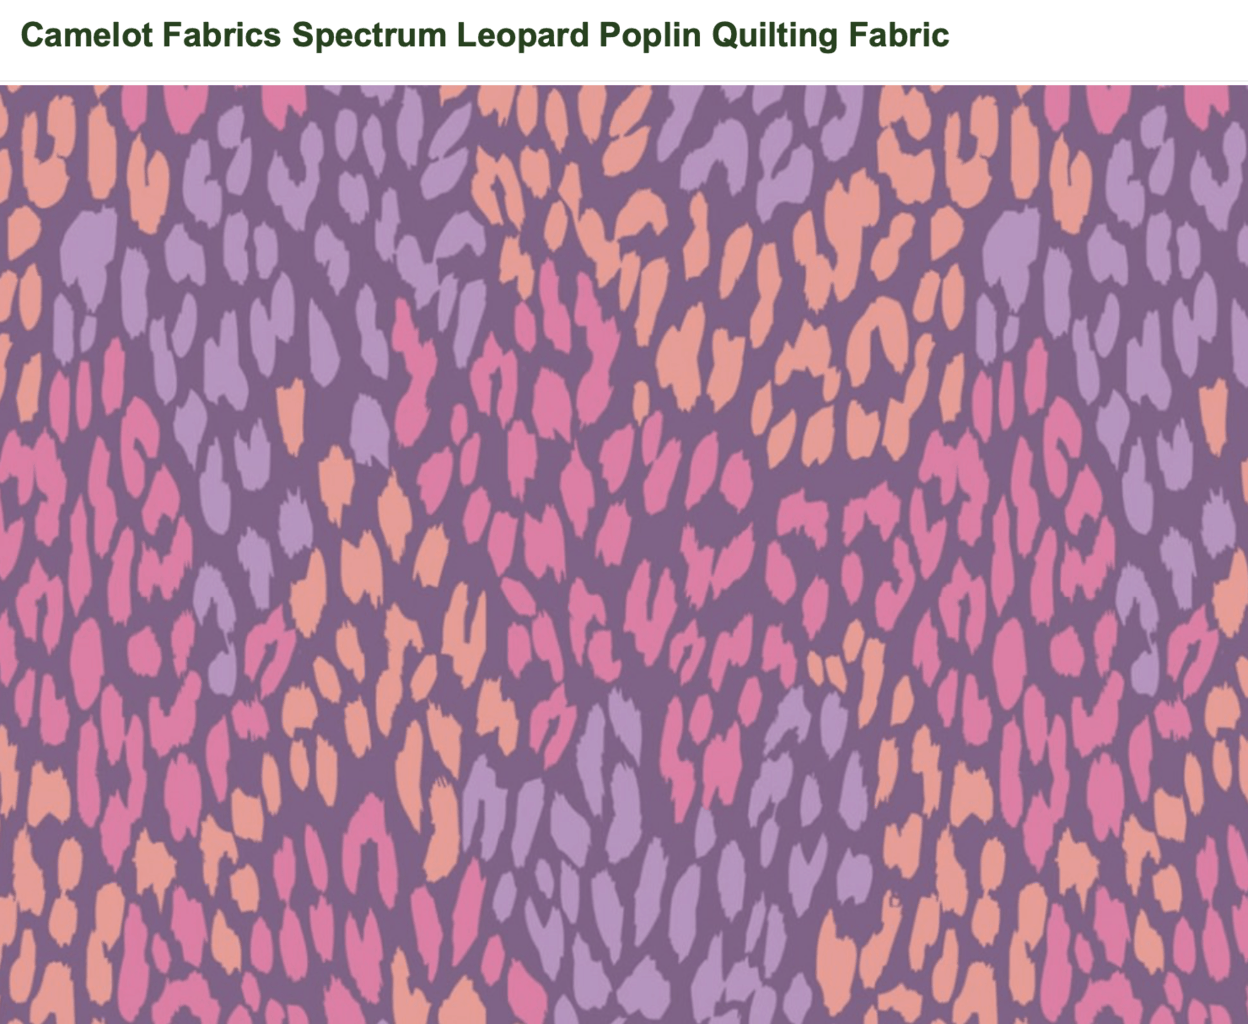
When it arrived, it didn’t quite coordinate with the gold leather in the way I’d hoped. The brown leopard print originally intended to be the lining, however, paired quite well. So that one now got promoted to Outer Fabric and the purple leopard got moved to Lining Fabric. We now had all the materials. Ready for lift-off (finally!) ?

I bought the metal hardware from Sew Hot – the pieces are from the range by Emmaline bags, in a beautiful antique brass colour. You can also get the whole range in silver, gold, gunmetal or rainbow. They look really professional and I’m just trying to figure out which project I can use the rainbow range on…


Included in the Noodlehead pattern is a little grid of squares for you to cut out and pin to the cut pieces – I definitely recommend doing this, because some of those pieces are very similar to each other!

Another thing that was amazingly helpful was this little diagram of the bag with all the pieces labelled – if you’re making the backpack in multiple fabrics like I was, it helps you to visualise which piece you’re cutting so that you can decide which fabric you want to cut it from. Sometimes I read pattern pieces and I just think ‘yeah… I have no idea what bit that is so I’m not really sure which fabric I want to cut it from’. This little picture helps SO MUCH.


It actually didn’t take that long to cut out all the pieces – I was, for some reason, expecting it to take much longer. I used my quilting ruler (honestly I don’t know how I ever lived without it!) and labelled all the pieces like a good girl. I used a bit of common sense and didn’t interface any of the pieces that I cut in leather – apart from the base. I did wonder how it would take to fusible interfacing – I thought there might be a good chance I’d end up with a hot gooey mess under the iron, but there’s only one way to find out right?! Thankfully it adhered without incident, and the leather even stood for a super quick press where needed (like the folds on the pocket on the front of the bag).

You’ll defo want to use a Teflon roller foot with sticky fabrics like leather – I’ve found that just a regular ol’ Teflon foot does bugger all. That little roller, I tell ya, is magical. It’ll help that leather slide on through the machine with no dramas. It also helps to put a sheet of paper under the leather if it’s directly against your machine bed – as close to the needle as you can get it to (but not under) the needle unless you enjoy the painstaking process of picking out tiny flakes of paper from your stitching. And FYI, when articles on the internet tell you that you can stitch over the paper and then just ‘tear it away’, they are lying to you. It doesn’t tear away.

I was a little bit nervous about quilting the back of the bag (something that’s recommended for sturdiness if you’re using a lighter fabric rather than canvas), because I ain’t no quilter. There was a great possibility for it to end up looking a complete shitfest. I saw some nice pictures of the quilting that others had done (fancy patterns, and all that ??♀️) but decided that the best decision was to stick to straight lines, and draw them on first so that I didn’t weave about all over the show. I drew the lines on with a dressmakers pencil, forgot to put the walking foot on my machine, and steamed straight in (the lack of walking foot didn’t seem to do *too* much damage btw).
You’re told that if you don’t want to see the quilting on the front of the bag (the top of the back folds over to show on the front of the bag) then don’t quilt the top 5 1/2 inches of the back piece. So I duly drew my line five and a half inches down and make sure that not a single stitch of my quilting goes past this for fear of it looking a state on the front of the bag.
Turns out I needn’t have worried about being so precious with sewing up to the line – you end up sewing a strip of fabric over that part anyway (thanks for letting me know that in the pattern instructions, btw ?). Never mind. I won’t bother being so careful next time.


Cutting the straps was a bit of a mission – something like 36 inches long each ? At least with these fiddly pieces of the pattern, there’s none of this turning-it-inside-out business – you fold it in on itself (raw edges therefore enclosed) and then topstitch. Much easier, and you get proper sharp corners too without having to use one of those pokey sticks.
I used compressed fleece on the back of the bag and all the pieces of the front – the pattern suggests using a layer of canvas, but I wasn’t sure that was really going to do much. And I didn’t have any canvas laying around. Perhaps I’ll try it for the next bag, just to see how it compares, but the fleece actually gives it a nice sturdy squishyness. I feel like the canvas might make it feel a bit… hard and stiff. Oo errrrr.

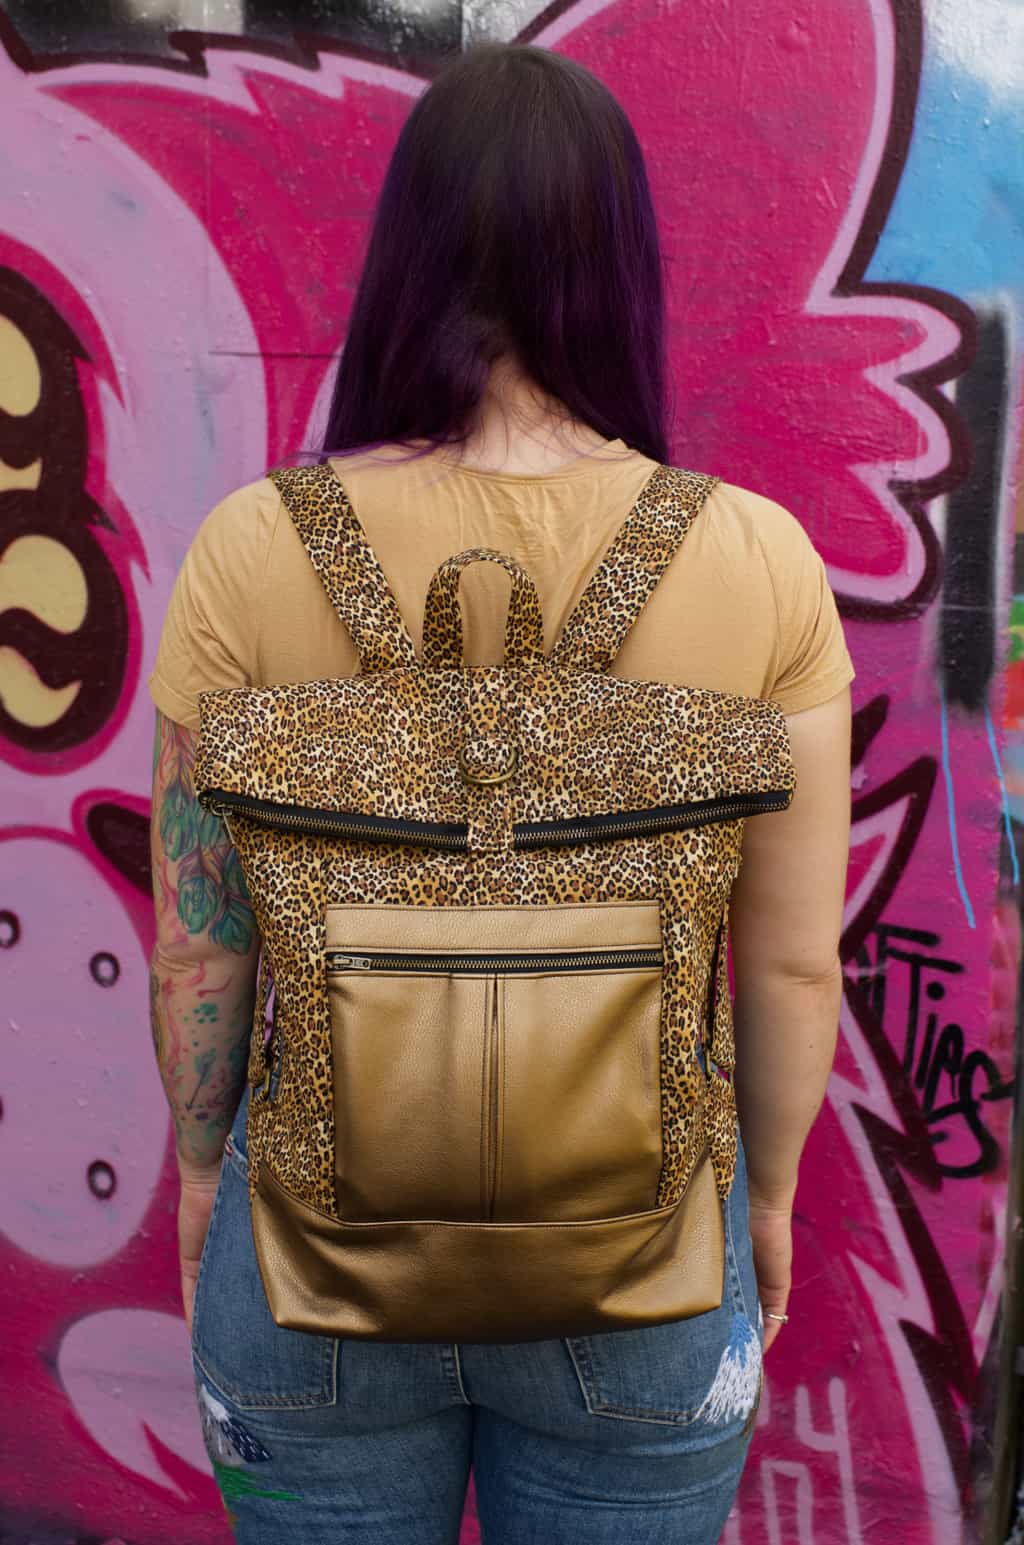
One thing I didn’t like about the design was the open top of the bag – living in London, you wanna be fastening your bags tres securely. I dug deep into the zip box to find something long enough to fit the top of the bag – I had a couple of options, but they were all metal, and too long. Did I want to faff around removing teeth? Not really, I was on a roll with the bag and didn’t want to stop. Definitely didn’t want to stop to have to wait for a zip that was the correct length to arrive. Nuh uh. So I did what I always do in situations like this – improvise. The best option for a zip was a too-long metal affair which just so happened to be matchy-matchy with the zip on the front pocket… it would have to do.
Because I was too lazy to remove the extra teeth, I had to just sew over the ends of the zip. CAREFULLY. As in turning that wheel BY HAND, super slowly. You do NOT want to send your needle slammin’ into a chunk of solid metal. The zip looks a bit crap at the ends because it kind of curls back in on itself rather than ending nicely, but that’s what you get when you cut corners ??♀️

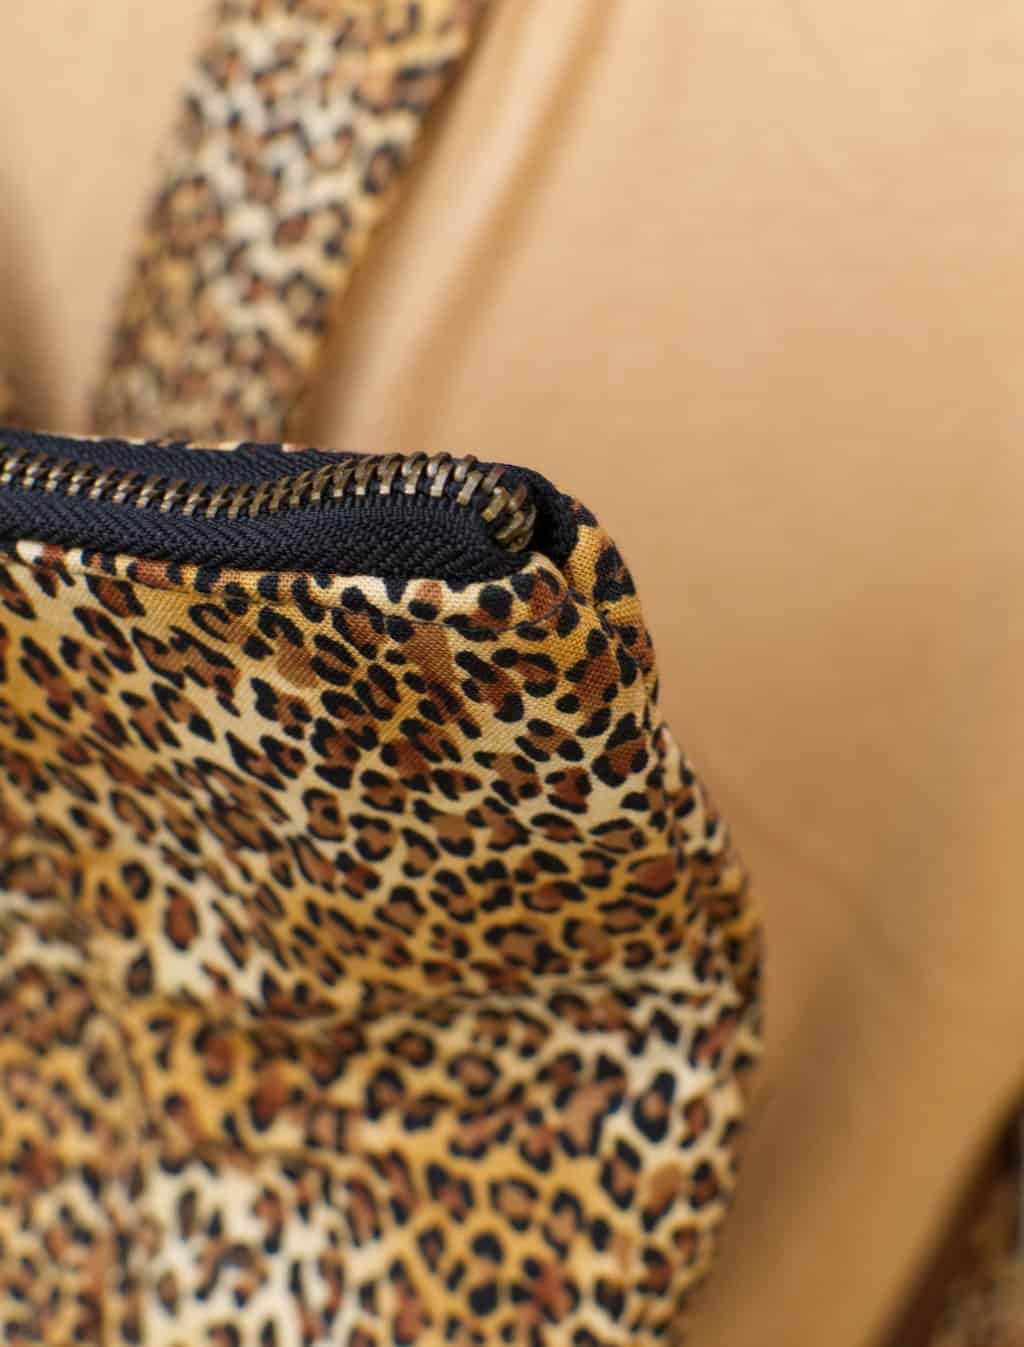
Although you could use quilting cotton for the whole bag, I’d really recommend you go with something proper sturdy for the base. Leather, waxed canvas, something that’s heavier than regular ol’ cotton. Something with a bit of water resistance would be good too, in case you have to put it down on a wet surface – otherwise, you’re gonna be soaking up that water like a sponge.
The front of the bag is made up of a handful of smaller pieces – something to bear in mind if your canvas has got quite a large scale print, or you’re looking for cohesive pattern-matching. Luckily the leopard print is quite small, so it didn’t make a difference for me. Plus I’m pretty sure I sewed at least one of the pieces upside down, but you can’t notice it so… ??♀️
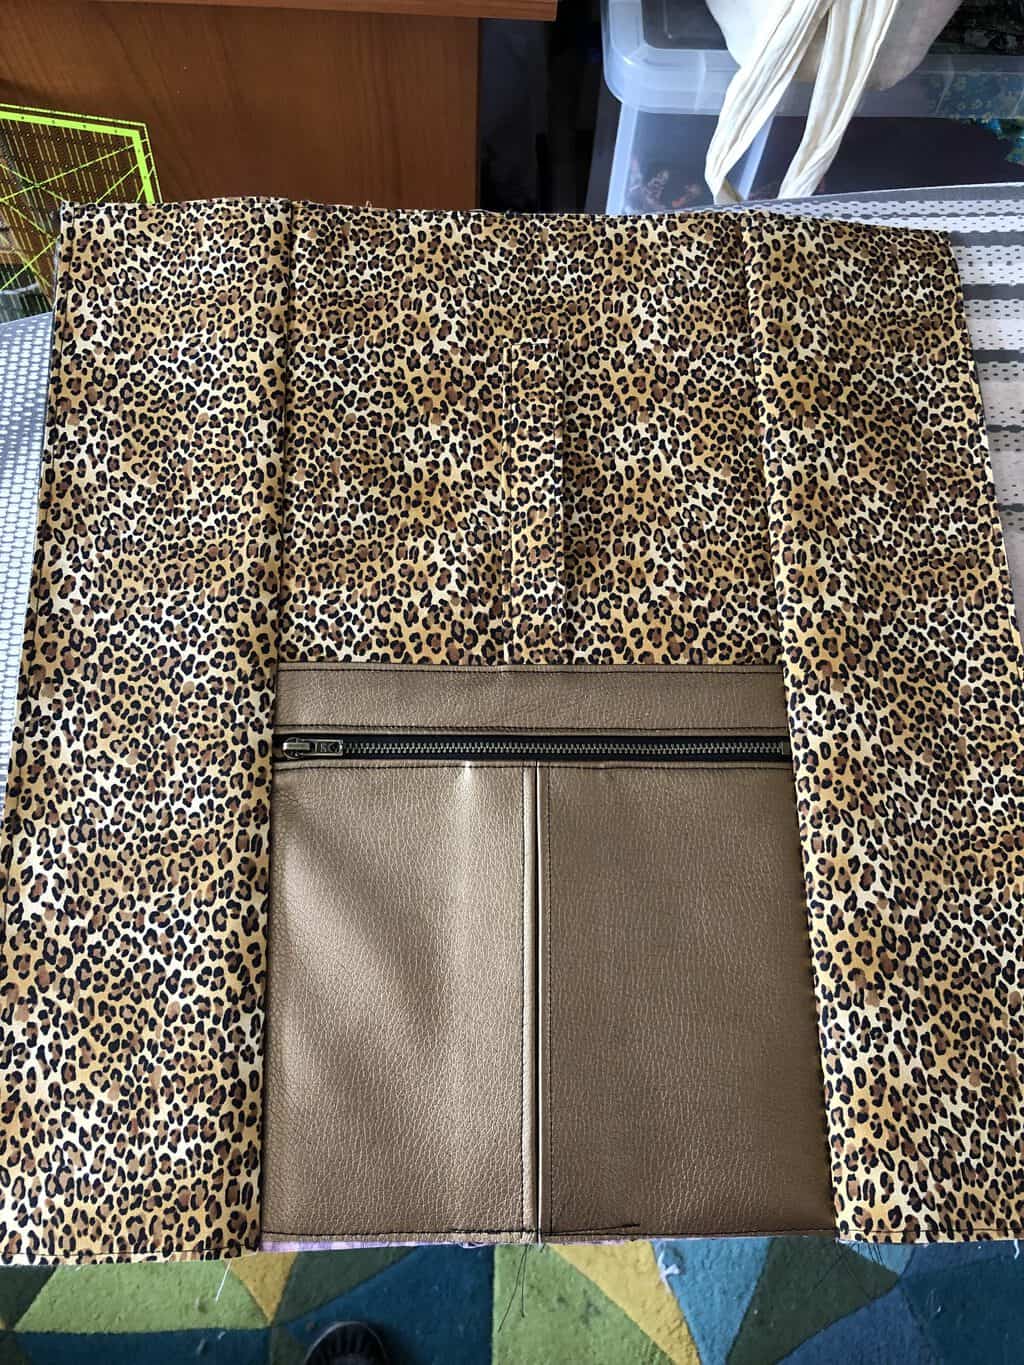
The lining is super simple – just two big pieces, one for the front and one for the back. Plus you’ve got a little slip pocket that you can put on too, if that’s your thing. The zip pocket on the front is lined as well, but as it’s stitched on to the main front of the bag, you only get one half of the pocket lined in your actual lining fabric – the other half is your outer fabric ? If I’d have realised that, I wouldn’t have used the lining fabric and instead would have used the main outer fabric as the lining so it looked a bit more uniform ??♀️


I’d definitely make another one of these backpacks – and I’m really happy with the finish, despite it being the first one I’ve ever made. The straps are comfy (but could possibly do with some padding for heavy loads), the hardware makes it look proper profesh, and it went together without drama. It’s roomy – I can fit a fair bit of stuff in it, it’s SO much better than those stupid tiny bags that you can’t even fit your wallet in. And it’s hands-free too. For the next one though, I would change the closure of the two D-rings on the front of the bag because it’s fiddly AF to get the bag open – one of those plastic clip things that you get on dog collars (what’re they called? ??♀️) would be perfect – just snap it open. Because I’ve installed the zip, I don’t really need the faff of the D-ring closure to deter potential bag-rummagers, so the clip would be fine.
This bag is also featured on the Minerva Crafts Blogger Network this month, so you can hop on over to that post and check out all the materials I used to make this beauty ?
Can you believe we’re almost at the end of Me Made May already… have you been participating? If you have, how’s it going? I’m managing to remember to document most of my Monday-Friday outfits (I think there’s maybe been one or two that I’ve missed ??♀️) and so far there are some clear trends emerging. Which is good, because it will hopefully direct my sewing towards the things that I wear the most!
There’ll be a full low-down next week on the blog, pop your email in the box at the bottom of the pictures to have it drop straight into your inbox??In the meantime, enjoy the rest of your weekends – I’m gonna spend mine sewing! ??


18 responses to “Home On The Range”
It looks great! So neat and professional. And I’m with you on backpacks, so much easier to carry a ton of stuff in that handbags that break your arm. Also a big fan of cross body satchel type bags. I really must try bag making soon, I have some cool fabric ideas ?
LikeLike
Thanks Romy! I actually impressed myself how good it looked, I guess I wasn’t expecting much from my first backpack but I’m pleasantly surprised! ? I’m glad it’s not just me that can’t be doing with faff handbags ? I definitely support your move into bag making, I feel like it could be addictive though… ??
LikeLike
I love making bags – it’s one thing I am actually good at, LOL! I have even managed to sell a couple too. I love yours. I have seen a few people around town wearing this style of bag, and I think your added zip is a much better option, When I saw them, I thought that’s a bit mad, anyone can nick stuff from that! Loving your jeans too, sooo cool!! x
LikeLike
That’s exactly what I thought about the initial fold over closure… ? Clearly that’s not gonna fly in London lol. Yay for selling bags! Well done you! This Noodlehead pattern actually gives the go-ahead to sell the items made from it (on a small, personal scale) and I was thinking about putting a couple in the Etsy shop to see how they go ? Ahh thanks on the jeans – it was one of the few items of clothing I picked up when we went to NYC last year! (The majority of purchases were fabric ?)
LikeLike
I love this bag, I’m going to buy the pattern now….how exciting my daughter 26 in June will love it for her birthday xxx
LikeLike
Ahh thanks Cindy! Ooh exciting that you are going to buy the pattern – which fabrics will you use?
LikeLike
Love your backpack; looks great. I’m a bag lady and haven’t yet reached the ‘too many’ number 🙂
LikeLike
Thanks Bren! ? Okay cool I’m glad I have your blessing to keep making, let me know when you get to ‘too many’ so I know where to stop ?
LikeLike
Your bag looks great. I look forward to your emails every week so I can read about what you’ve been up to. 🙂
LikeLike
Ahh thanks Denise! So happy to hear that you enjoy the blog ??
LikeLike
Looks great Sarah, another bag lady here too, I think the clip that your referring to is a parachute clip alternatively called a side release buckle maybe?
LikeLike
Thanks Sam! And YES – that’s exactly what I mean! Thanks for putting the proper name to it, ‘side release buckle’ sounds WAY better than ‘dog collar release thing’ ???
LikeLike
I completely agree with you that backpacks are the way to go and I’ve always loved this pattern so when I saw you had made it, I couldn’t wait to see what you used re fabric choices. Of course you didn’t disappoint! That gold faux leather with that leopard print is beautiful but you must love opening it and showing off that interior!
LikeLike
Thanks Kathleen! It’s that gold leather that’s my fave… I’m actually considering making a version entirely of leather to see how that works out ? I’ve seen them on Instagram so know that it’s possible… ? You can never go wrong with leopard print in my eyes ???
LikeLike
This is a great bag! I love when the lining becomes the outer, that’s happened to me on a jacket ?
Fancy looking hardware too ?
LikeLike
Thanks! ? It’s funny how intentions and plans change, isn’t it! I really feel that the hardware looks proper profesh, takes the focus off any dodgy topstitching ?
LikeLike
Love it!!
LikeLike
Thank you! ??
LikeLike