So, here we are finally, another post by me!*
*Usual disclaimer – for anyone new to my ‘guest posts’, if you are easily offended, turn away now. This shit can get sweary ? Oh, and it’s a bit long, so go and grab a cuppa will ya?

Let me start off by saying, it’s been awhile, hasn’t it…

In fact, it has been almost 18 months since I started sewing this top, and a year (at least, depending on when the wife can squeeze this post in) since you last heard from me.
Over the last 18 months, I have started and re-started typing this post more times than I care to know but each time the words just seemed to fail me. This final version you are reading is revision number…

Yes, really.
I wrote a fairly sizeable piece on mental illness to go in here at the start (as this is something that I feel strongly about and believe that more people need to be aware of and understand what goes on with people who suffer from it) but given some time and reflection, I think most of what I put was ramblings and not really anything worth reading. What I will leave in for anyone who is interested is this following paragraph that I had started off with –
“There has been a lot of talk recently about mental health – in the news, in the workplace, the BBC even did a series on it with a really good hour-long episode with some of the top names in English football alongside HRH The Duke of Cambridge called “A Royal Team Talk”. It all focuses on one thing – getting men to open up. Suicide is the biggest killer of men under the age of 45 in the UK.”

That is a crazy statistic, and it’s even crazier in this day and age that so many people feel they do not have the support network around them to help them through.
I am incredibly lucky to have someone who is not only strong and supportive but understanding alongside me, so if things get tough I know the wife is there for me.
So let’s finish this little section off by saying over the last year I have not really felt like making much – or writing about what little I have made – for various reasons, but I can feel it coming back. The creative spark is returning and right now I’m getting my make on with BEADS!
They iz the shiny-shiny too! ?
So far I have made three bracelets for the wife, isn’t she lucky! And I am now working on some beaded Christmas baubles, also because the wife asked for them. I’m not too sure how many I will have done by Christmas though. Maybe just one, in which case the Christmas tree is going to look fucking awful ?

Hopefully sometime soon I will be able to get back into my sewing too, as I have several more t-shirts to make and I do actually enjoy it – I have just been feeling a bit like this guy:

Now, on to the sweary-sweary fun times!

As you may remember from my last post back in October 2018 (?) I completed the Prada silk Tee for the wife during a week off work in the summer. With that done I was on a roll and I went straight into my Versace jersey. Yes – MY Versace jersey! I was actually going to make and complete something for me to wear! Woo ??
I picked up the jersey from a seller on eBay that sells a lot of designer fabrics. It comes in pre-cut lengths (probably end of rolls ?♂️) and I had managed to win an auction for a piece big enough to make a couple of tops.
With the fabric sorted I now needed a pattern for a men’s t-shirt. I wanted something reasonably simple, the arms needed to be as stress-free as arms can be because I’m sure you all remember how much I fucking hate sleeves.
Thankfully, the wife had been looking at projects from Norris Danta Ford and Mimi G to try and inspire me into starting my next project and that is where the pattern came from. The Simplicity, MimiG Style 8613 Men’s T-shirt. (As a side note, I’m not too keen on Mimi, but Norris has some style!)
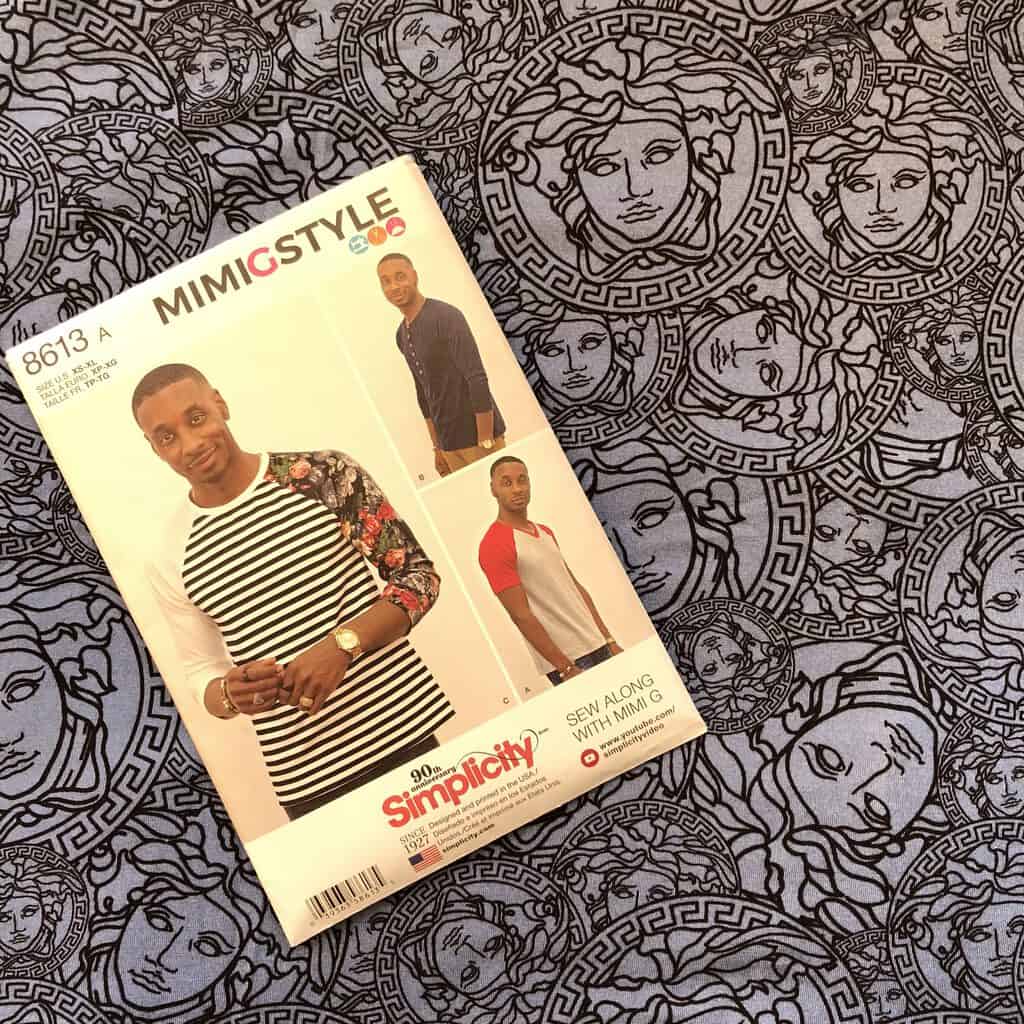
The plan was to make the V-neck short sleeve version entirely out of this fabric, and then make the long sleeve (three-quarter sleeve which at actual length may as well be full length on me) with contrast black sleeves and crew neck collar. Well, let me tell you now – the long sleeve version took me about 6 months to actually get off my ass and complete after I had finished the short sleeve version ?
So, with ideas in mind, fabric in hand and pattern chosen, bought and delivered, it was time to start on my very first item of clothing, for me ?
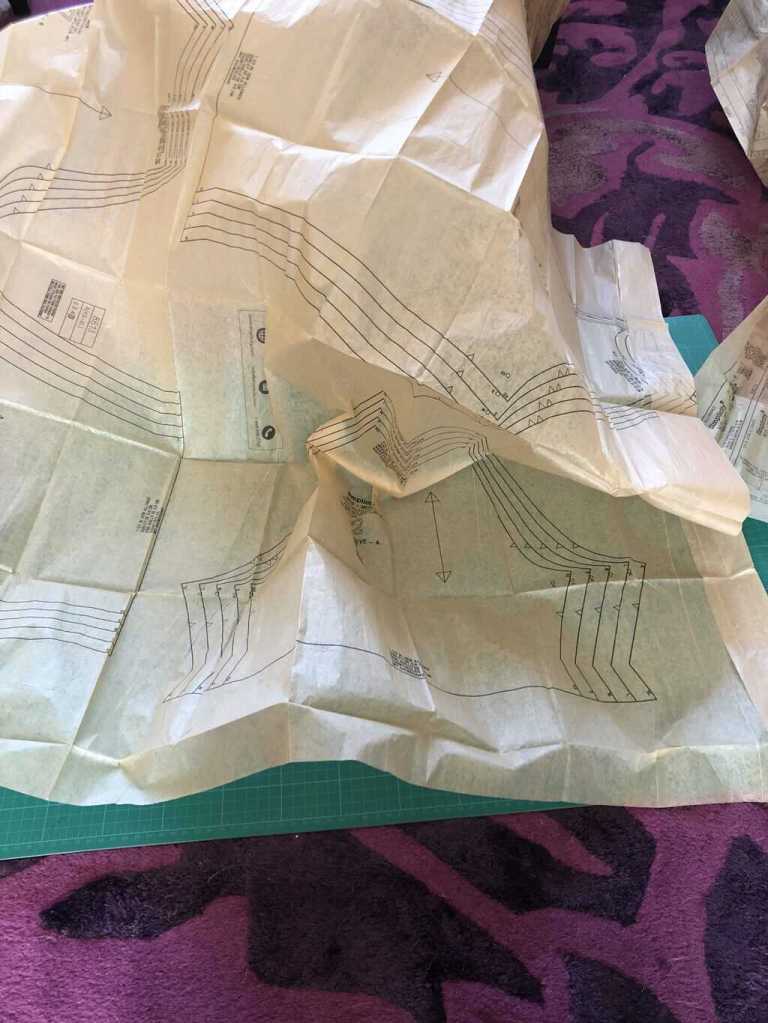
I started off well with my complete inability to unfold the tissue paper. I mean, seriously, who the fuck can’t unfold some tissue paper ? I think I need instructions on how to unfold the instructions.

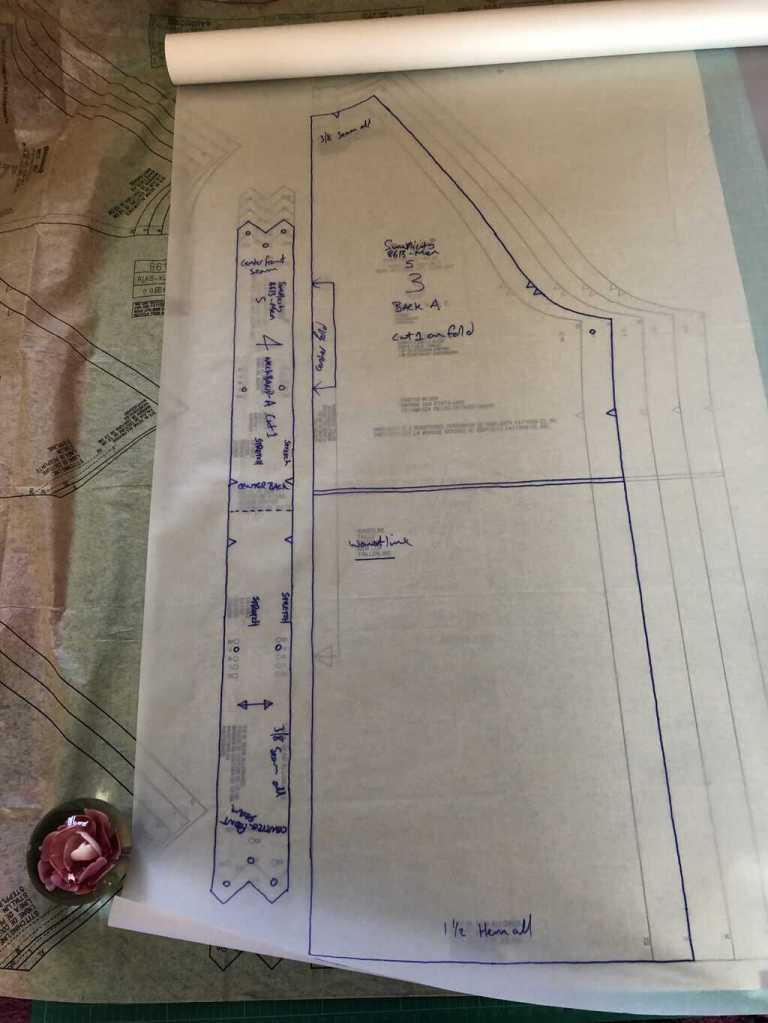
Once the drama llama had had its moment, in the light I managed to move on to actually tracing the pattern and cutting the pieces with very little problem.
There was not much of a need for pattern placement as the pattern is quite simple and repetitive, so I found a spot, slapped it on and cut away!
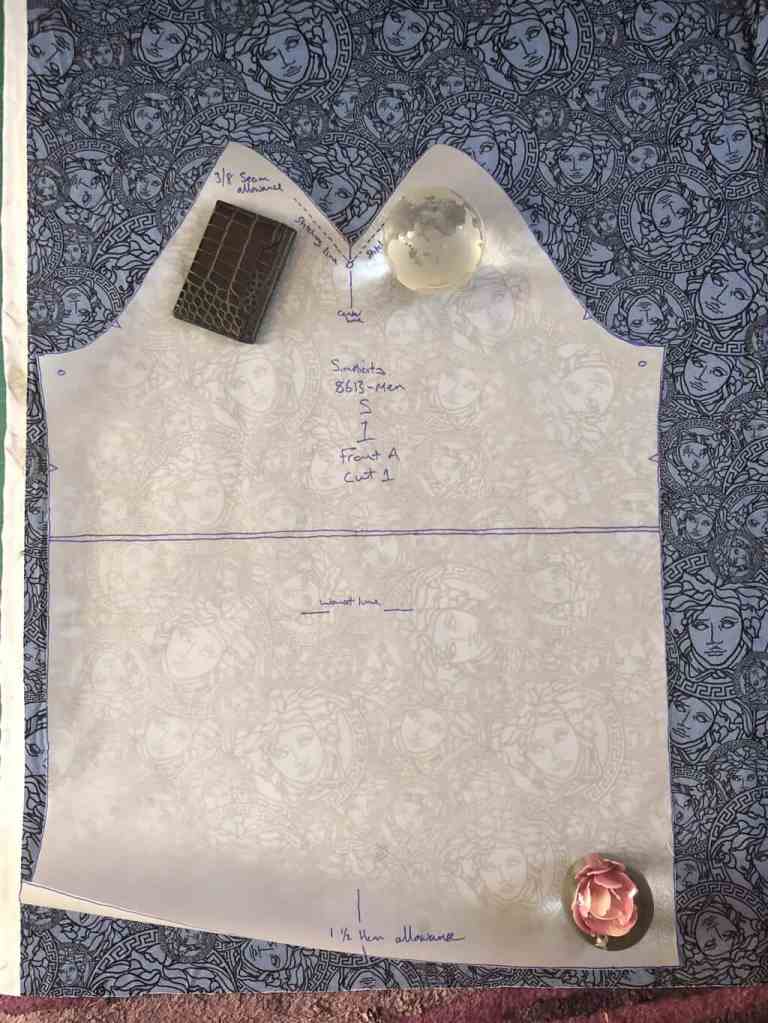
As per usual with most things I do, I got totally carried away and cut half the notches off, or if I remembered to cut them, I’m not convinced they were in entirely the right place ?♂️
Being a fairly heavy jersey fabric I had none of the movement issues that I had previously with the silks I used for the wife, in fact, it was relatively stress-free for a change ? I felt like this was becoming a rather big win.
Putting the top together should have been pretty straight forward too. Now that I was putting sleeves in flat, there was much less drama and the swears decreased dramatically, or so it seemed…
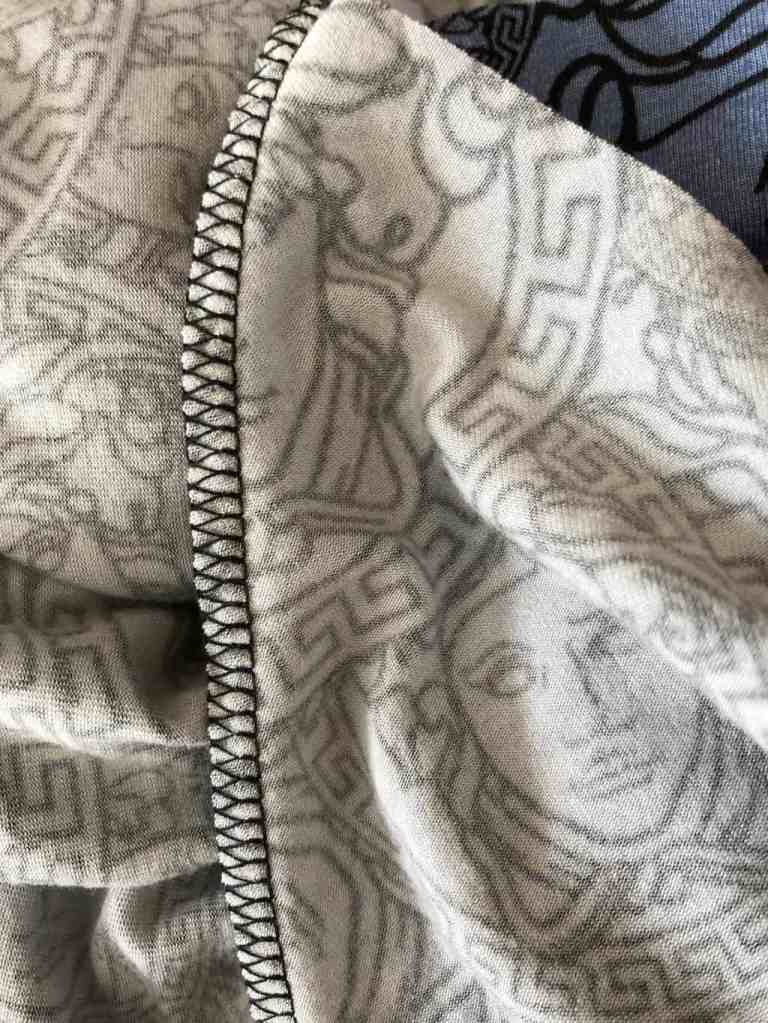
I re-threaded the overlocker (yes, I impressed myself that I managed to do this and have it work) and got to work overlocking every piece of fabric in sight.
Shoulders first, then place in the sleeves open and overlock across the top (being careful not to catch anything else, and keeping all other fabric well out of the way of the finger chopper) and then run all the way up the side from the bottom and into the underside of the arm, flip over and do the same on the other side and BOOM you are done! SIMPLES! Drama free, easy.

Or so I thought.
Next up was the V neck collar which ended up being the most historic fuck up ever… or was it? Yes, yes it was, though it was very nearly equalled a little while later ?
So, what was wrong with this collar you ask? Well, I matched the markings, stretched the fabric to fit, it didn’t fit, I moved the markings and it was a bit better. Dodgy markings or dodgy placement? Who knows? I blame dodgy fabric. What is it they say – a good workman ALWAYS blames his tools? ?
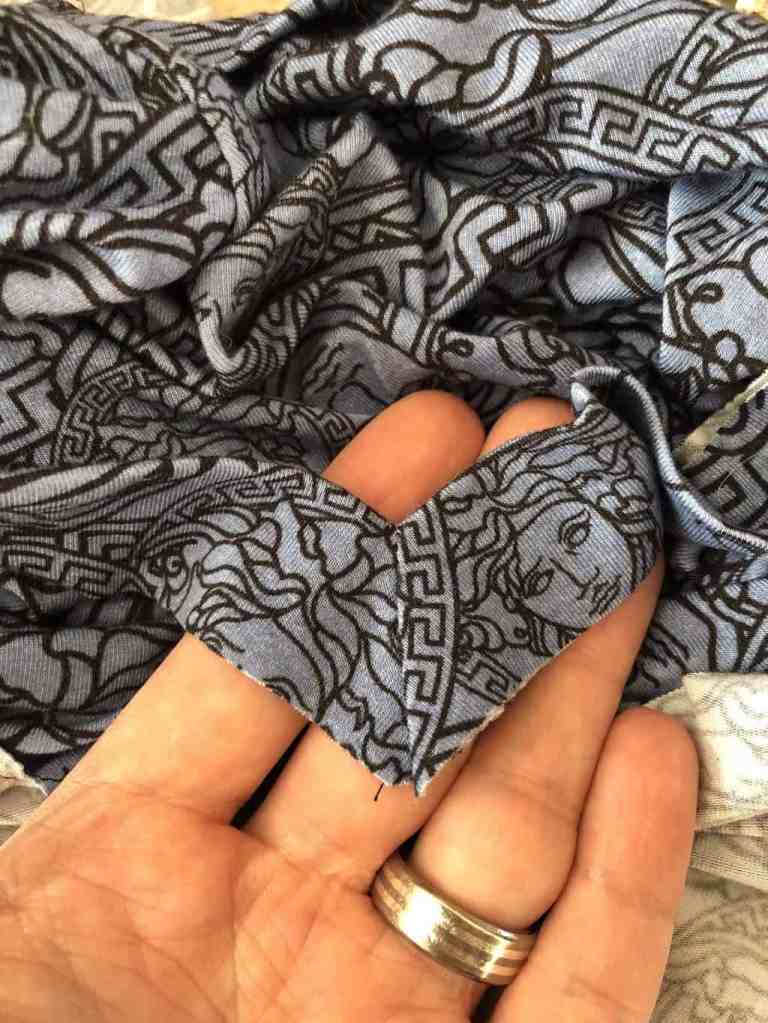
I pinned it all in place, got the wife to check that she was happy with how it looked and it was agreed that this looked as good as it was going to look, so over to the overlocker I trot and here is where things start to go downhill. Real fast!
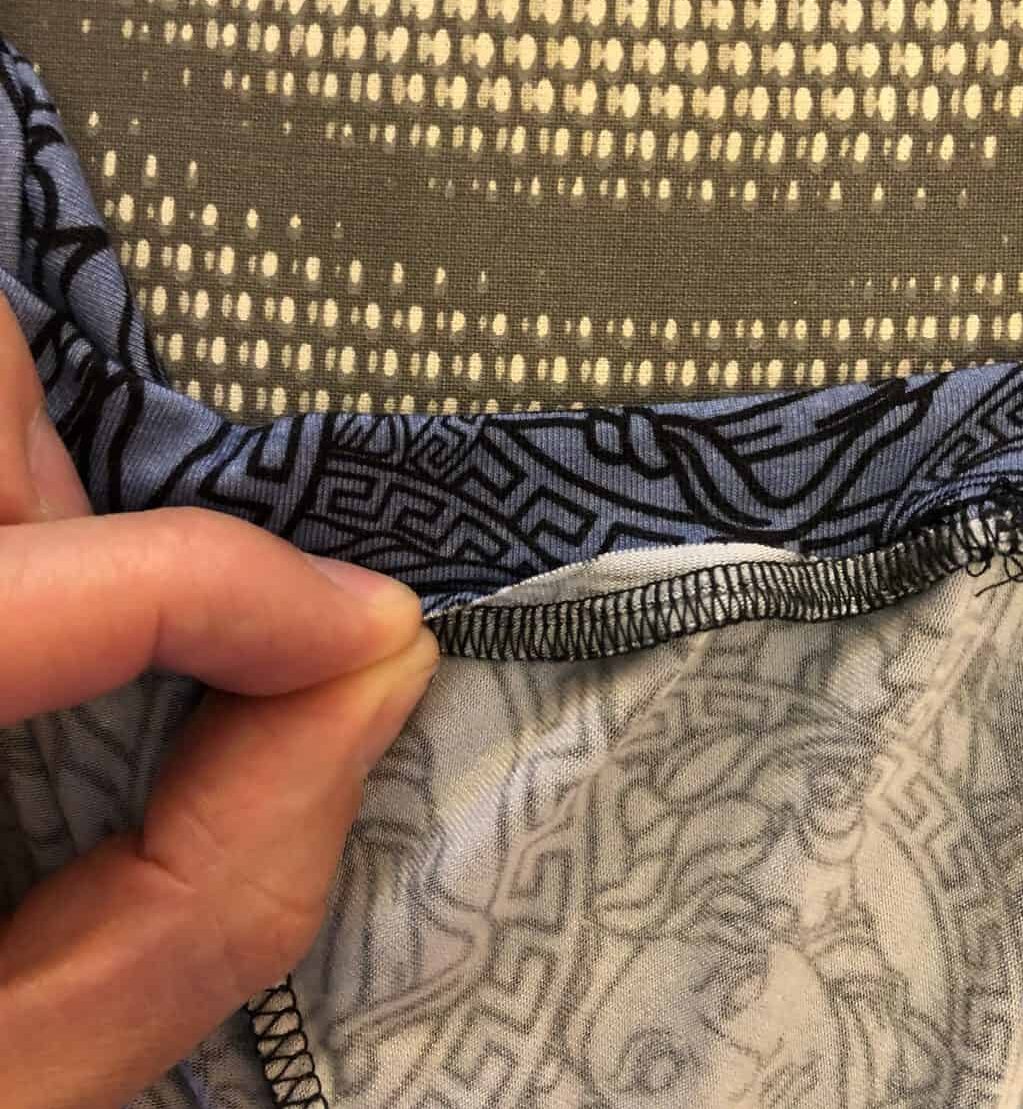
As I overlocked around the collar parts of the fabric seemed to get folded up, and then the world ended.

It seemed as if the collar shifted while I was overlocking. The point at the bottom hadn’t caught against the body and so I had overlocked and trimmed for nothing. Second attempt: line the collar up, realise that now the point of the V was off centre and due to the aforementioned trimming, the collar was now significantly slimmer at the bottom than it should have been and visibly thinner than the rest. This had now become the single biggest hash up ever.
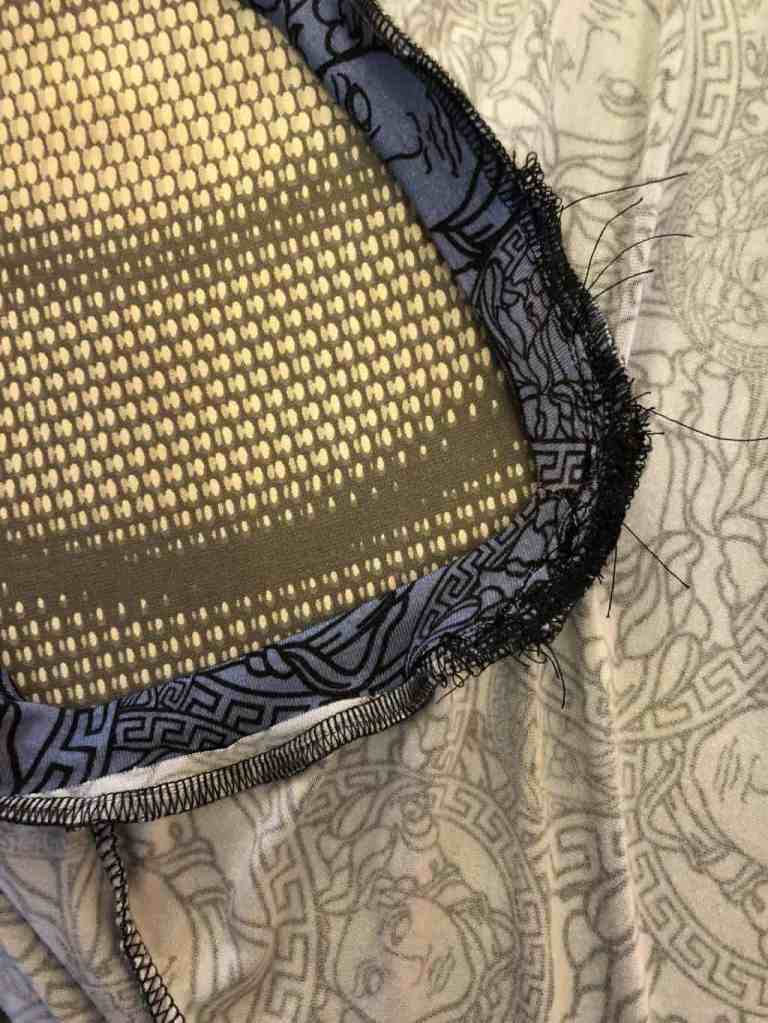
So back to the overlocker we go, trying very carefully not to take any more off the width, go over the point again keeping my fingers tightly crossed that I was actually catching everything I needed to this time and ending up with the horror show you can see above ?
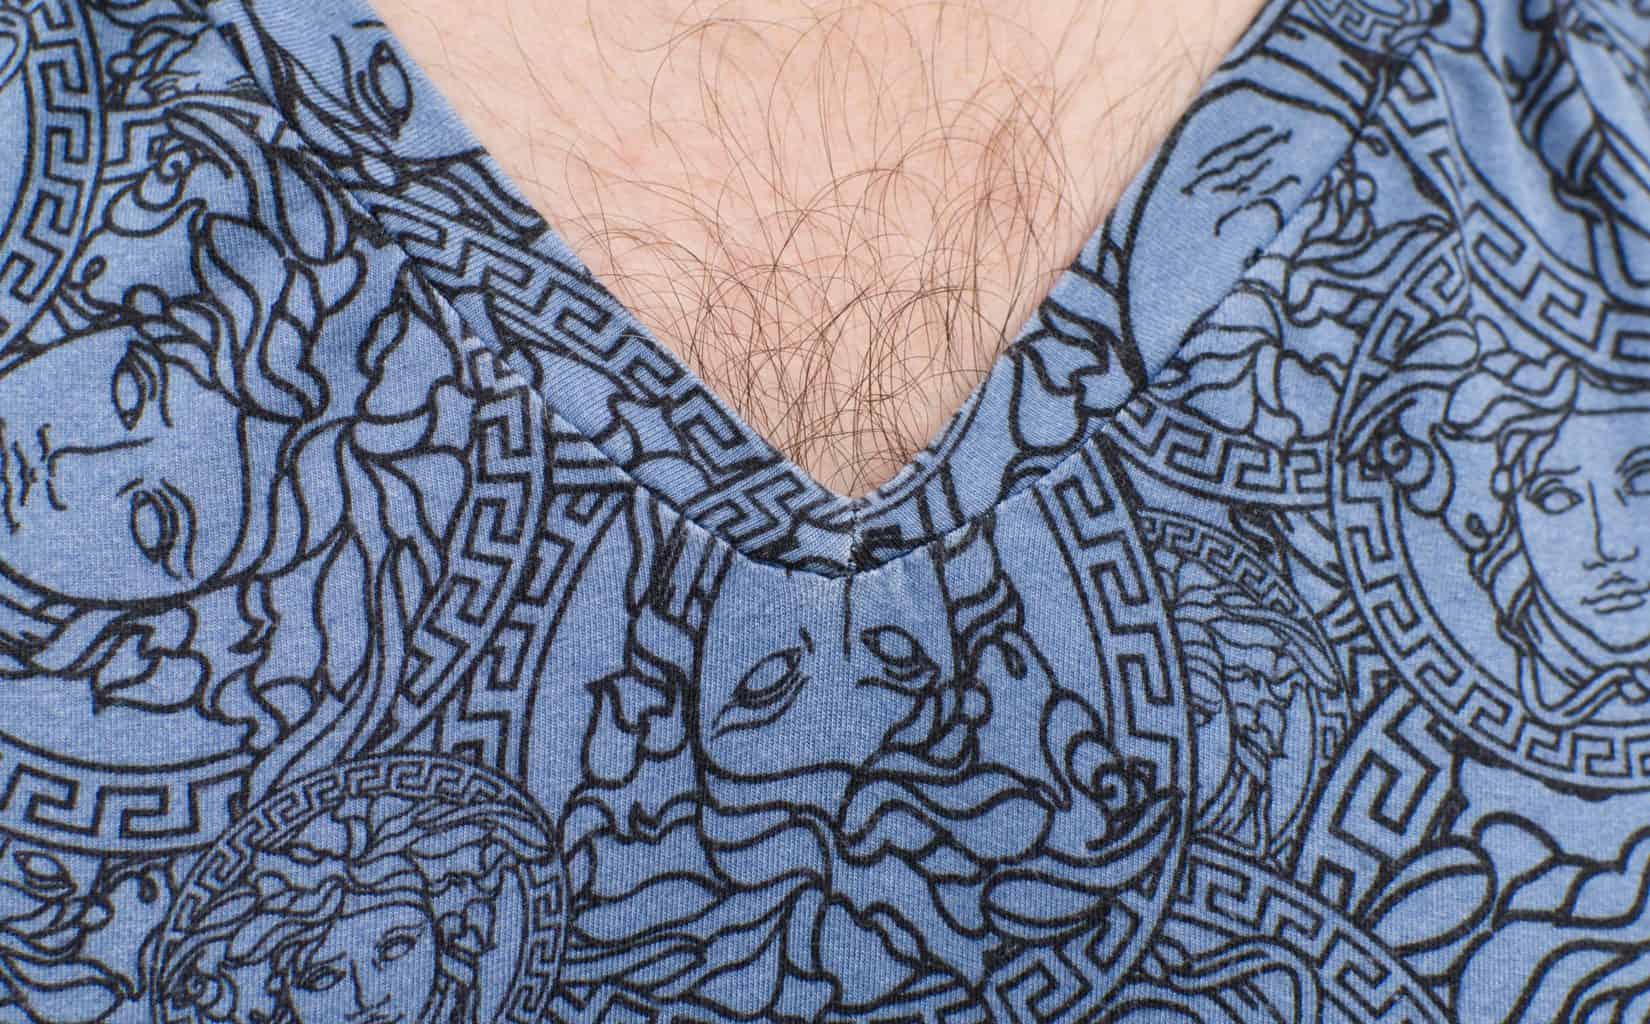
Here you can see how off centre the point is and also how much thinner it gets compared to the rest of the collar.
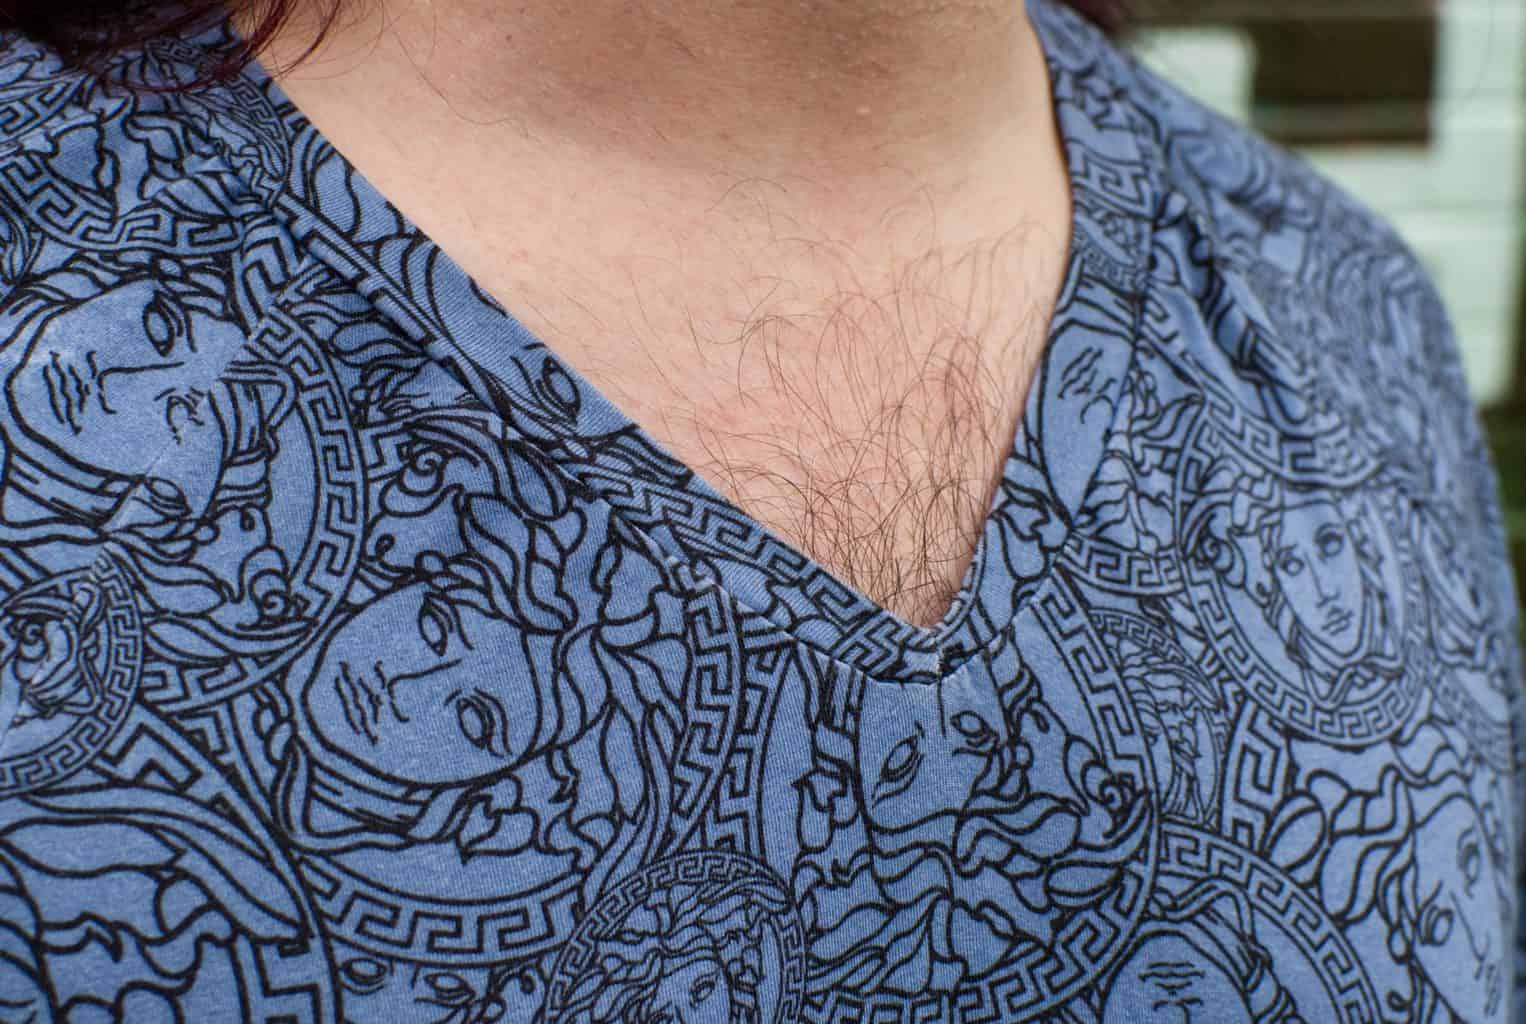
What also doesn’t help is the number of ripples around the collar. Now I’m not usually one for V necks but I envisioned this one looking okay (I only own one other V neck t-shirt). I should have gone with my instinct as this one did not turn out well and has done nothing to convince me that I may start to like them any time in the near future.
Now that the top was looking completely fucked I though what more could possibly go wrong? So I guess it was the right time to be the first person to break out the new coverstitch machine. Neither of us knew what we were doing with this machine as it was the first time either of us had used it. I managed to thread the thing which was a minor miracle in itself and with a couple of practice attempts and a few adjustments, we were there, ready to hem my top.
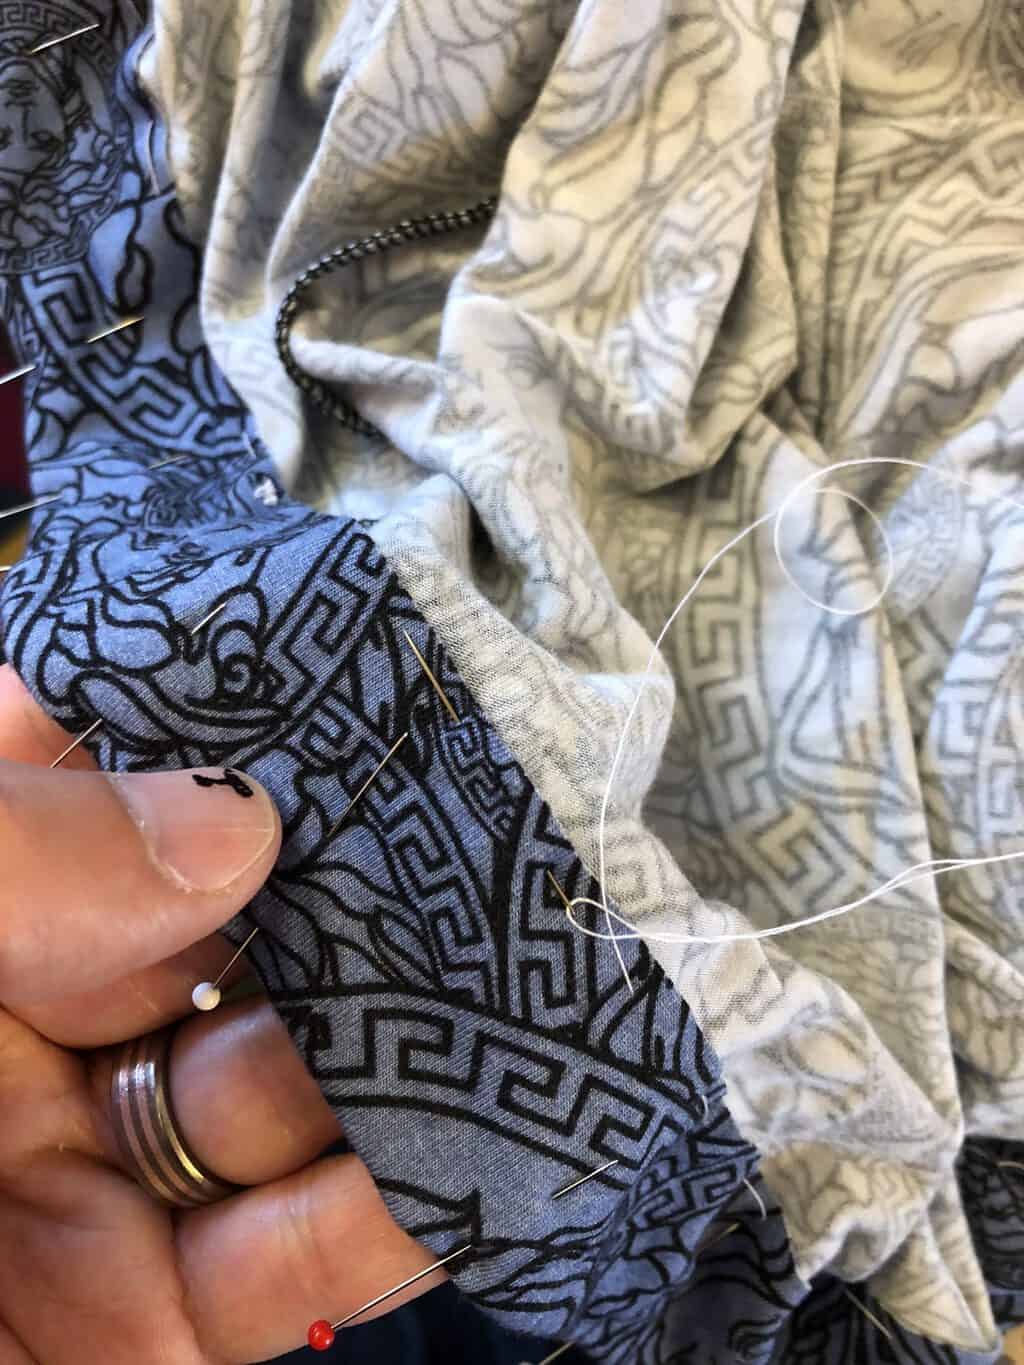
The pattern calls for a 1.5-inch hem and on reflection, I can really say that this is a bit much. I feel like with such a large hem it weighs the top down a bit and makes it hang funny. Next time I will chop some of the extra off and do a much smaller hem.

I prepared the hem and took my seat at the coverstitch machine with all the confidence of Bambi on ice. I start the machine, slide the hem in and away we go! Nice and slow and steady, making good progress. I got about two-thirds of the way around when HOLY SHIT WHAT THE FUCK HAS JUST HAPPENED.

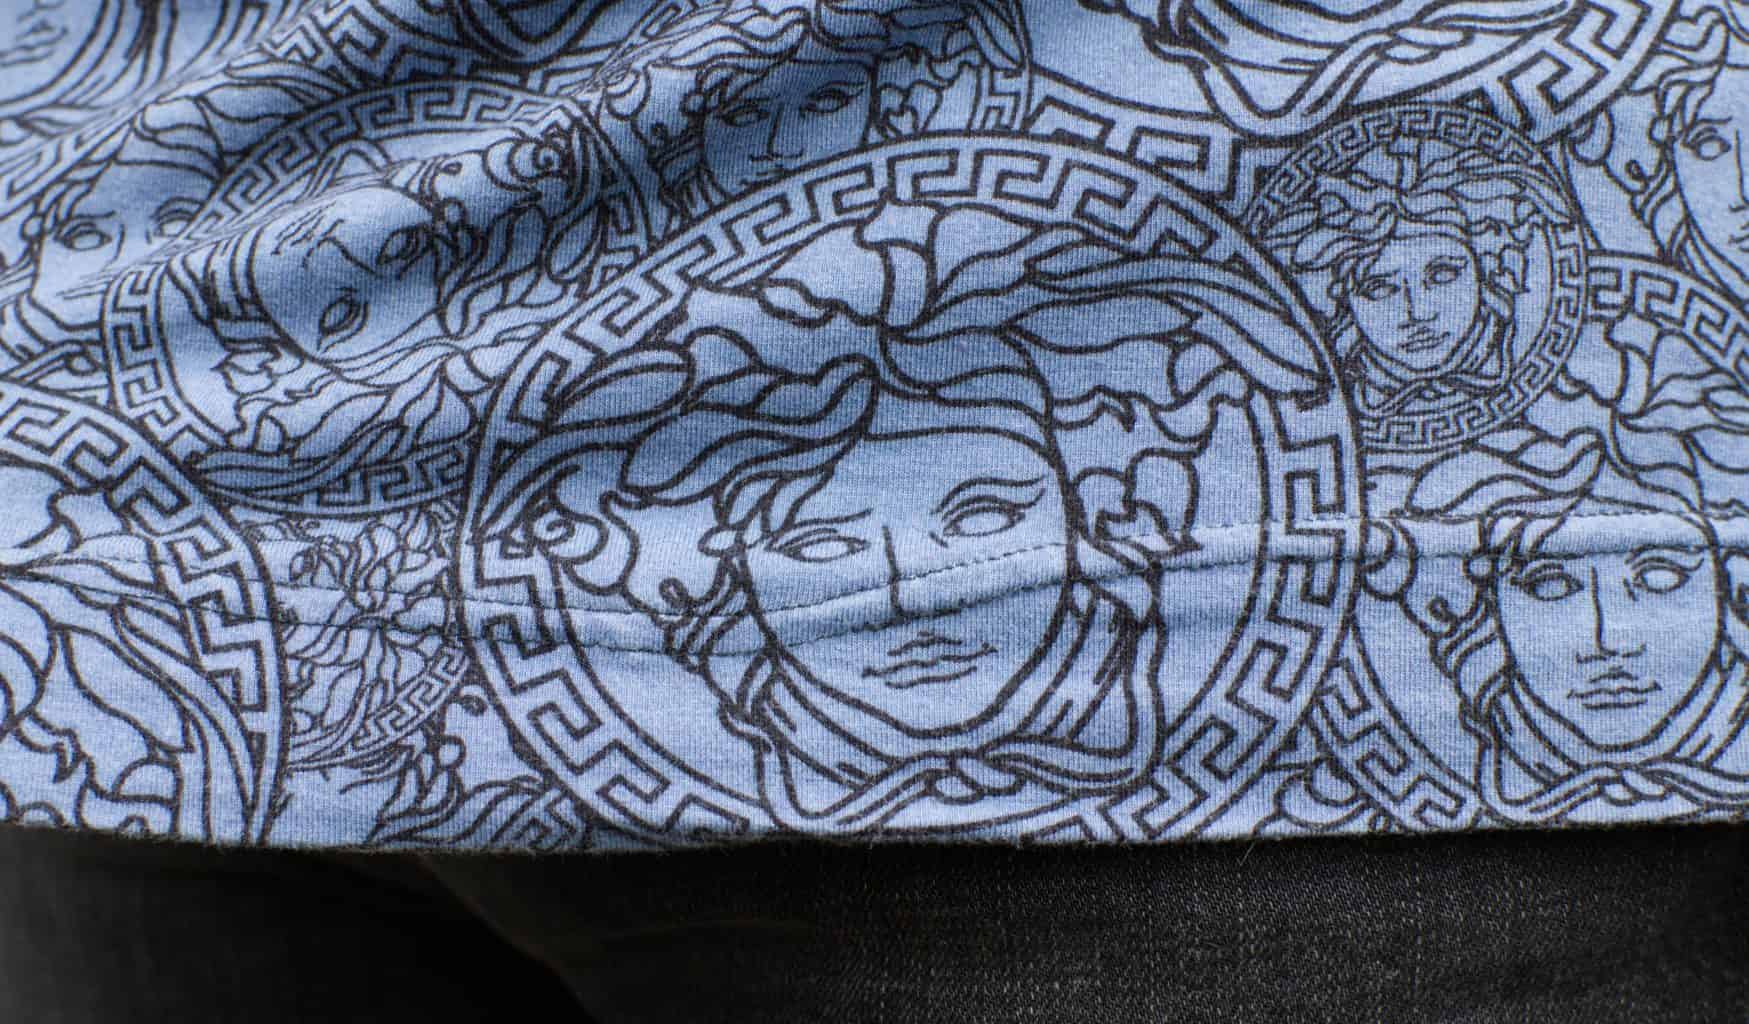
Why did my hem decide to take a walk halfway up my top? On THREE occasions after unpicking the fucking thing twice! I got angry, I almost stopped. After the third attempt – which was still not much better and genuinely looked like a blind man could have got a straighter line – I did stop. It took me over 2 weeks to finally do the sleeves to finish the top. And by the way, I pinned, then hand-stitched the shit out of that hem so I had a guide to follow and it still fucked off miles away from where it should have been. I mean, this thing had a mind of its own.
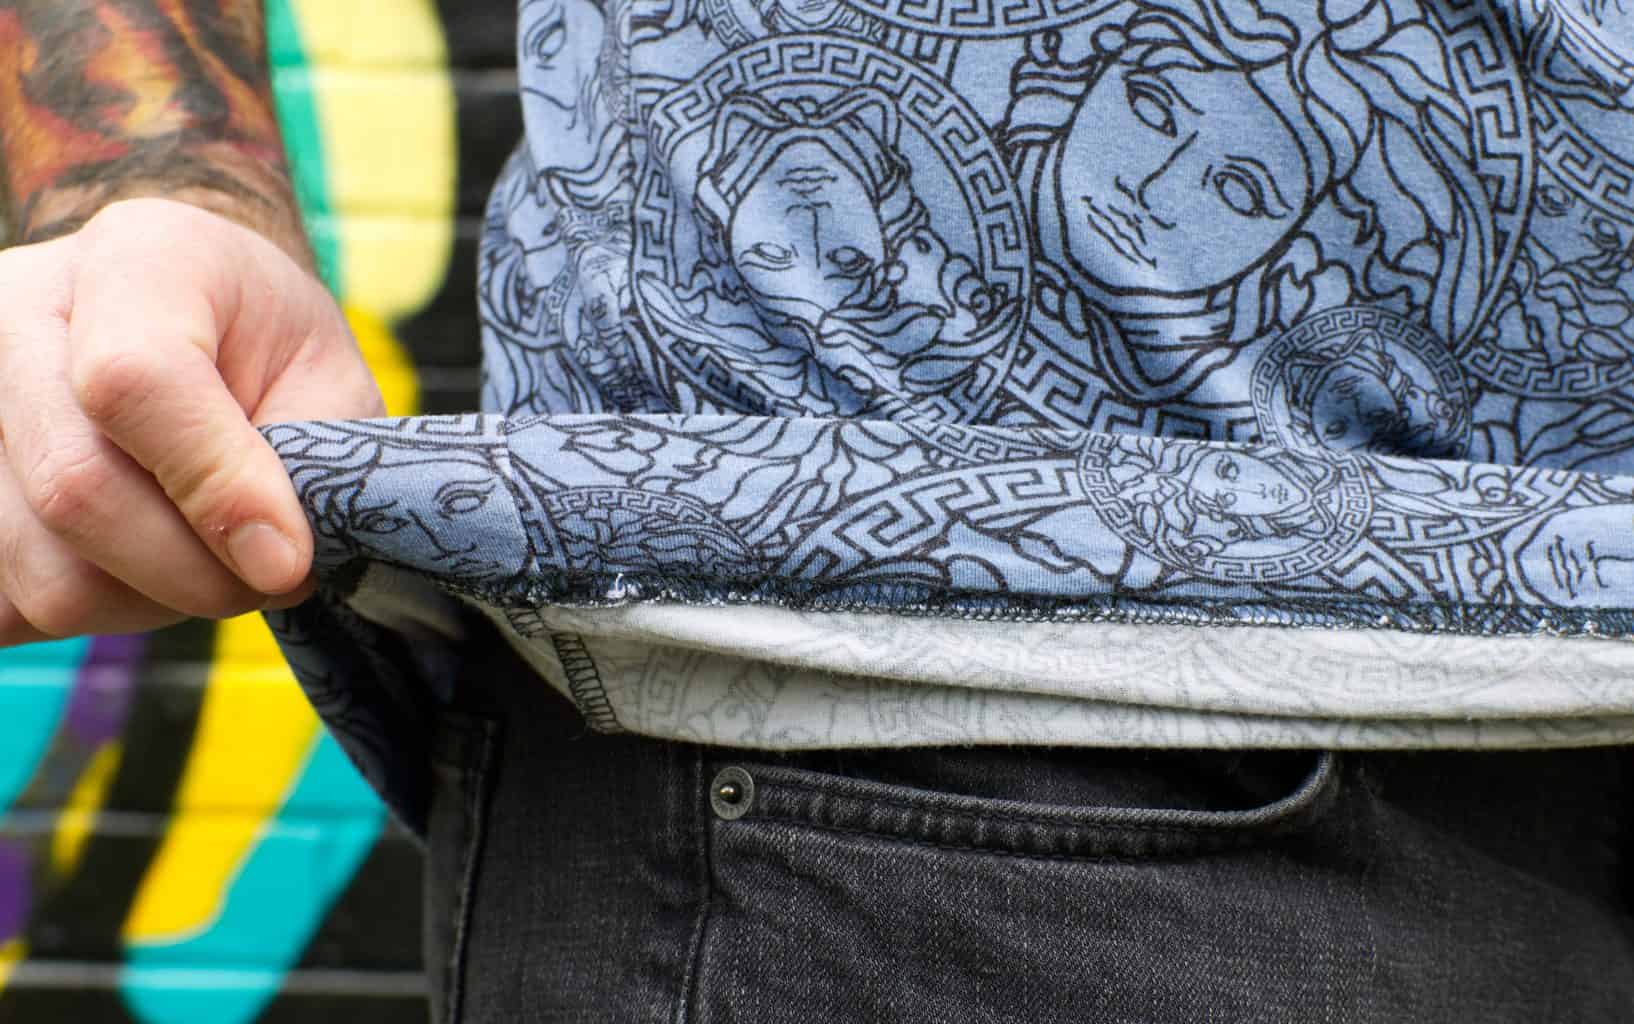
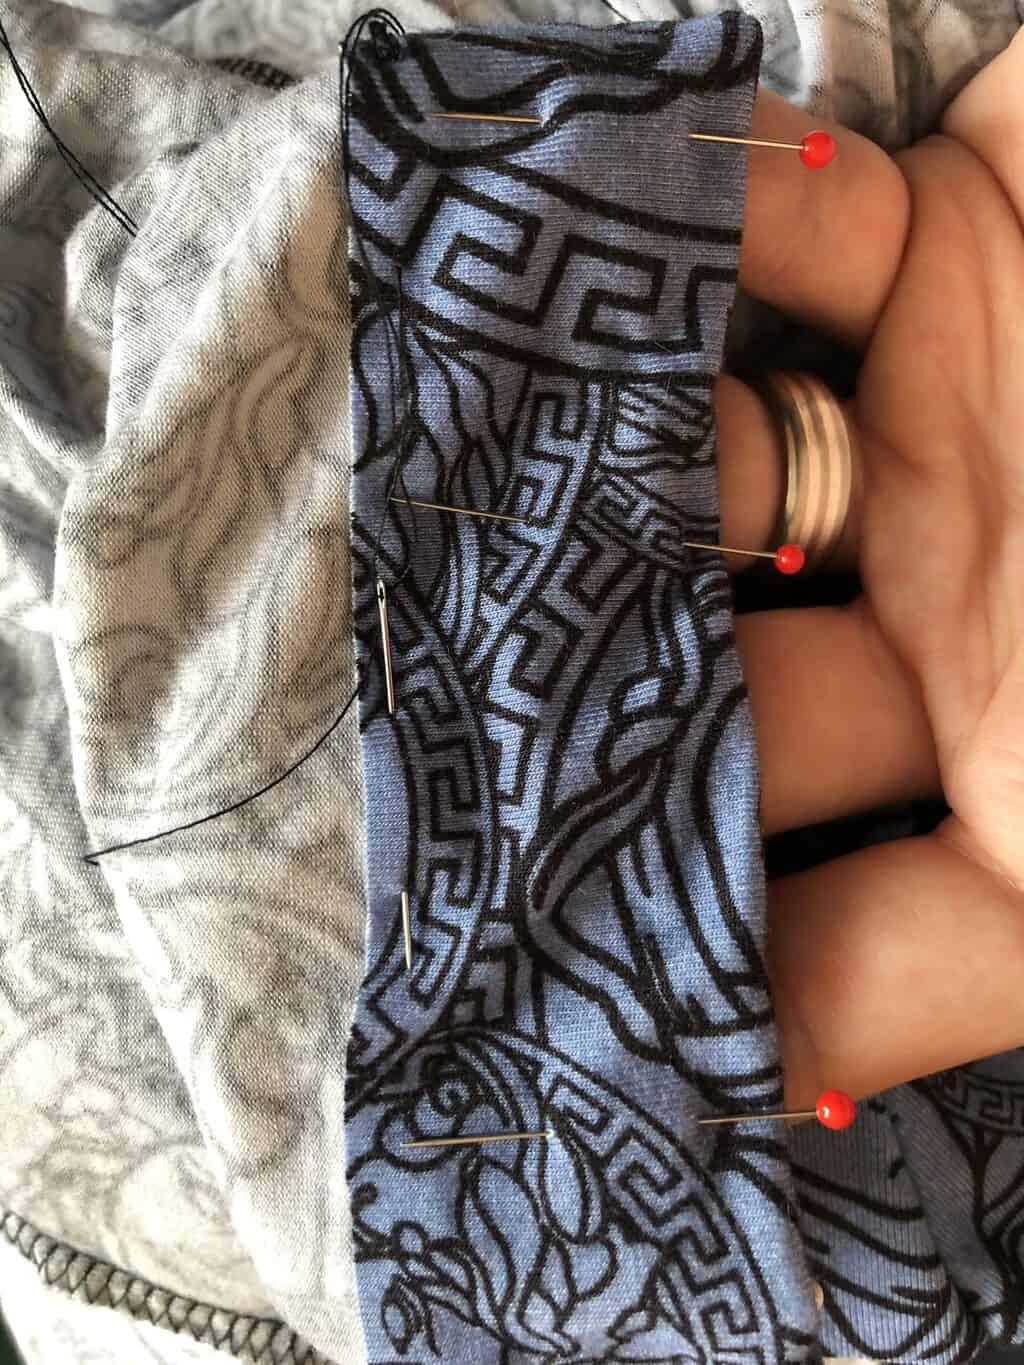
So, after more than two weeks of sulking, I came back to the top to finish it off. I pinned the sleeves and then basted them in place for two reasons, first, I didn’t want a repeat of what happened on the hem and second, you remember how much I fucking hate sleeves right? Well, there was no way I was going to be messing this up and having to unpick just to do it all again. This was a one time deal. Complete or not this was the only shot I was giving it. If it didn’t work then either the wife finished it off for me or the entire thing went in the bin.
Well, I bet you can guess what almost happened… but with some persuasion, I did manage to finish the top, albeit with a bit more drama.
I was wary of this new coverstitch machine and its strange dealings, so I thought I would be extra careful this time. Turns out the machine doesn’t seem to like being run too slowly.
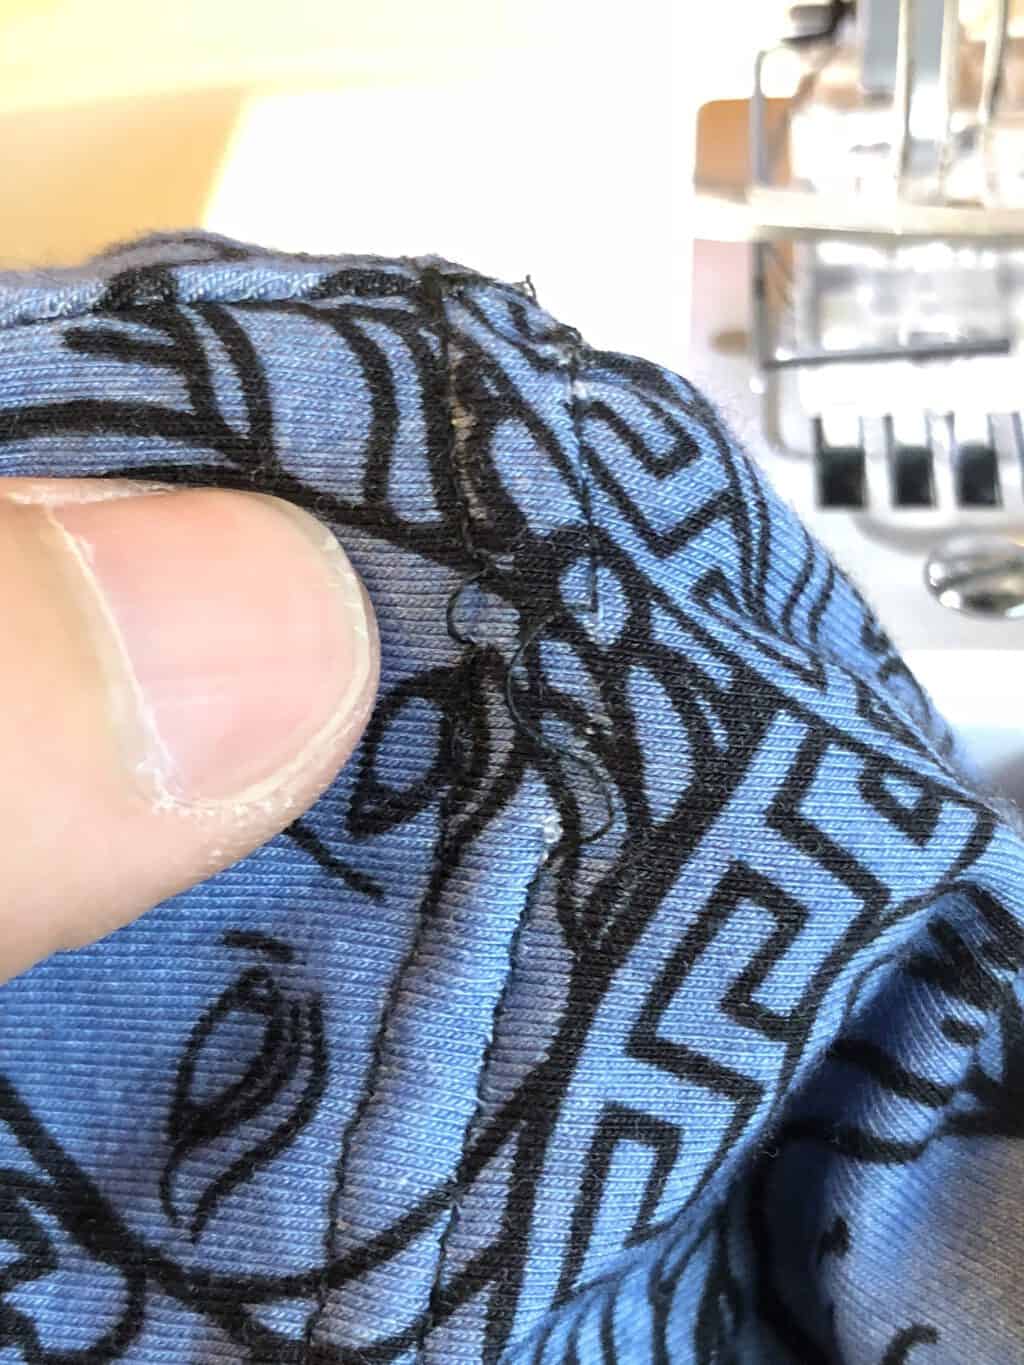
I was quite happily moving along at a pace a snail would have found slow when all of a sudden the top stopped moving and started disappearing inside the machine. It was literally eating my top alive!

I stopped and tried to remove the top.
Now, if any of you have a coverstitch machine, you may well know what I am about to say. If you don’t have a coverstitch machine let me enlighten you.
With an overlocker or even a straightforward sewing machine, once you are done you pull the material away and with it comes the thread for you to snip at a decent length. Not so with the coverstitch. I pulled and pulled. I pulled until I thought I was going to rip a hole my top and do you think it would budge? Like fuck it would.
I had to open the machine up and pull one of the little metal arms to the side to be able to release the top. Maybe this was due to the fabric being sucked in? Nope! Even now after lots more attempts, and non-disaster projects, this is the only way to release the tension and allow the thread to move freely.
(If anyone has any tips on this or if we are just being really stupid and missing something obvious here, please let me know because this seems totally ridiculous)
Why did it suddenly try to eat my top? I didn’t have an answer but there was a lot of unsightly goings-on.
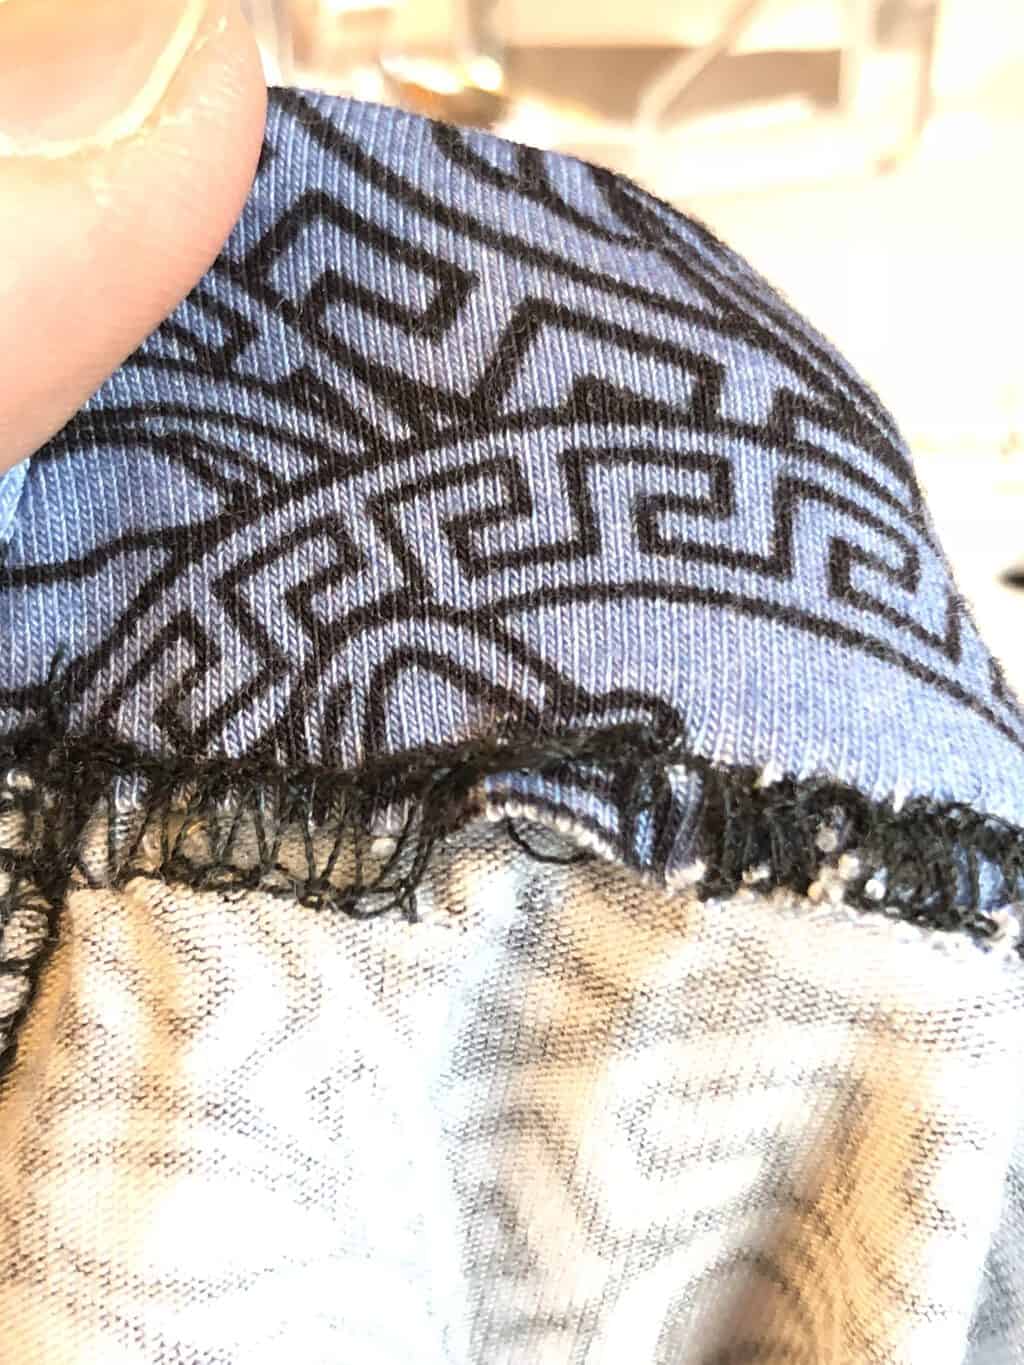
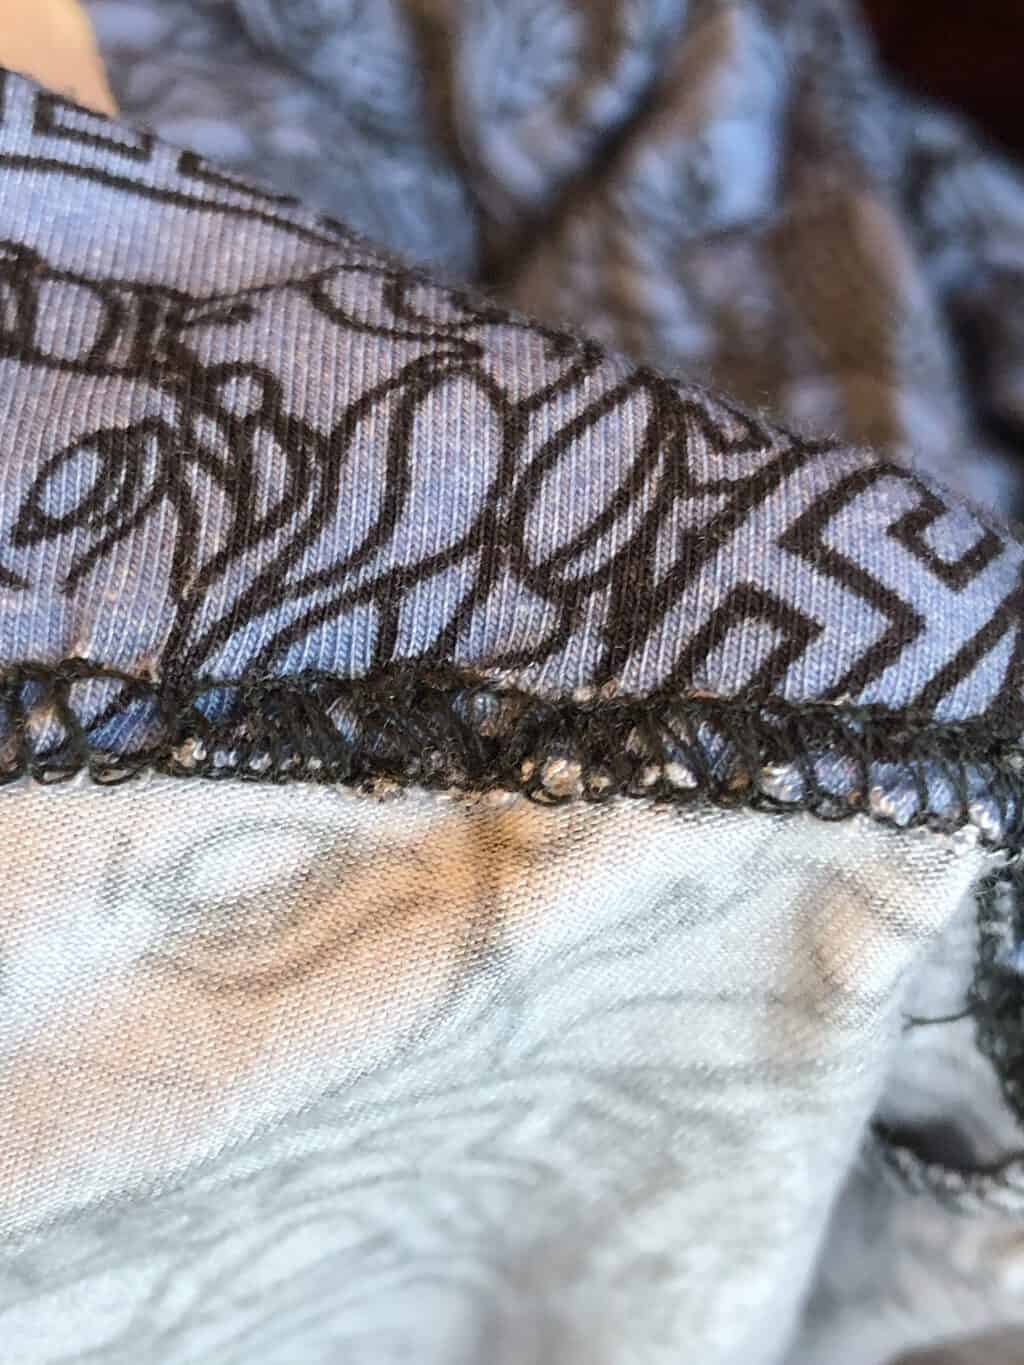
I thought that maybe I had the tension too tight also as I was getting a weird tunnel effect even though I had it set up exactly the same as when I did the hem and other than the fact that it decided to draw tram lines halfway up the top, it wasn’t creating this effect ?

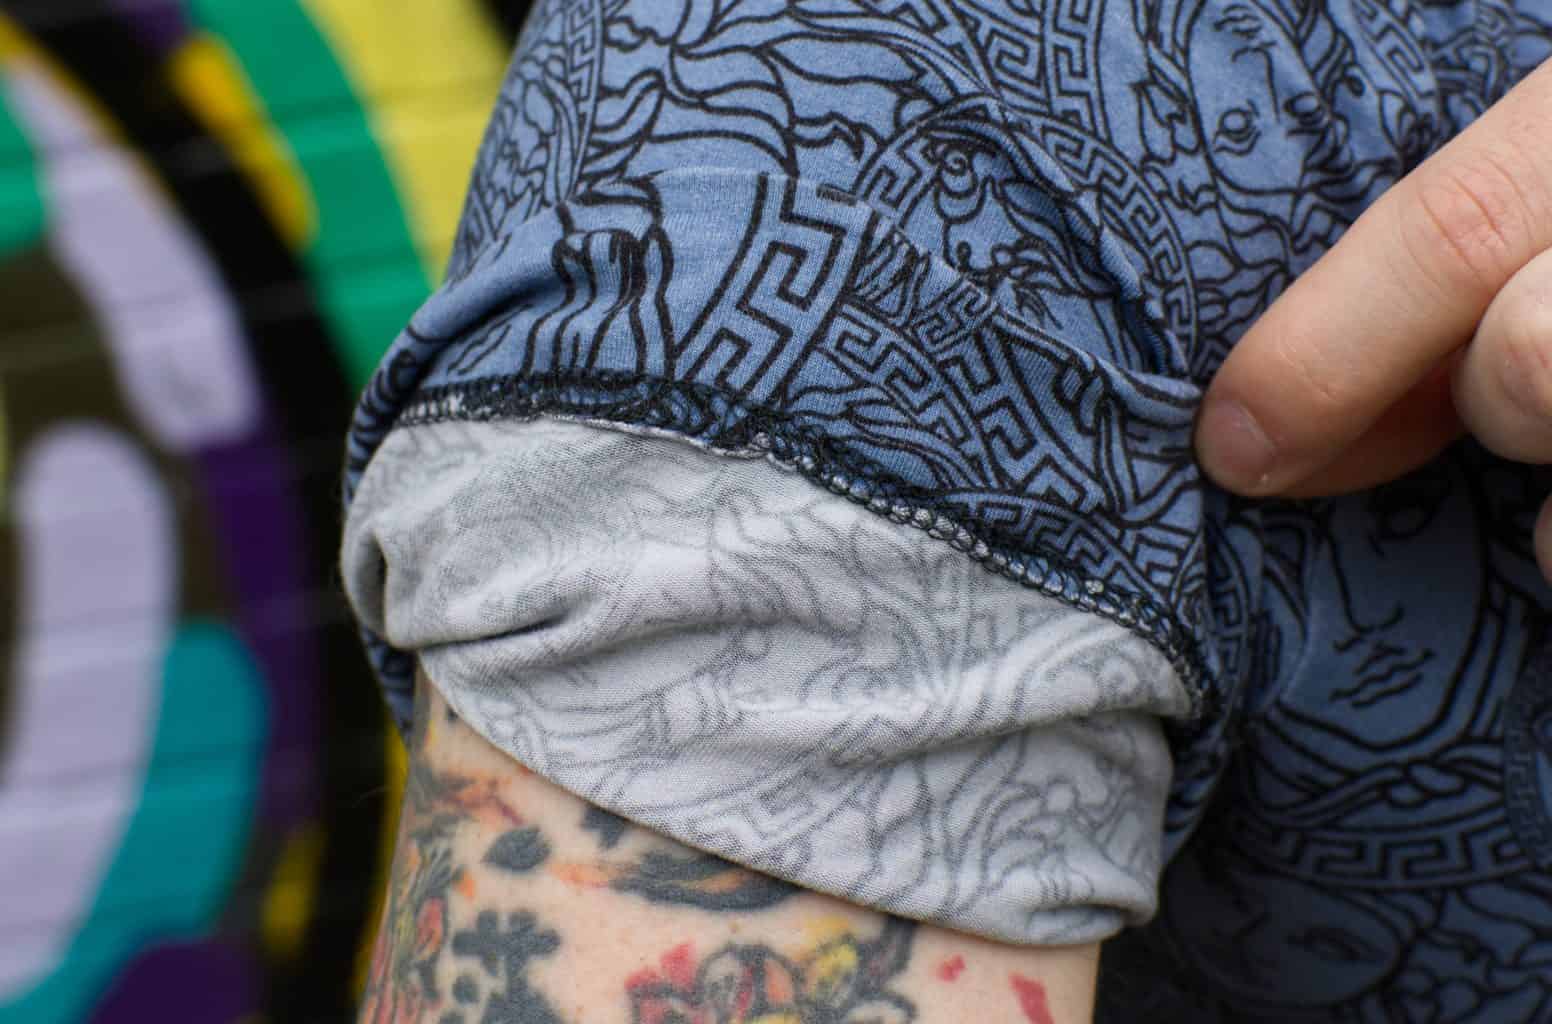
Well, a year later and we may have found the solution, however not in time to save my next project. It seems that if you coverstitch fully on the two layers of fabric rather than straddling the raw edge, it stops this weird tube thing from happening.
So, what do I think to the top I’ve made?
I am definitely not a fan of the V-neck, and I feel like I need to make it again out of a lighter cotton jersey to really get a better feel for the pattern. The jersey I used is quite heavy, and I feel the hem weighs it down a bit too much as well.
Having said that, it has had its fair share of rotation in my summer (work) wardrobe, but on taking the pictures for this post at the same time as taking the pictures for my next post (coming soon!) I actually saw how much the fabric has faded over the last 18 months compared to the long sleeve top which has only been worn a couple of times so far.
Well, that concludes part one of this adventure… Join me next time for part two which features a better collar, longer sleeves and a bit more drama as the next one took me a VERY long time to finish. But for now, enjoy some pictures of me looking a bit on the chubby side ?


One final word, because when I started working on this post I realised I had fucked up BIG TIME.
As it turns out, the WordPress app on my phone wasn’t refreshing itself (or playing by the rules at all it seems) so not long after I completed my previous posts, I went in to respond to the comments (and do other admin like start future posts, make notes for anything I intended posting in the future etc etc) and saw a “draft” version of a post I had already published. I thought it was a discarded copy (there were technical issues and as a result were multiple versions of the same post at one point) and so I deleted it.
Turns out it wasn’t an old draft, it was the real thing but it just hadn’t updated in the app. I had deleted the live post.
I managed to rescue a second blog post from the bin (which I’d also deleted thinking it was another draft) before it was permanently deleted, but my first post was not so lucky. No matter how much digging we (the wife) did, it seemed to have fallen into a gap where even websites that copy websites for some form of restorative purposes hadn’t saved anything over that one month period of that post. It is gone forever!
So if any of you wonderful people out there in blogland have somehow downloaded/saved/copied my first ever post “Stepping Out From The Shadows” I would be forever grateful if you could let me know! (actually, let the wife know as my WordPress admin privileges have been revoked so I don’t delete anything else ?).
Happy Sunday ✌?
Coming to you next week – the wife returns with a second version of the Republique Du Chiffon Gerard Coat ✂️ Subscribe below to have the post drop straight into your inbox! ??

24 responses to “A Thousand Faces (part one)”
??? Hilarious! Brilliant post ??????
LikeLike
Thank you very much, glad you enjoyed it 😊
LikeLike
I always read and love the posts from you two,
The coverstitch machine is priceless once you master it, personally always pin up extra hem allowance so say for 3/4 inch hem I would pin up 1 1/2 inches run the pins horizontal to the bottom of the fabric but at the top of the hem then you don’t have to remove them as you sew ( this helps to stop the fabric moving as you sew). Sew all around through double thickness from right side, at the end hand turn the crank wheel backwards once this releases the tension, pull the fabric slightly till you can grasp the threads then holding the threads tight pull the garment free, hopefully it won’t undo a couple of stitches but if it does you can doctor these with a needle and mimic the stitches to look the same, then with a needle thread the cotton to the wrong side and knot off all threads together. Remove the surplus hem cutting close to the stitches from the wrong side with small sharp scissors.
Also I always use ball point or stretch needles and you can get special cover stitch needles.
Hope this makes sense and helps X
LikeLike
Hi Sandra, glad you enjoy the blog posts ☺️
Thanks for the advice, I will try turning the crank wheel backwards next time, I didn’t think of that. I will be soooo happy if that works 😁
As for the hem, I think Sarah recently discovered exactly what you have said in sewing double thickness, this seems to work quite nicely 👍
LikeLike
Fucking Ace! Seems to me like the level of fuckery is about perfect. My first forays into stretch fabrics had very similar results, although I have never fallen into the ‘buy expensive machines to fuck things up even more’ hole.
Knit hems are the devil’s work. My usual cop out is to overlock the edge, then fold and just zig zag it. Some fabrics need stabiliser [looks like yours is one of them, or that fab sticky hem stuff. Never underestimate the importance of basting for evil fabric though, I mean, you splash out on all these fancy schmancy fabrics, then dodge the couture steps…tut tut lol
V necks- I also avoid them where feasible, but have found they MUST be stitched on the ‘normal’ machine before venturing towards the overlocker. I also use the Style Arc tip of just sewing it on like a normal round neck collar, then pinch out a little dart at the V and sew that with a straight stitch. Gives a lovely sharp V and is more easily controlled- overlockers just won’t tackle the angle properly
Keep up coming kiddo
LikeLike
Oh, I just love finding new ways to completely fuck things up and if I can find a machine to assist then why not 😂
Will look into some kind of stabiliser if I use any fabric like that again, see if it helps.
I will never be making a V neck again after this, but if I do, I will try out your advice 😊
LikeLike
I strongly believe that not much sewing can take place without a bit of swearyness. Especially if overlockers and coverstitch machines are employed. I agree with THEDEMENTEDFAIRY, in that v-necks are tricky and best sewn on the sewing machine before the overlocker. Overlockers just do not allow the sharp pivot required at centre neck. There’s also a lot of opportunity for catching fabric and cutting a hole in it! I know this from past experience :-).
Coverstitch machines, particularly the Janome ones (I have the Janome CPX2000), do have a steep learning curve. I suspect that you probably do not have the presser foot pressure set high enough; this needs to be altered depending on the fabric used. Tunnelling is a tension issue. I run my hem fold against a piece of tape as a straight edge on the flat bed of the machine to help me to keep straight. I also use Prym Wonder Tape, https://www.prym.com/en/wonder-tape-987125, available from Amazon, to hold everything in place. It washes away on the first laundering and is invisible and soft anyway. I always press up my hems and apply the tape before attempting the coverstitching. It saves time in the long run. I recommend this book, ‘Master-Coverstitch-Machine-complete-coverstitch’, by Johanna Lundström, also available on Amazon. Johanna has some free to watch tutorials on YouTube, too. The final thing I recommend is a clear presser foot. It’s worth the investment, as it’s so much easier to see what’s happening.
To remove the fabric from my coverstitch machine I raise the needles and presser foot, turn the handwheel to raise the needles to their highest point, pull the the needle threads to the front of the machine using a stylus or tweezers, or something like that, cut the loops, then pull the fabric sharply backwards and to the left. This pulls the cut threads to the back of the fabric and locks them off so they don’t unravel. Then cut the looper thread. Sorry about the essay.
I look forward to your next post. Love me a bit of beading, too.
LikeLike
It certainly can’t take place without a bit of swearyness, especially in this house!
I will not be making another V neck (this one has put me right off!) but should that change I will give the overlocker a miss when doing the collar.
Thanks for all the suggestions, I will have a look into these. Anything that can help is a bonus!
It looks as if the tension issue is at least partly due to being half on double thickness and partly on single thickness fabric.
I will also give your advice on removing the fabric from the coverstitch machine a try, anything is worth a go at this point!
Glad you enjoyed the post and I still haven’t finished the bauble…
LikeLike
I had a massive amount of dental work done on Friday and you just made me laugh out loud. Ouch. But it was worth it. Top looks great!
LikeLike
😳
Glad you enjoyed the post and I hope it didn’t cause too much pain 😊
LikeLike
Oh dear…you two make my sunday, I love you both xxx
Take care, look after each other and i hope the shop goes crazy with orders
Xxxx
Cindy xx
P.s I think you v neck shirt looks very good on you, as does your hair too….
X
LikeLike
Thanks Cindy ☺️
LikeLike
Oh God, I’m glad it’s not just me that has the sewing dramas! You have encouraged me to dig around and find a skirt that I bagged up and hid, so I never had to try and finish tackling the demon layers of pin tucks!!! I can manage one pin tuck, but put several next each other and they are enough to send one demented. I think I have un-picked 3 times so far. Yes, I have several other projects that have been banished too- so now I am going to give them another go. Thanks!
LikeLike
It is certainly not just you that has the sewing dramas! Put me near a machine and the drama flows 😂
I’m glad I have been able to encourage you to attempt to finish some of those unfinished projects 🙌 I hope they turn out okay
LikeLike
Sorry you’re not too keen on me but glad you got use of my pattern. ?? Looks great on you.
LikeLike
Ahhh it’s nothing personal, I just don’t think your womens range really suits me 😂
If you design a skirt that looks as good on Norris as it does on you then I will certainly give it a go! 👍 ☺️
The t-shirt pattern is great and I can see it getting a good amount of use. Thanks! 😊
LikeLike
Loved this post! (Yes I’m a week late??♀️) The top looks super. Who wants something perfect anyways. Not one me-made item in my wardrobe is perfect and I’m completely fine with that. Looking good! Can’t wait for the next post. ??
LikeLike
Hi Julie, I don’t care if you are a week late ☺️ I love getting comments on my posts… and I’m a week later than you in replying to them all 😂
Glad you enjoyed the post. Next one is underway already. Hopefully it won’t take me 18 months to finish writing this one 😳
LikeLike
Really enjoyed reading this post – it made me laugh and it’s always good to hear that other stitchers have disasters too. And I definitely WONT be buying a coverstitch machine based on your recommendation – I agree with you TheDementedFairy’s solution for hems – overlock the edge, turn and zigzag on the machine, or sometimes I use a twin needle.
As for the neckband, as my old Nan used to say ‘a bind man would be glad to see it! X
LikeLike
So glad to hear you enjoyed the post 😁 Disaster is never far away when I am sewing 😂
Personally, I think even a blind man would be horrified with my collar 😂
LikeLike
Sorry for being late to the party, but I totally feel you on the coverstitch issues. I’ve gotten in the habit of doing practice runs on scraps of the fabric I’m using for my project so that I can twiddle with the settings in a no-pressure, no-mistakes fashion. And I agree with Bren about the presser foot pressure (say that 3x fast) AND those who have said to do V-necks on a regular sewing machine before finishing edges. I think presser foot pressure is something that we don’t usually even consider, especially on standard machines, because most issues get solved by using different feet. But on a serger or coverstitch, it’s typically a tension or pressure adjustment that will fix most problems.
I also agree that 1.5 inches is too much for a t-shirt hem. My standard depth is 1″ because I like how the coverstitch looks at that distance from the hem. Funny how much of a difference a half an inch can make.
That fabric print is awesome, though, so I’m glad you got a wearable T out of it in the end. And the shampoo-commercial-hair-flip is also awesome.I hope all of your pre-Christmas craft stall endeavors go favorably!
LikeLike
Totally fine being late to the party, I think I am rarely on time to anything 🤷♂️😂
I actually tried practice runs on scraps of fabric with the coverstitch machine before moving on to the real thing. Was always fine until I moved on to the real thing, then it went wrong 🤔
I adjusted the hem for the next top I did… post to come sometime within the next year hopefully 😂 and I was much happier with it.
I do quite like that fabric print, unfortunately it has not worn too well… info to come in the next post.
LikeLike
Just returning to thank you – I have finished the skirt! Remarkably it seemed easier this time, perhaps I just needed a year to get my head straight! lol I’d send a picture if I could, but I’m not very techy and I can’t see how to.
LikeLike
That’s fantastic news! Well done on the finished skirt and also really good to hear it seemed easier too.
I honestly have no idea if/how you could send a picture.
Are you on Instagram? If so, feel free to tag me in the post there @hmexus ☺️
LikeLike