Settle in guys, this one’s a long’un. We’re word-heavy and photo-heavy. Grab a cuppa, get some snacks, find a blanket and get yourself settled.
Ready Freddie?
Good 😁
You all know that coats are my thing. Some people have a thing for China dolls (which IMO, they are creepy AF ). Some people like stamps. Me? I like vintage coat sewing patterns. Not to just look at and collect mind you – I actually want to use them and make the coats. I never really understand why people buy vintage patterns with no intention of using them – like classic cars that just sit in the garage… use the bloody thing, will you? 😤

I don’t know what it is about coats. I mean, they can be hideously complicated to sew, but they’re like a drug… I always go back for more. I am – like 99% of the time – usually cold, but even so, I really don’t need as many coats as I’ve made… I seem to be unable to stop making more, though 🤷🏻♀️
When I saw this vintage Vogue coat pattern for sale on Etsy (complete with the original sew-in label!!) I HAD to have it. It is, by far, the most expensive pattern I’ve ever bought, and I deliberated over it for more than a week. I looked at other, more widely available coat patterns, but none of them matched up to the design and style of this one. I got up the courage to treat myself as an early (very early, like, I was proper stretching the ‘birthday’ thing 😂) birthday present.
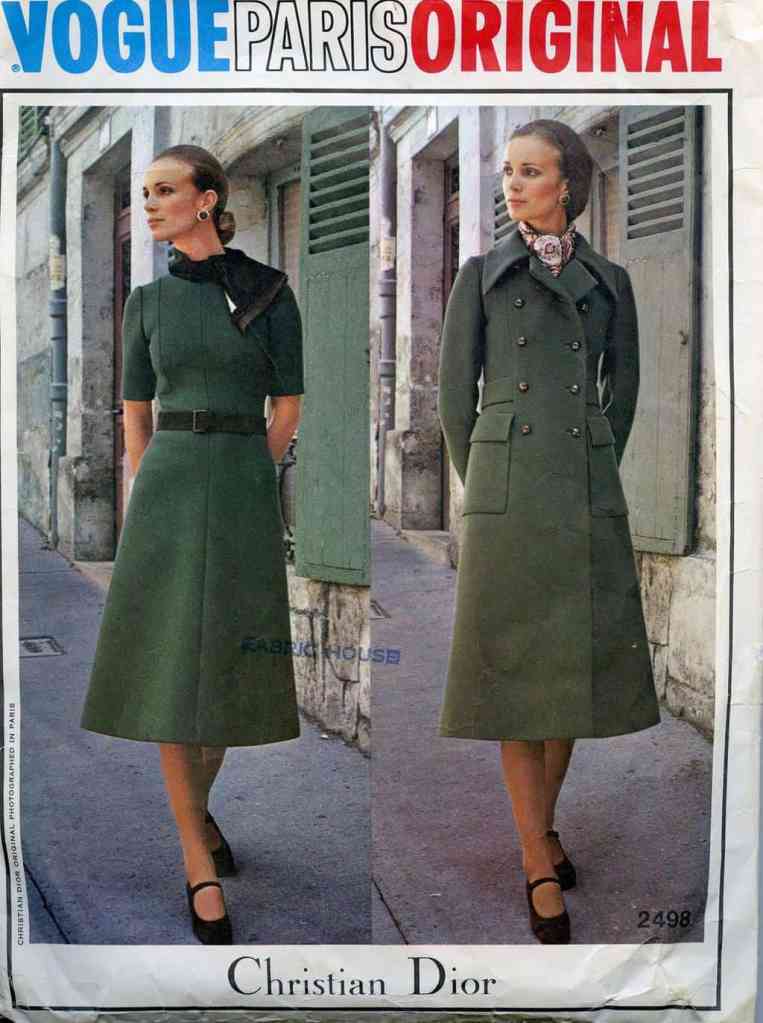
When it arrived I was so giddily excited – a genuine vintage Dior coat sewing pattern! I put it away somewhere extremely safe until I was ready to use it, because over the firework season last year one of the dogs got hold of a sewing pattern (an untraced original, obvs) and chewed it up while I was at work. I learned THAT lesson, believe me 😳

I thought about tracing the pieces of this pattern (because I’m trying to get into the ‘good habit’ of doing that) but I really only trace multi-sized patterns in case I want to make a different size (read that as ‘incase I put weight on again’ 😂). I decided against tracing – because in all honesty I just wanted to get straight into the sewing, obvs – but I think at some point in the future I will trace these pieces just to preserve them because they are just fragile tissue after all. The sheer size of some of the main coat body pieces does put me off a little though if I’m honest – they’re ginormous 😨
When I bought the pattern, in the back of my mind I was thinking about making this coat with the cashmere remnant I got from Paris – but there’s NO WAY I’m going steaming into a massive coat project for the first time with my precious cashmere. So, I decided to use it as one of my Minerva Blogger Network posts and give it a trial run.
I’m glad I did.
*full disclosure – materials for this coat were provided free of charge by Minerva* 🎁
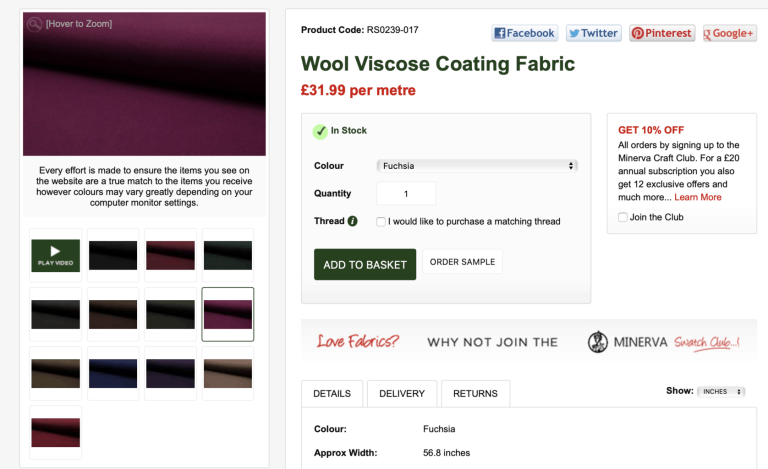
I chose a wool/viscose blend for the outside of the coat. I was hoping for a thick, smooth fabric – as it looked in the picture – but when it arrived it had a little bit of texture to it and also some tweedy bits. It also had a little bit of drape to it – that’ll be the viscose. Should have realised that. The look of the fabric wasn’t exactly what I wanted (tweed isn’t really me, it screams ‘country life’ too much), so I decided to use the ‘wrong side’ of the fabric as the right side because it was a bit smoother and less tweedy than the other side. No biggie. The pink colour was good, exactly what I wanted 💕
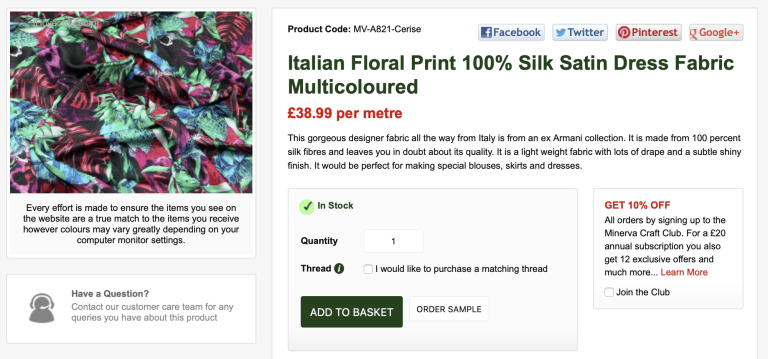
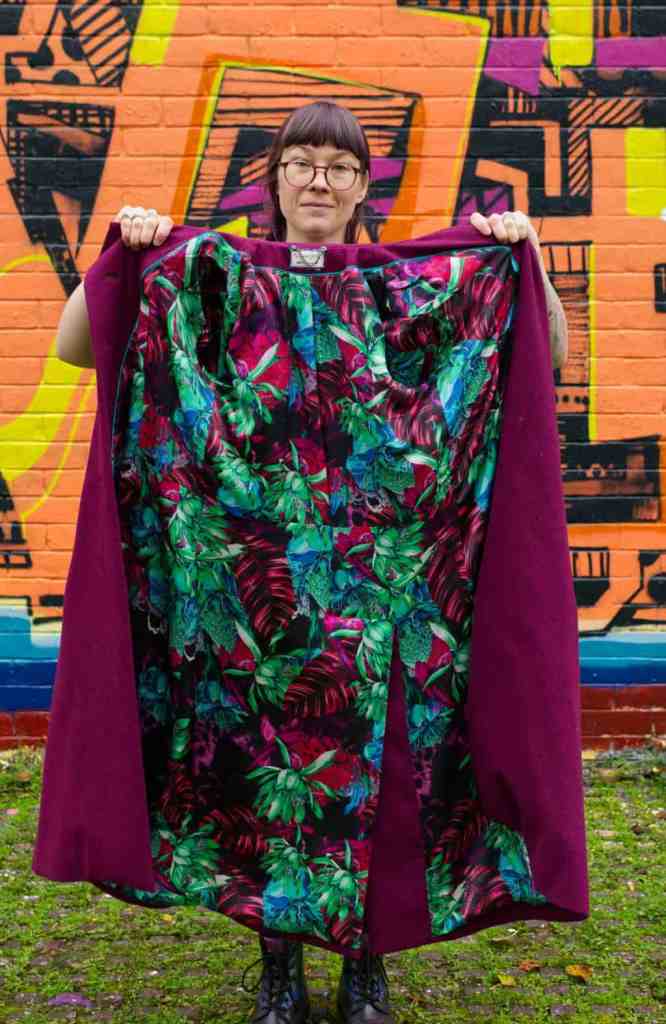
For the lining, I chose a beautiful ex-designer silk satin, which I’d also used previously for an Ogden Cami. It coordinated perfectly with the pink wool (even if it was more expensive! 😱)
The coat is underlined – a first in my sewing experience so far. I decided that I would underline it in cotton flannel for uber-warmth – thankfully, the wool fabric isn’t as heavy as it could be, so the flannel wouldn’t make it overly bulky (I was slightly concerned that the coat would be a bit tight even without this extra bulk, because it said on the envelope that it’s ‘sized to be worn over the dress only’. I read that as ‘this coat comes up hella small’ 😂) The cashmere I was potentially planning on using later could be a different story, though, as that IS thick. Kind of like a thick felt. And so, SO soft 🤤

I also chose some iron-on interfacing for the coat – I tend to stick to sew in usually, but with coats, I find that a lot of interfacing covers only half of the front panels and I didn’t want to have to hand stitch the edge of the interfacing down on the middle of the coat and risk seeing it from the outside. The product I chose was Vilene G740, a fancy ‘brushed cotton’ one, which I’ve used before and had good results with.
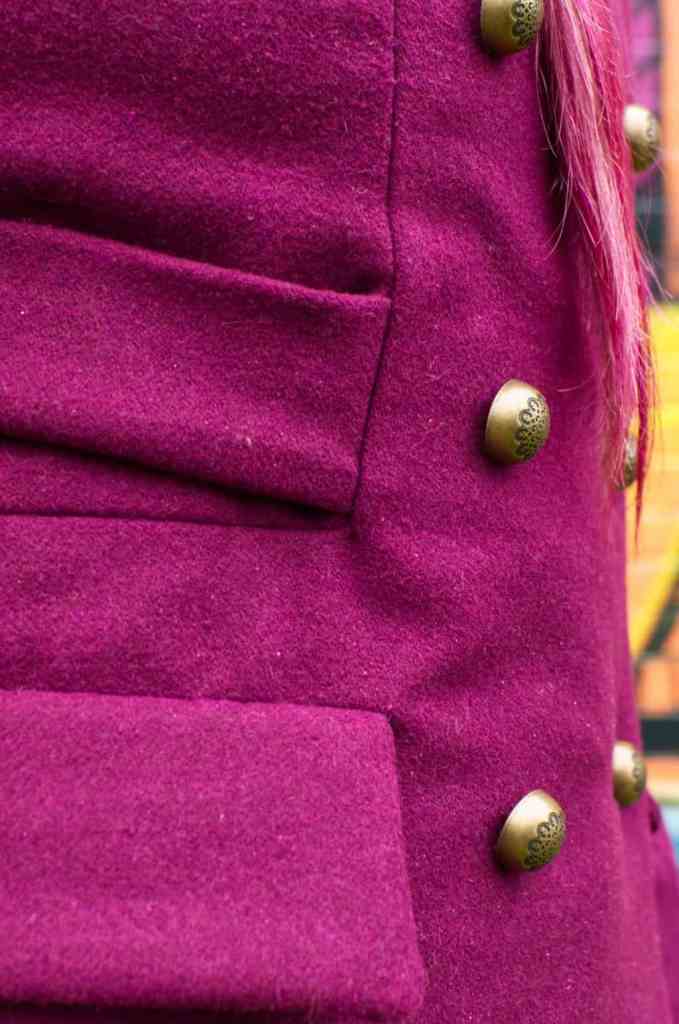
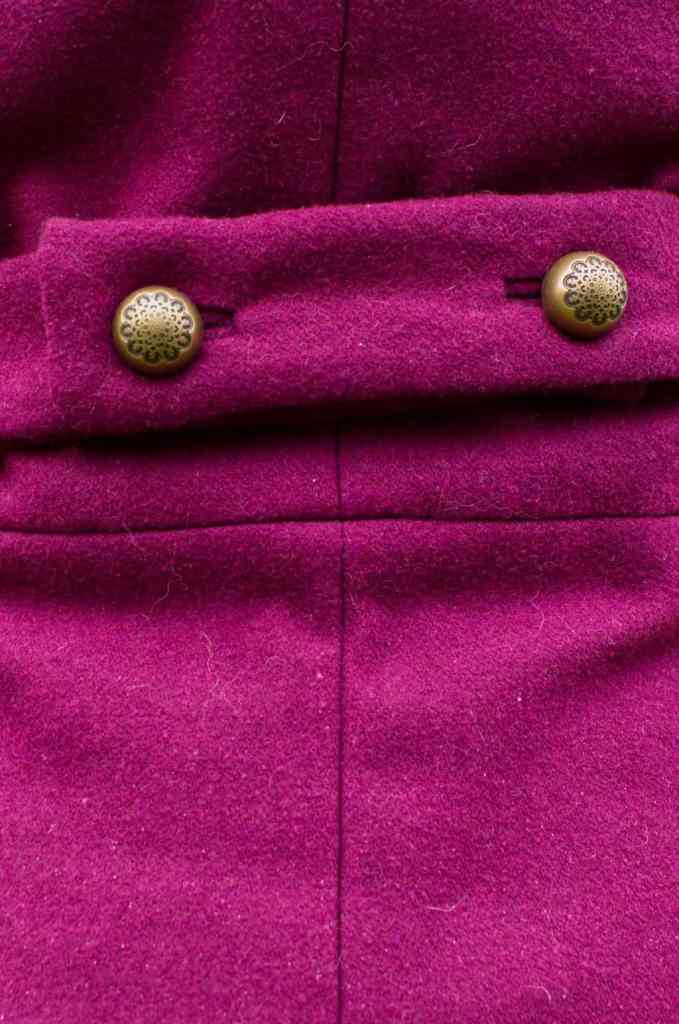
And finally, for the finishing touches, I chose some domed shank buttons with a decorative mandala pattern on them.
Now that the materials were gathered, it was time for the cutting ✂️
I absolutely LOVE that for vintage coat patterns they give you separate cutting templates for interfacing. Modern patterns get really lazy and make you cut the interfacing and lining from the same pieces as the main body (the pieces that say ‘cut here for lining’ are the WORST for me – so annoying, because you either have to trace the separate lining pieces or fold up the extra bit 😤). Plus, these vintage patterns mark the seam lines on the template too, which can help you visualise what you need to do when the instructions aren’t quite descriptive enough.

One of the templates for the interfacing of this coat has to be cut in two before you actually use it to cut the interfacing – one piece gets fused onto the front and the other bit onto the side front. I guess this is a way of getting around printing a template that doesn’t have a seam allowance on one side, but it was a bit confusing!
So it seems that you absolutely, 100% need 60-inch wide fabric for this coat – I found out the hard way that the templates won’t fit on folded 45-inch fabric. The skirt is MASSIVE. The coat required 3 metres of fabric, so I bought three metres of the flannel underlining, thinking that as I’d need to underline all the coat pieces, I’d need the same amount of underlining as the main fabric. Logical, right? 🤔 It wasn’t until I came to cut the front coat pieces from the underlining that I realised the flannel is only 45 inches wide, and that the template wouldn’t fit on the folded fabric 😫 As that particular template is the entire length of the coat as well, I had to buy another 1.5 metres of flannel and cut each front piece with the fabric laid out flat. It was a real fabric guzzler 😨
After cutting out what was essentially two coats (once from the wool fabric and once again from the underlining), I then had to cut out all the lining. There was a LOT of cutting for this coat, lemme tell ya. I spread it out over several cutting sessions spanning a couple of weekends, and even then it still felt immense.
As this was a previously-used vintage pattern, one of the back lining templates caused me a bit of drama with the back vent on the coat (and the two back pieces not being symmetrical, because of the vent). In its original uncut form, the template was a full-sized one, which was to be cut once. You then removed a chunk of that template and cut another piece, which is smaller than the previous one you just cut. This coat had been made before, so that cut had already been made – it took me a fair while to figure out that I needed to stick those pieces back together to get one of the templates.
Several hours later, all the cutting was done.

It also took me a while to get to grips with the underlining – when working on one of front pieces, I completely forgot about the underlining and went steaming in fusing the interfacing straight to the outer wool 🤦🏻♀️ Then I realised that I wasn’t actually sure if I should even fuse the interfacing to the underlining, or whether fusing it to the outer wool – what I’d just done – was correct 🤷🏻♀️ Even though the instructions didn’t explicitly specify, the pictures seemed to indicate that I should fuse it to the underlining, so that’s what I did. (Apart from on that very first piece where I messed it up 😂). If anyone has any opinions on what exactly the interfacing should be fused to, let me know!
I knew it would be so, but my heart still sank a little when I saw the instruction ‘make bound buttonholes’. Those three words can hold you up for HOURS. They look the balls, don’t get me wrong, but my word do they take ages. I reminded myself that it’s good to slow down and take time, though. Modern life is all RUSH RUSH RUSH so take your time and spend an hour making two buttonholes. Chill yo’ self ✌🏻 I’ve sewn bound buttonholes before, but they’ve always ended up super bulky and with the lips not quite even in the little window. Totes frustrating 😫 So I started looking for an alternative approach – and found one 🙌🏻 Piped buttonholes. The tutorial I used to follow previously used massive squares of fabric that required origami-standard precision folding (which I never managed), whereas this method from Threads Magazine uses what is essentially piping made from your fashion fabric. You had to fold a strip of your fabric, press it, and stitch it at 1/8th inch. You then trimmed it to be 2/8th of an inch wide, so that your line of stitching was straight down the middle. You sewed them on to the right side of your fabric, then cut the hole and turned them to the inside. Simples, huh? No fussy folding required 🙌🏻
Honestly, I wish I’d found this tutorial years ago. I certainly won’t be going back to the old way, that’s for sure!
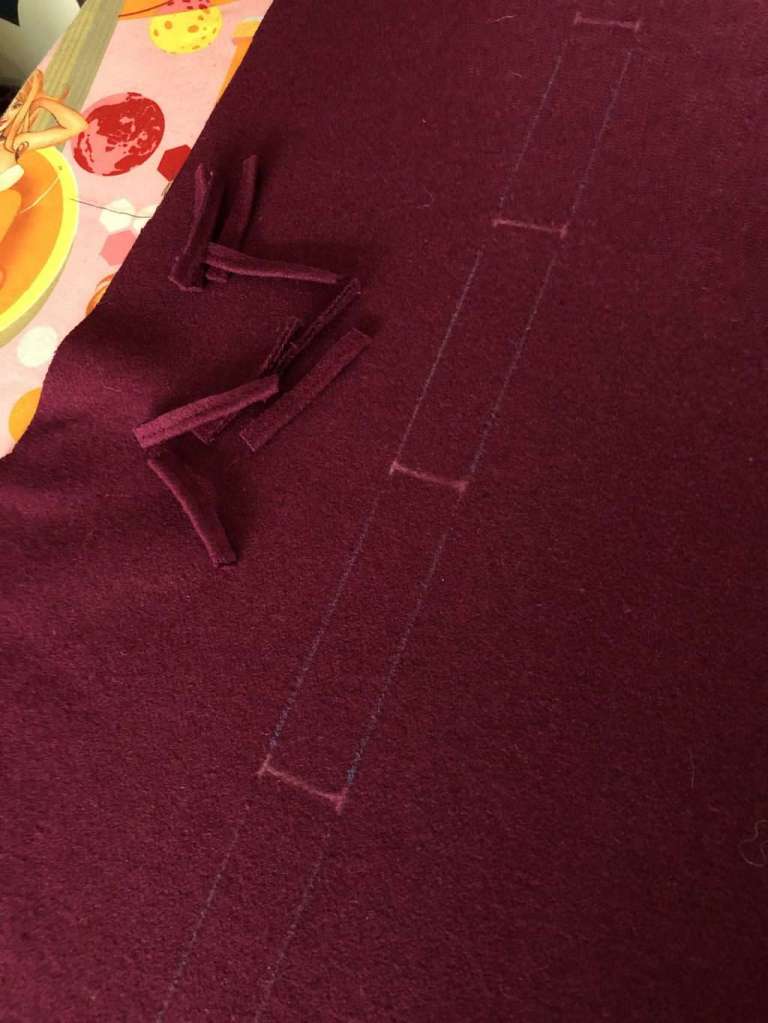
Not only was this method much quicker than my previous attempts, it also uses considerably less fabric, is WAY easier to get a good straight finish and is a hell of a lot less bulky because you’ve only got two strips of piping on the inside rather than a square of fabric that’s been folded a hundred times with multiple layers.
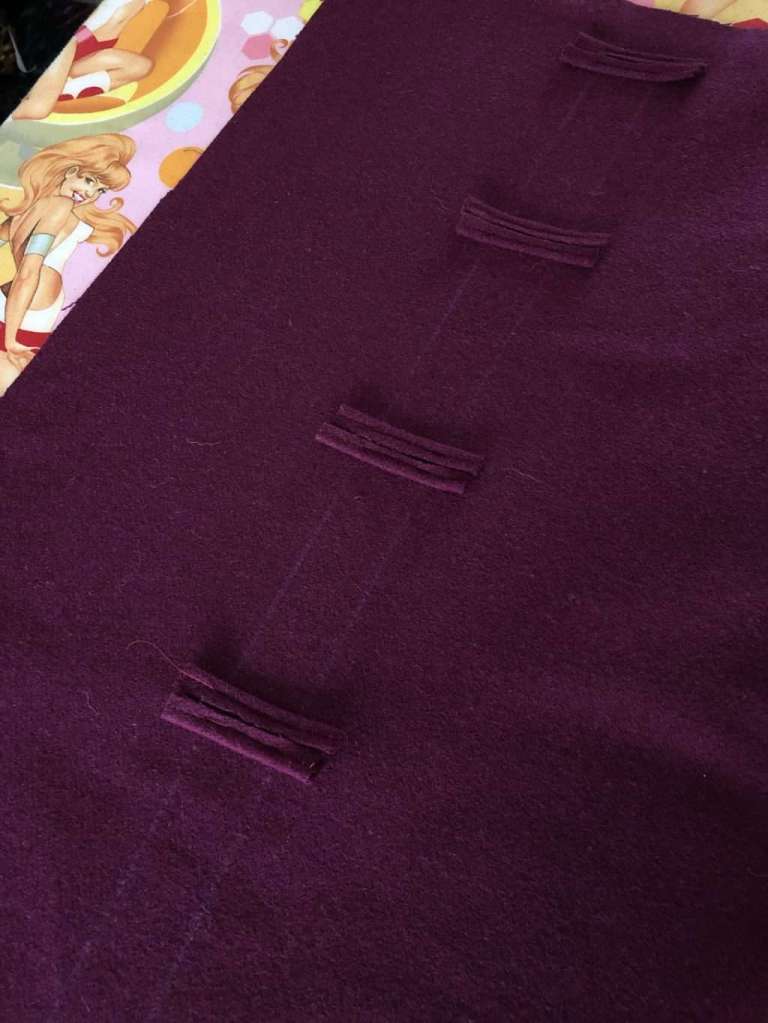
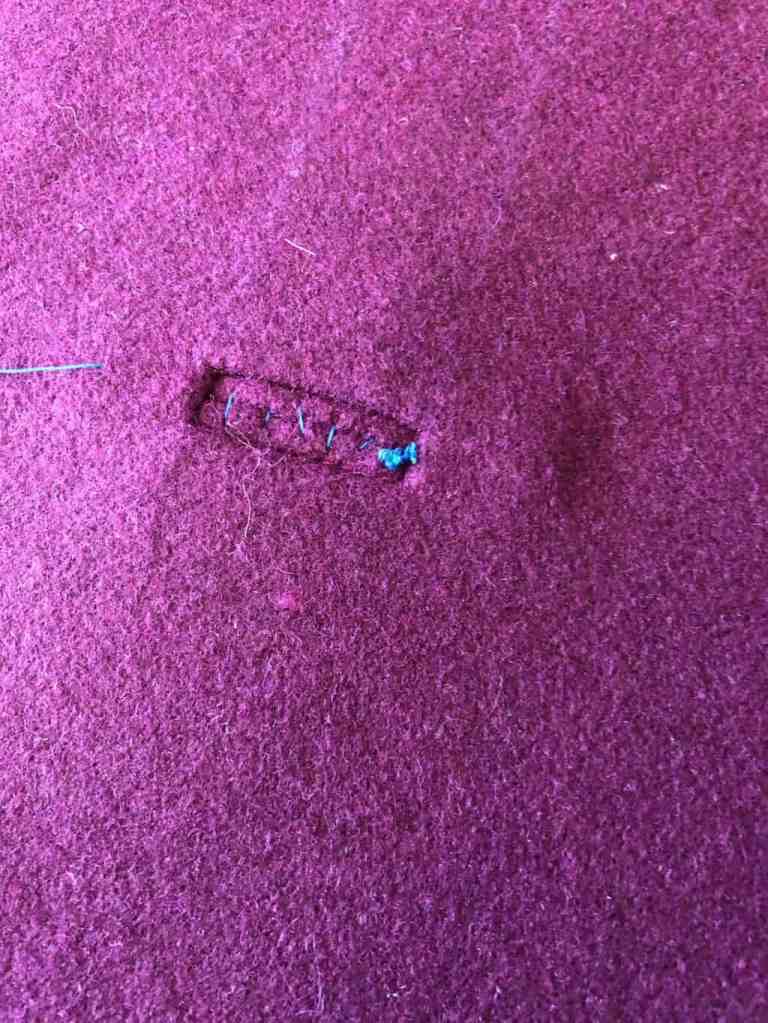
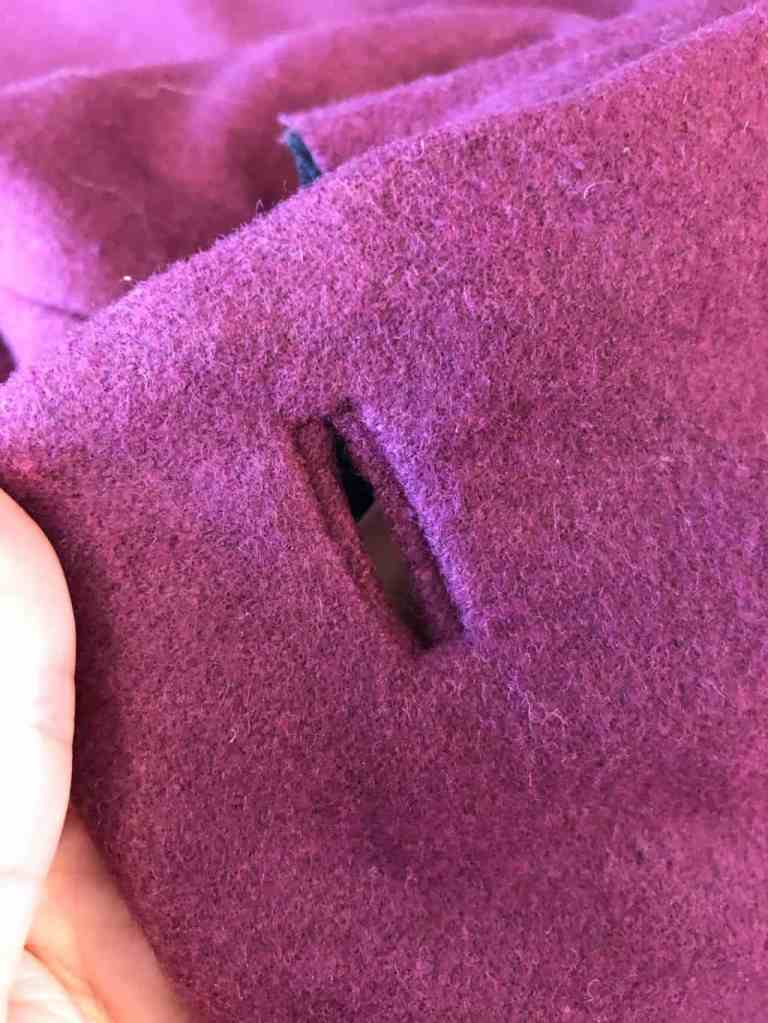
I wasn’t sure whether it would be too much to attempt the buttonholes through the wool and the flannel underlining, so rather than risk it and balls it up, I just cut windows in the flannel around the buttonholes. Turns out I needn’t have worried, as it would have been fine to do it through both layers, so I’ll remember that for the next attempt.
When it came to creating the corresponding holes in the facing for the button to go through (because if it isn’t bad enough that you have to make all those buttonholes, you then have to repeat the process on the facing and make damn sure that you get the holes in the same places as the buttonholes) we had more drama 😫 Again, my old method had you construct these holes using another square of fashion fabric (and thus adding to the already super-bulky-hulk-bulk) but I decided to see if I could use something thinner rather than more of the outer wool fabric. I went for the thinnest, most stable thing I could find: silk organza. It worked, in the sense that it caused virtually no bulk (and as a plus, I could see the stitch markings I’d made for the box through it), but it was a little bit of a faff and you could see some of the silk poking through at the edge of the hole. I mean, these holes are on the inside facing of the coat and no one is going to see them – ever – but it still got on my chimes a little. So for the next hole, I decided to use some of the iron-on interfacing instead of silk organza. The plan was to pull the interfacing through the hole to the wrong side hard enough so that you couldn’t see any of it poking through at the edge, and then fuse it down in place so it couldn’t peek back through. I gave it a try, and OMG YOU GUYS IT WORKED 😨 *So* much better than the silk organza (and even that was still better than the way I used to do it) so I consider this a MASSIVE win 💪🏻
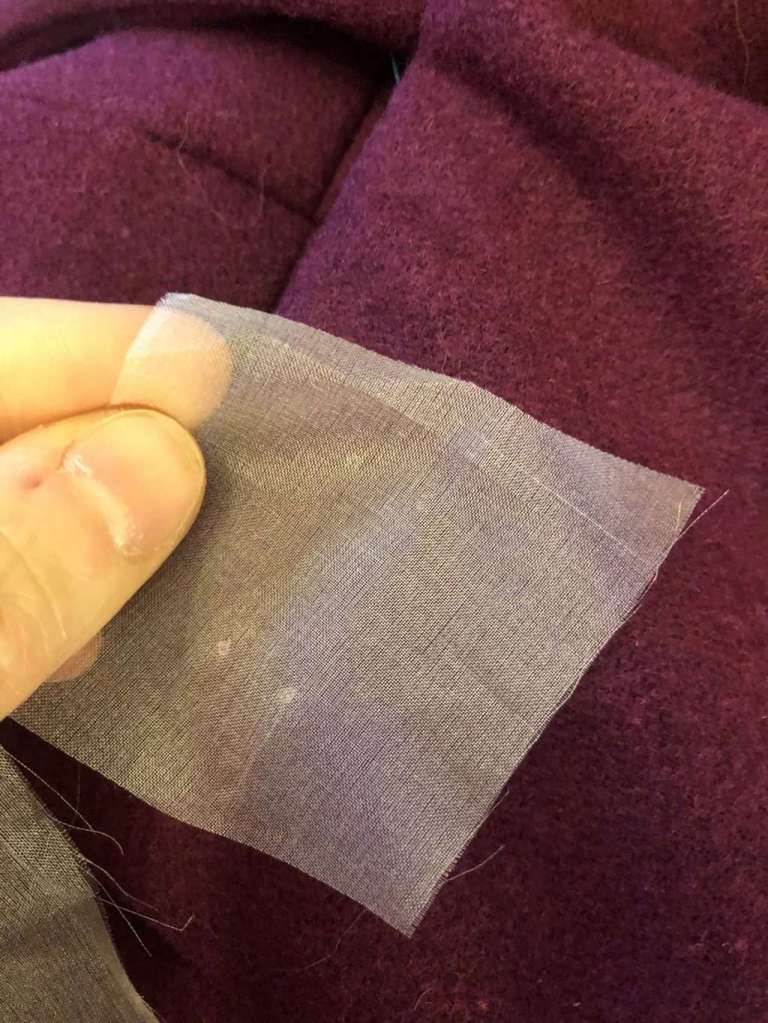
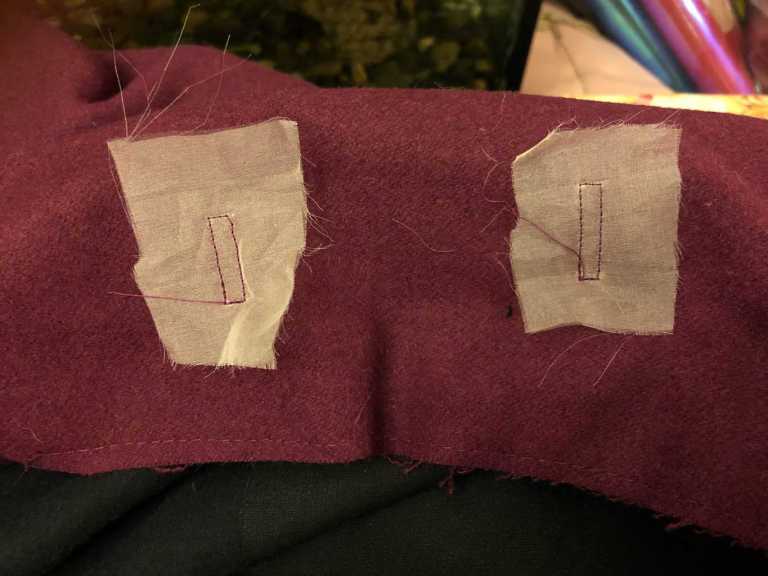
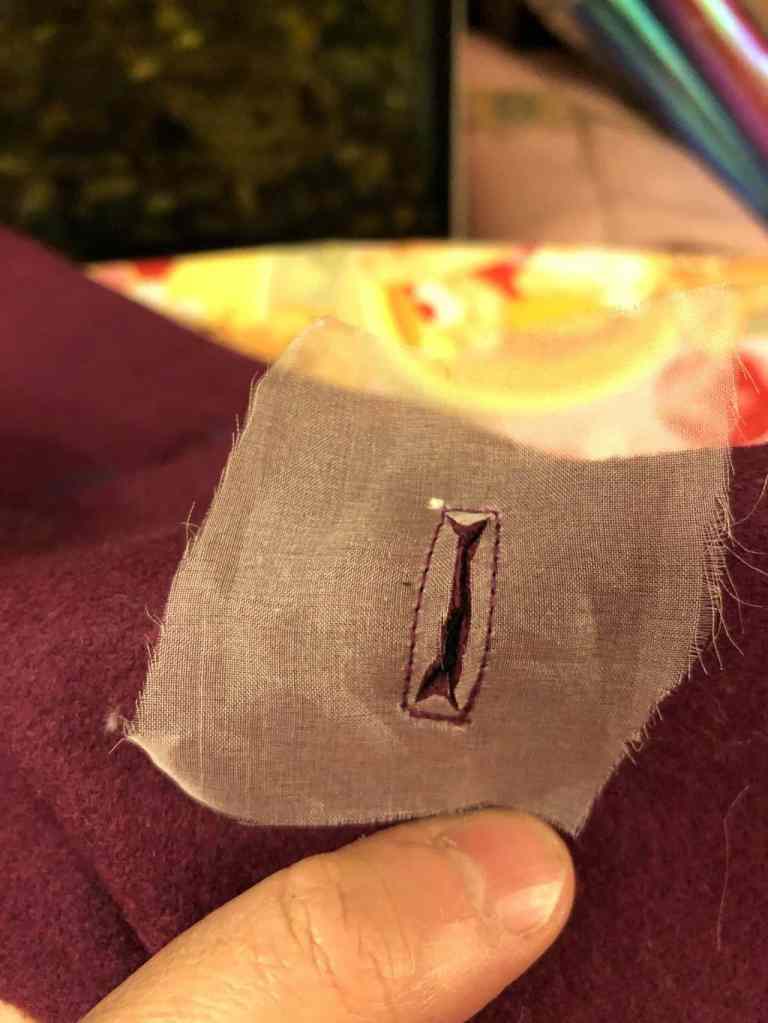
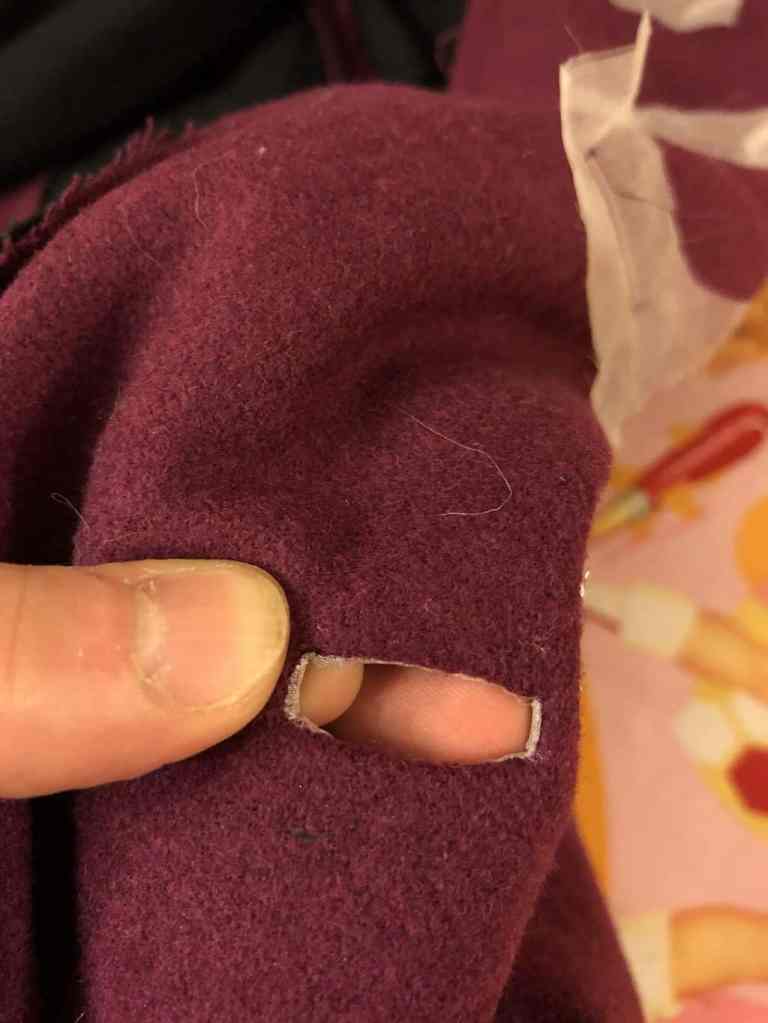
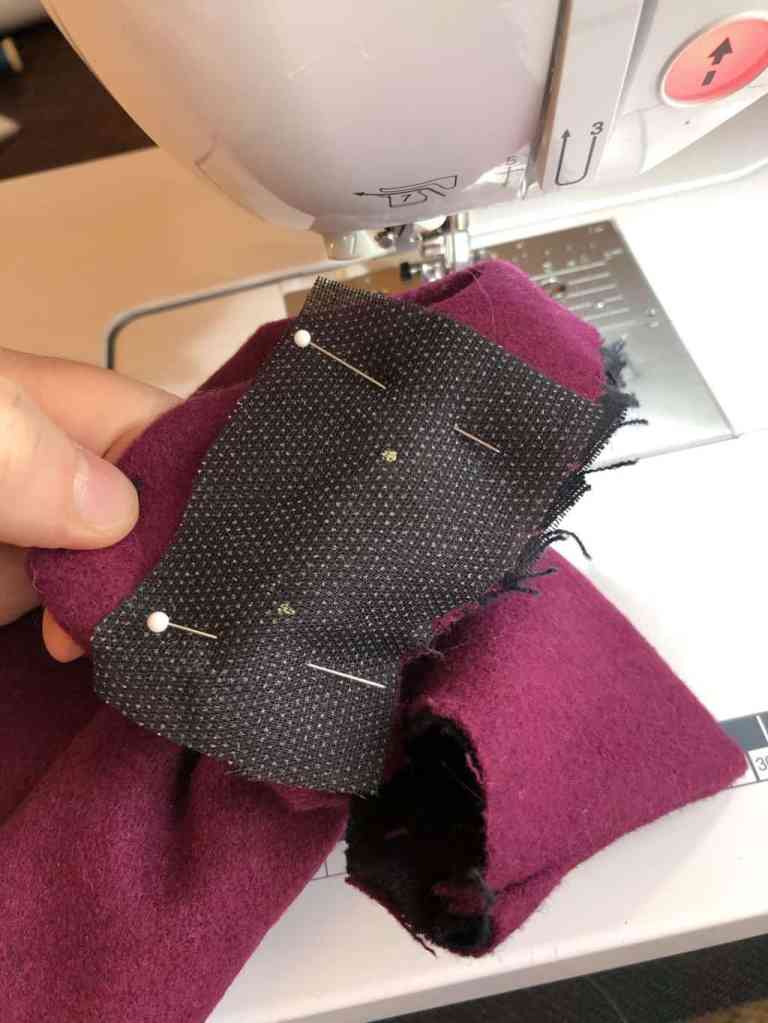
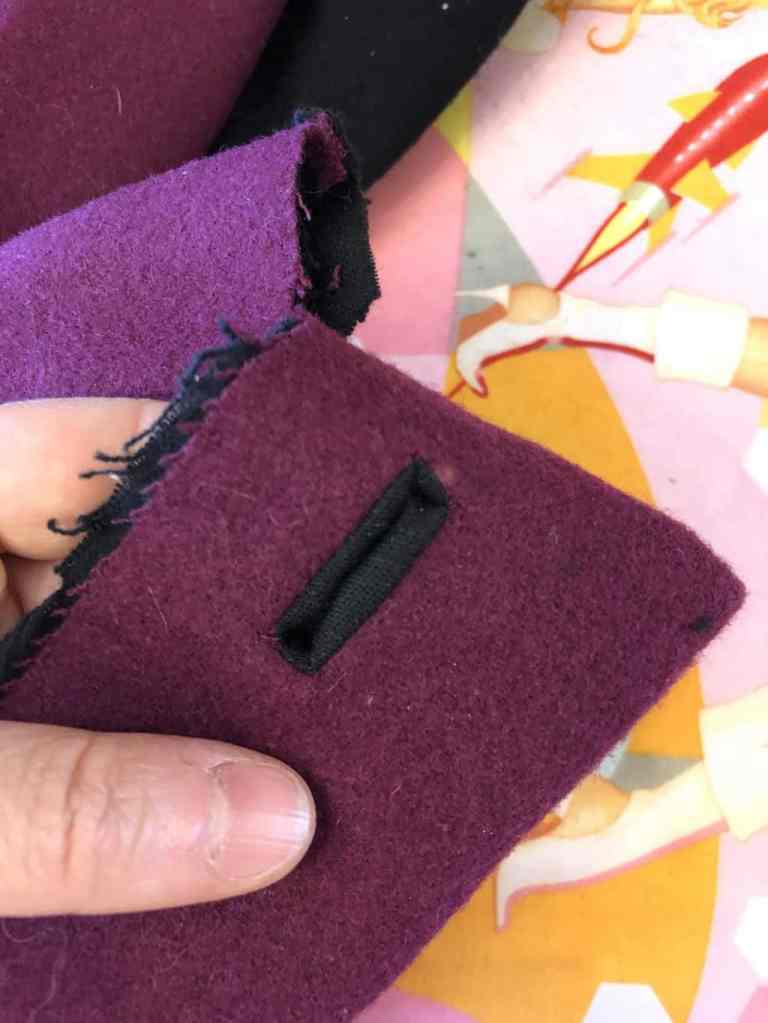
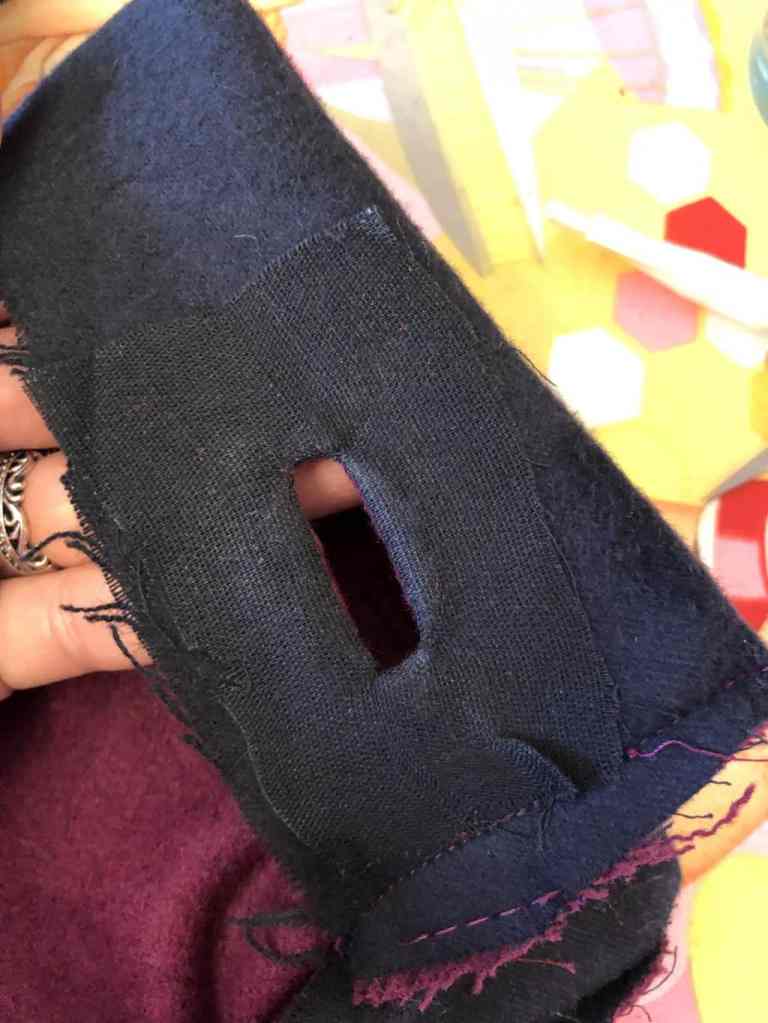

Piped buttonholes with fusible interfacing on the facing holes is DEFINITELY the way I will go in the future – it’s so simple that I don’t even dread making the bound buttonholes any more!
With the buttonholes well and truly conquered, I moved on to the rest of the coat 💪🏻
You have to attach the pockets to the outside of the coat BY HAND. By hand, people 😨 You construct the main pocket by hand as well, before sewing it (did I mention by hand?) to the coat. Turns out my slip-stitching isn’t quite up to scratch, because you can sort of see the little indentations the stitches have made along the edge on the outside of the coat. I need to work on my technique, it seems – but I also get a bit twitchy that the pockets are only attached by the strength of my hand sewing, and I wouldn’t want to put anything heavy and/or really small in them. I feel better when something is attached by a strong machine seam, although I totally appreciate that visible stitching would ruin the clean lines of the coat… DILEMMAS 😫
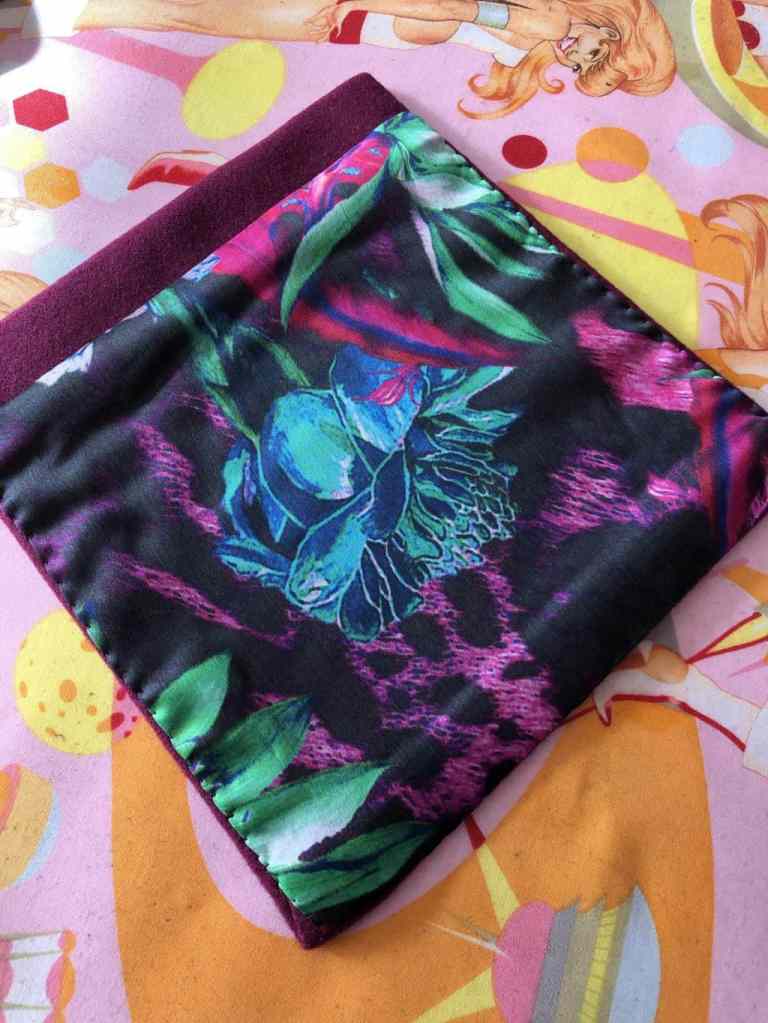
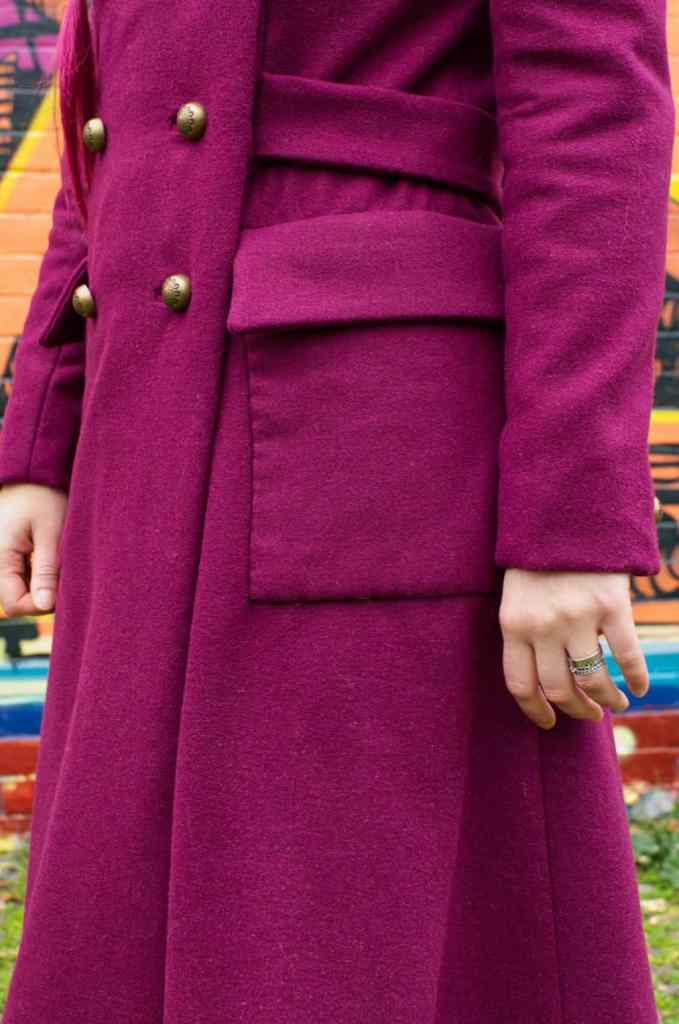
Even that pocket flap is sewn on BY HAND. For realsies.
There was some pad-stitching on the collar to do, but as I’d bought iron-on interfacing, and already fused it prior to reading the instructions, that didn’t happen 😂 I do actually have some hair canvas stashed, which I’ll use on the cashmere version instead of the iron-on interfacing, and see whether it’s worth the hype.
I remembered to install a hanging chain (something I always forget, because in our house, coats get hung over the bannister 😂), and wanted to copy my method from the husbeast’s Thread Theory Peacoat and mount the label onto a small square of lining fabric. The neck facing was reallllly super narrow though so I could only get a small square of lining around it – but it’s better than nothing though and it still looks fancy 💁🏻♀️
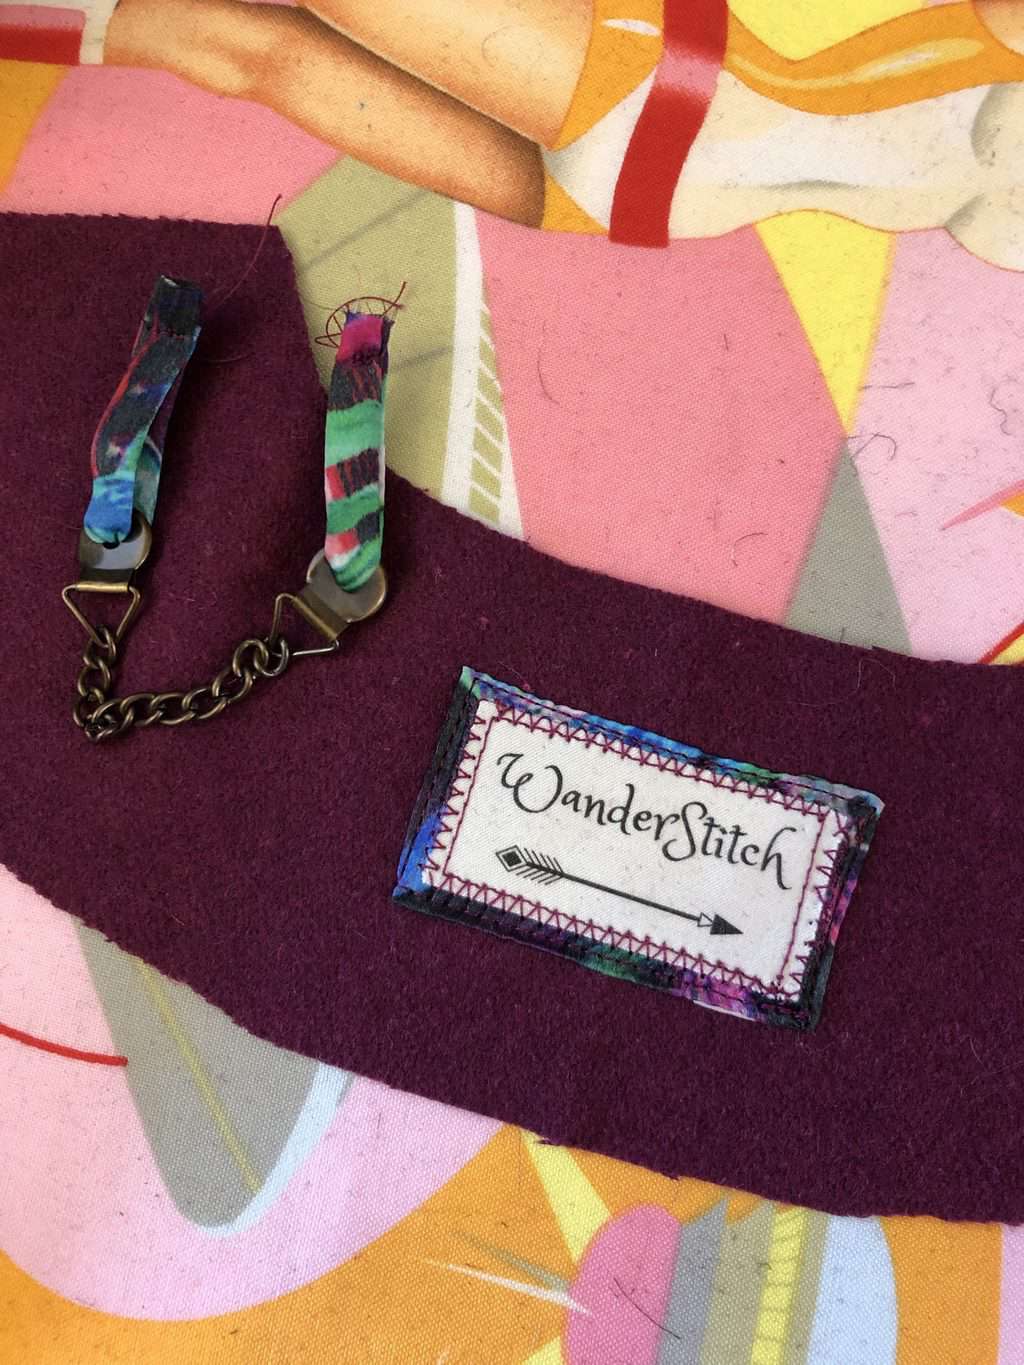
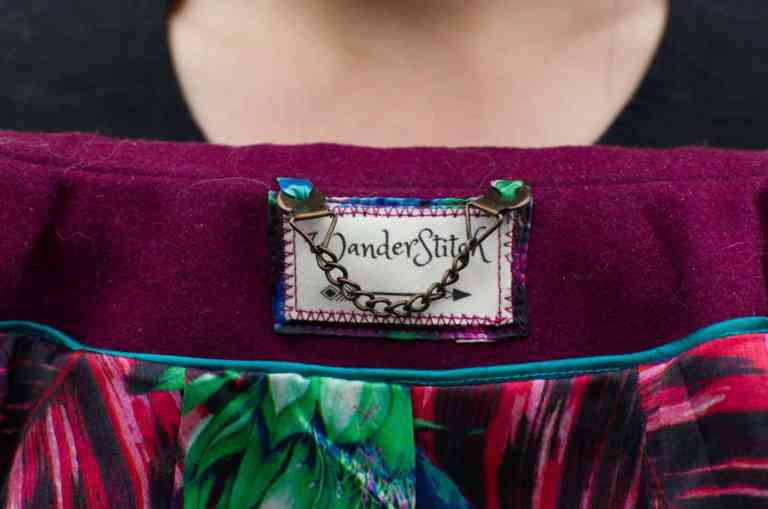
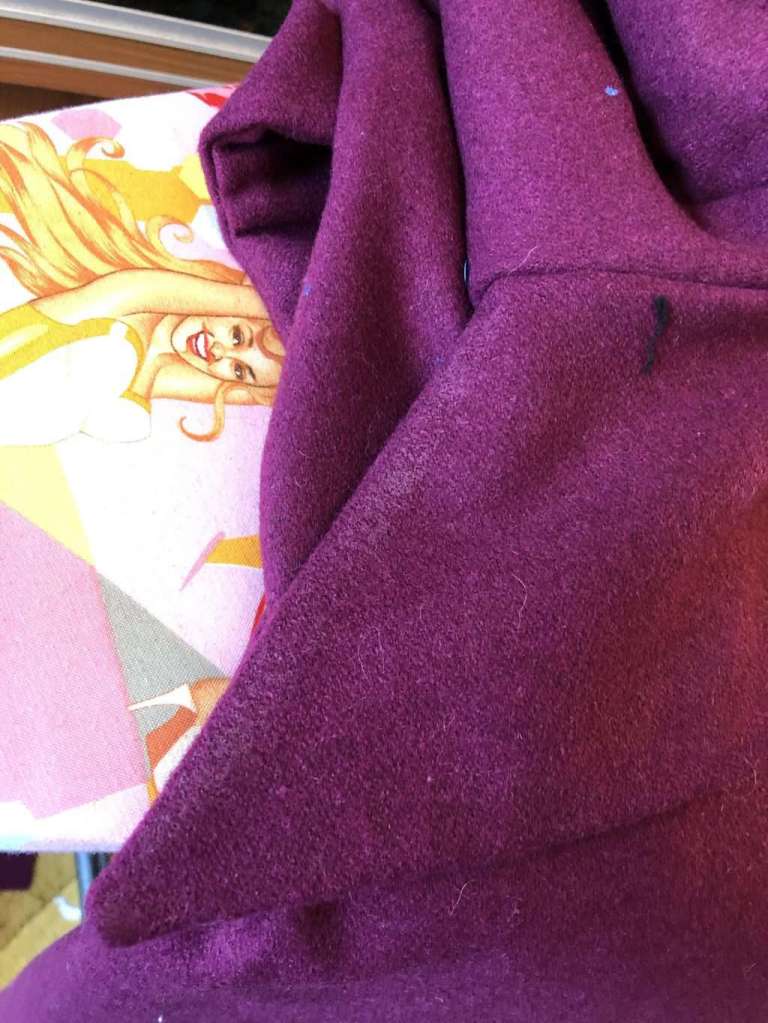
Even though the wool is a viscose blend, I wasn’t expecting it to melt/go shiny under the iron – I mean, okay, I can be a bit savage with the iron sometimes, but it still surprised me that this happened. The wool is also slightly itchy, especially at the neckline where it touches my bare skin (because there isn’t enough room in the coat to wear a sweater under it). You can just about see the shine on the diagonal edge of the collar in the photo below 👀😫
One thing that’s not included in the instructions, which I always do on coats, is put piping between the facing and lining fabrics. It surprised me a little that this wasn’t part of the design if I’m honest – I thought it definitely would have been a nice touch. I made my own from bias tape and 2mm piping cord, in a turquoise colour which coordinates with the silk lining. Super easy and it looks well profesh 👌🏻
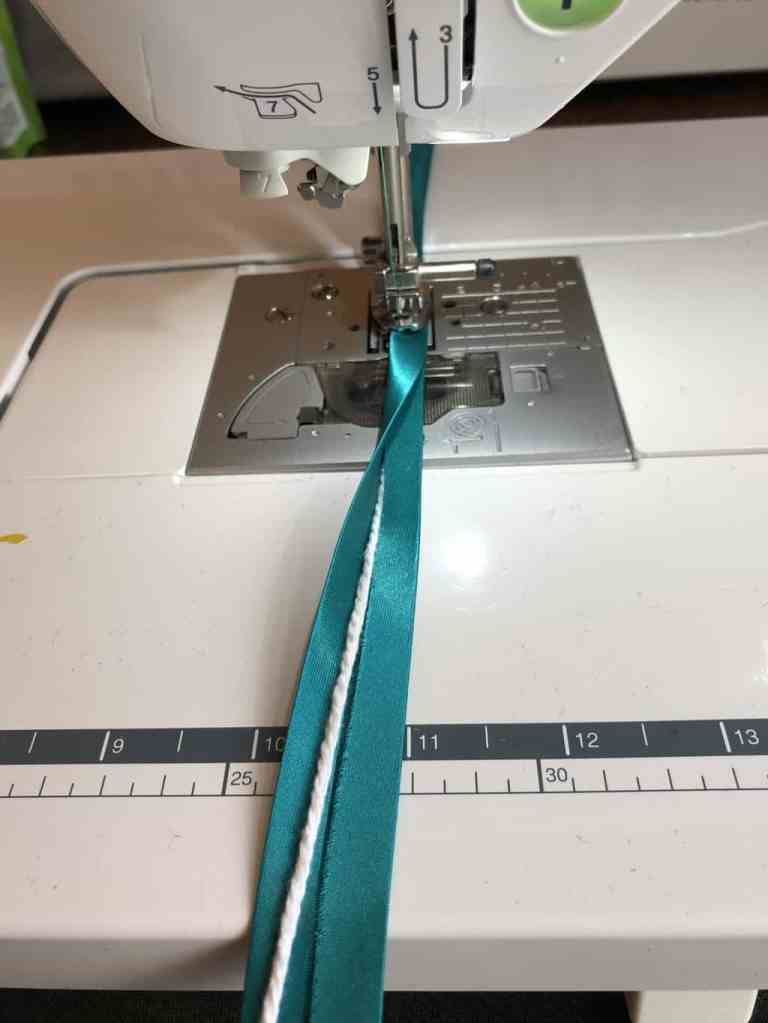
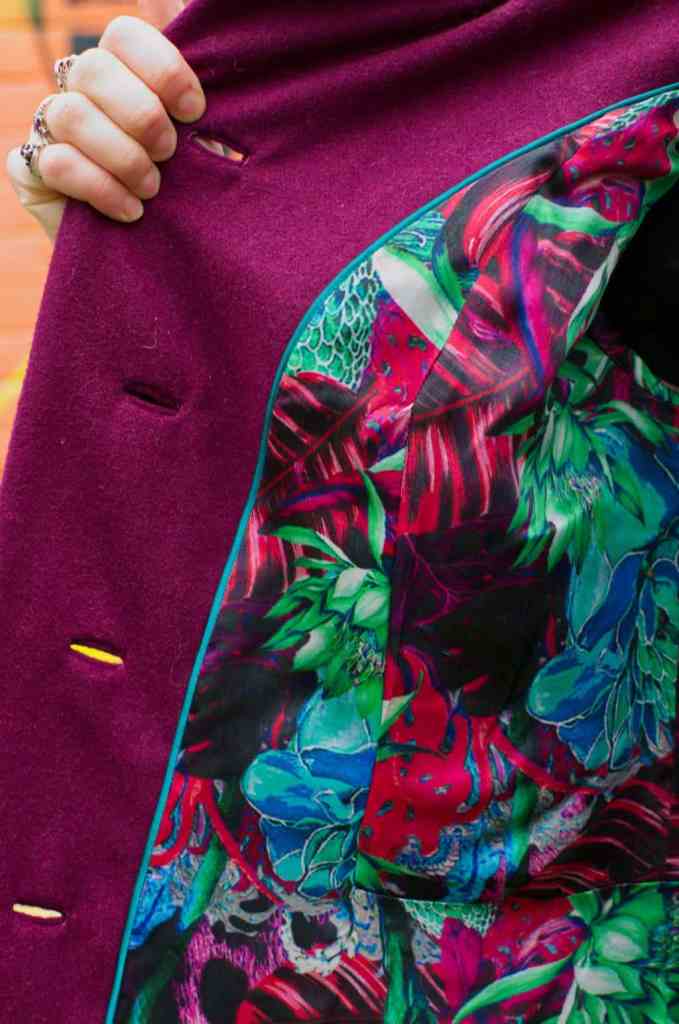
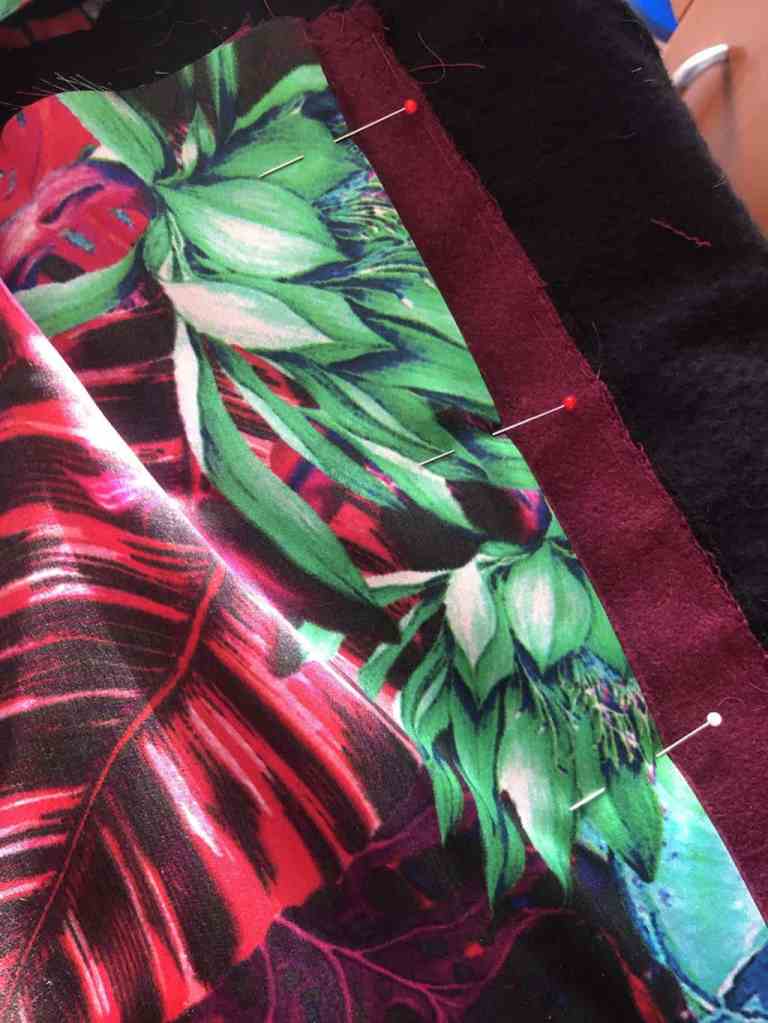
I hand basted the piping to the facing of the coat, to make sure that it was bang on the seam line. I then went around and stitched it into place – using a contrasting bobbin thread (and a coordinating main thread) so that I can follow that same seam line when I’m sewing the lining to the other side. I was surprised that the pattern didn’t instruct you to put piping – this coat spared no expense in most areas, and I thought this would be a professional little touch that they’d advise. Anyway, I love me a bit of piping, so in it went. When inserting the lining, the pattern instructs to turn in 5/8” on the lining, and then slipstitch it (by hand, of course) to the facing of the coat. I couldn’t really see the benefit of doing it this way over my machine stitched way, so I went with my way (if you have views on why hand stitching it would have been better – holla at me). I pinned the lining in place, lining up the raw edges, and followed my line of stitching that I made earlier in my contrasting thread. It got the job done, in a pretty good way – but maybe next time I’ll try the hand sewing just to see how it goes.
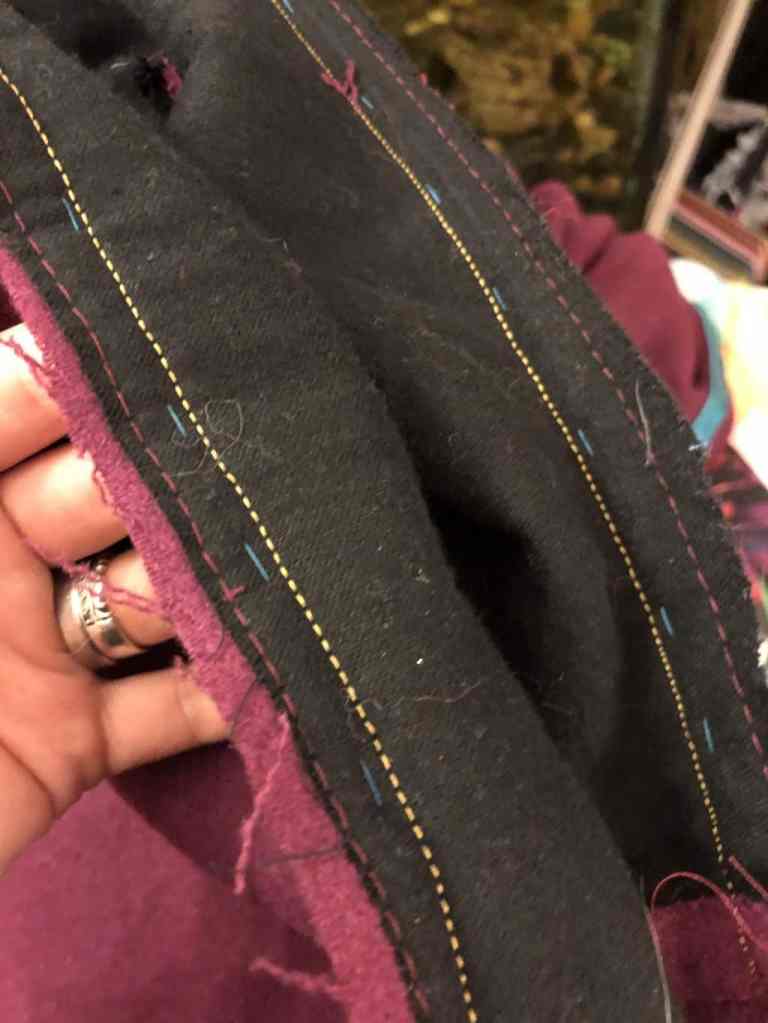
(soz for the blurry photo… phone was having a moment by the looks of it 👀😂)
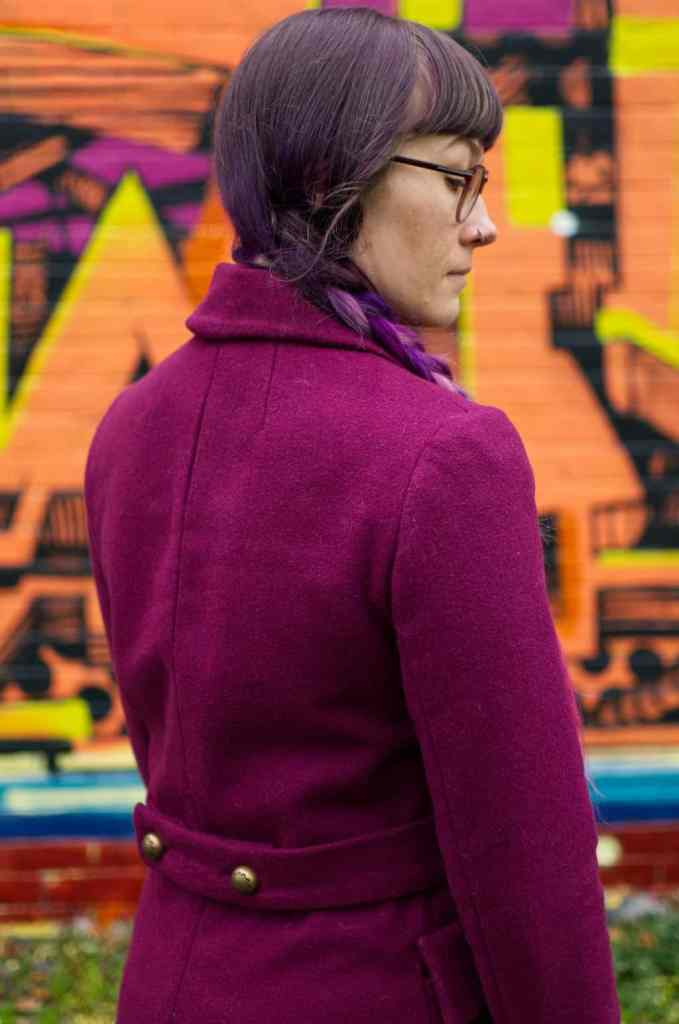
I used ‘sleeve head’ for the shoulders instead of shoulder pads… not sure I’m completely convinced by its benefits (and tbh, I’m not actually sure what they are anyway 🤷🏻♀️), and that was after I’d spent a good half an hour trying to ease in the sleeve cap without getting wrinkles 😳
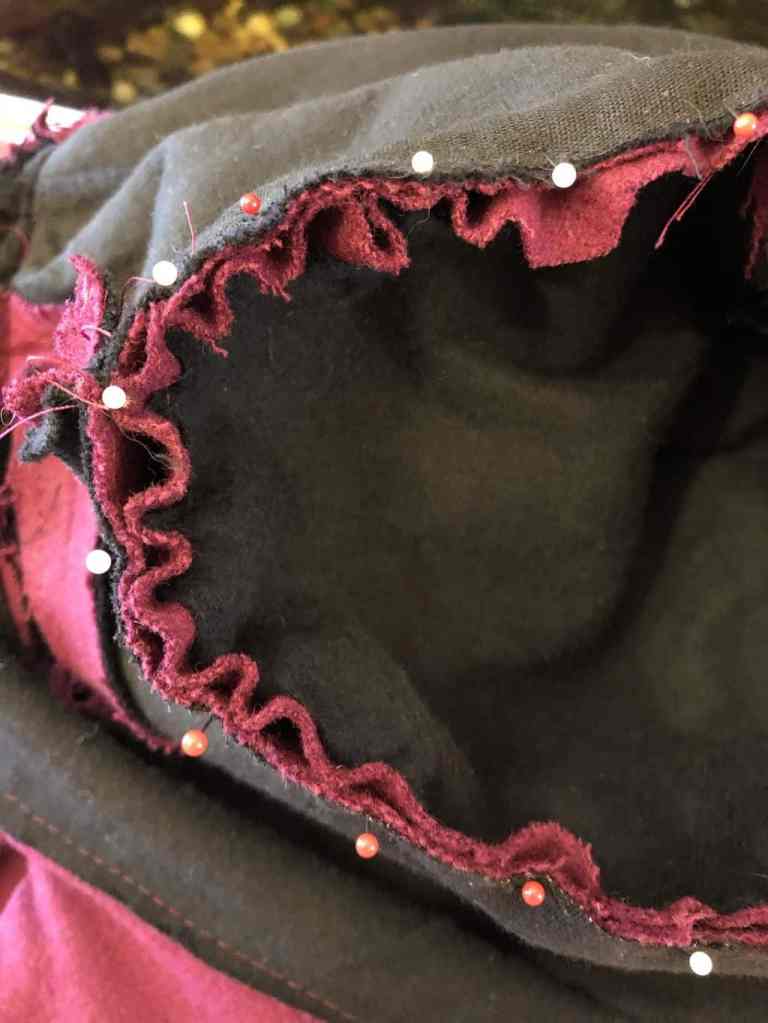
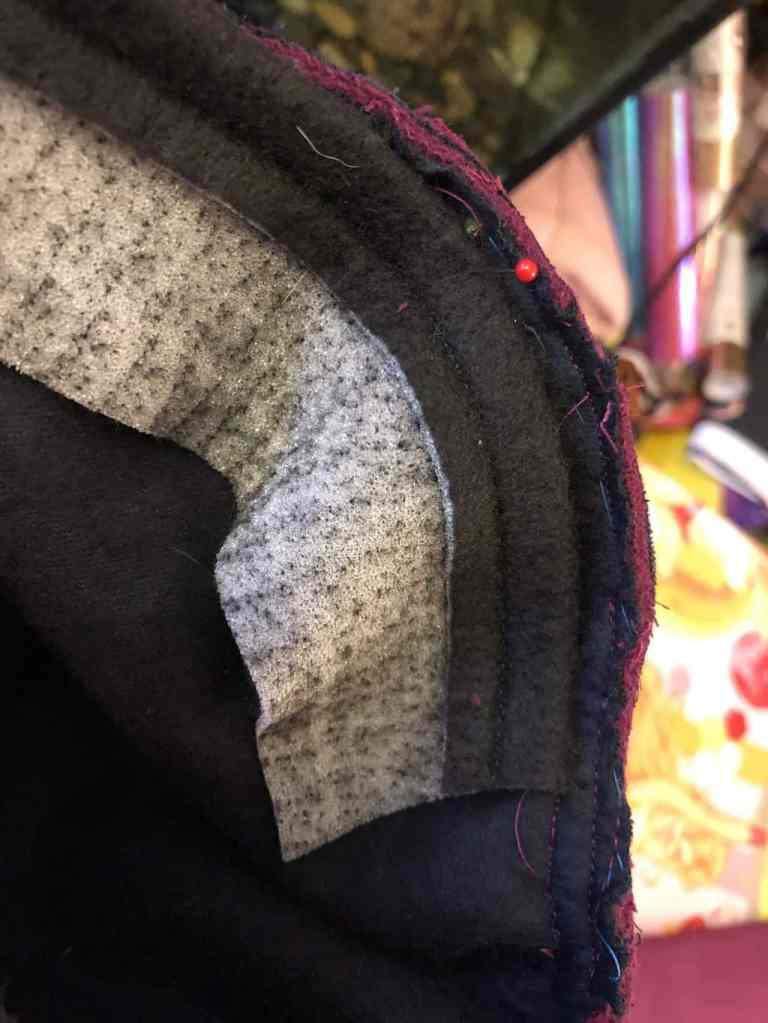
With the main body of the coat put together, we were finally on the home stretch.
I sewed on all the functional buttons – double checking my placements were in line with the buttonholes – and when it came to completing the button set with the non-functional buttons, I made sure to mark out the placement because I *ALWAYS* get at least a couple that are out of line, even when I follow the original markings I made from the pattern piece. As per usual though, my chalk makings had rubbed off by the time I needed them (yay 😤😂) so I put the markings back where I thought they should go, and proceeded to sew on the remaining buttons (with plastic keeper buttons behind them so that the button shank doesn’t pull/distort the fabric). I put the coat on and got the husbeast to check the placements. Several things became clear at this point:
1. I had sewn a couple of the buttonhole windows on the facing smaller than the actual main buttonholes on the outside of the coat, and the buttons wouldn’t fit all the way through. FFS.
2. The functional button placement was a bit off, and several of the non-functional buttons were too far down in relation to their functional counterparts. Yay.
3. Said non-functional buttons were also sad and droopy because of their shank attachment. The functional ones looked okay as they had the coat body behind them for support and stood up nicely, but the non-functional ones? Droopy AF.

It was late at night and I was proper tired (the plan had been to finish sewing on the last button and then climb into bed), but I made the husbeast mark – visually – where he thought the non-functional buttons should go in relation to the working ones. I then got into bed and started googling how to stop the droop (😂) – I’ve made several double-breasted coats and NOT ONE pattern has indicated that the non-functional buttons should be sewn on any differently to the others, but none of the photos on the front of the pattern envelopes show saggy buttons 👀 I hit the jackpot on one website – it suggested making a hole with an awl (so that you don’t split the threads of the fabric and cause fraying), and pushing through the shank of the button. This would sink the button into the fabric (rather than having it sit on top of it) and provide support to stop some of the droop. Even though I had the flannel underlining, the fabric still wasn’t particularly thick, but it could work. I did, however, also have the unresolved query of how I actually sew the button to something once I’ve pushed the shank through though… 🤔
But I had a plan, and that was progress.
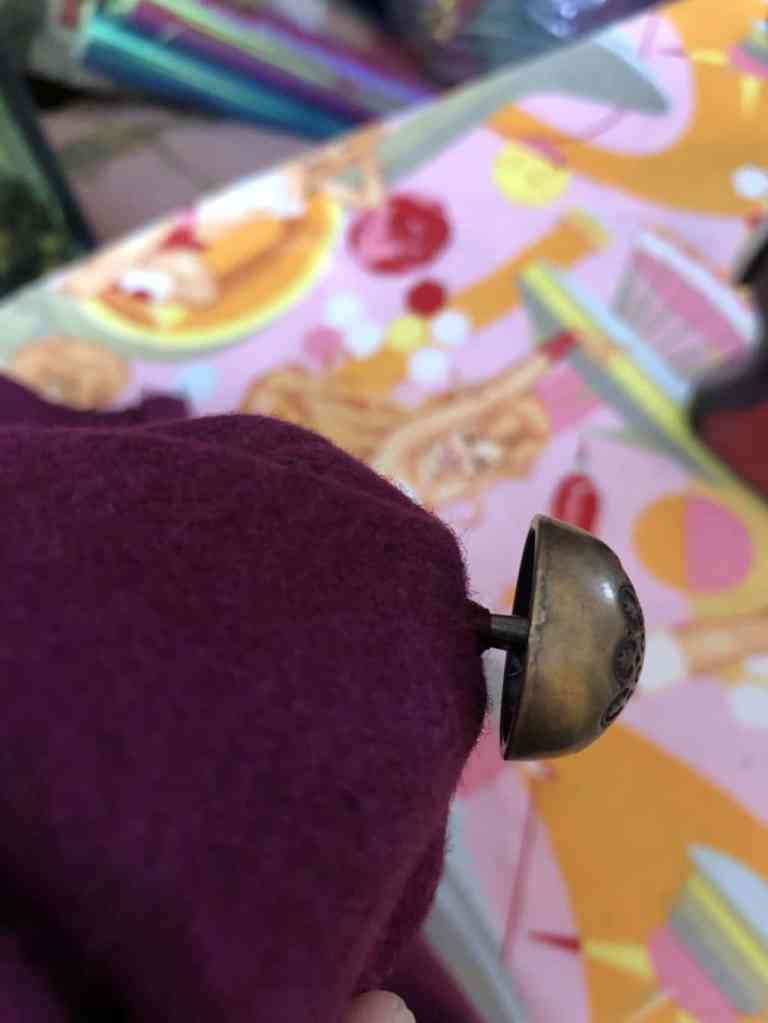
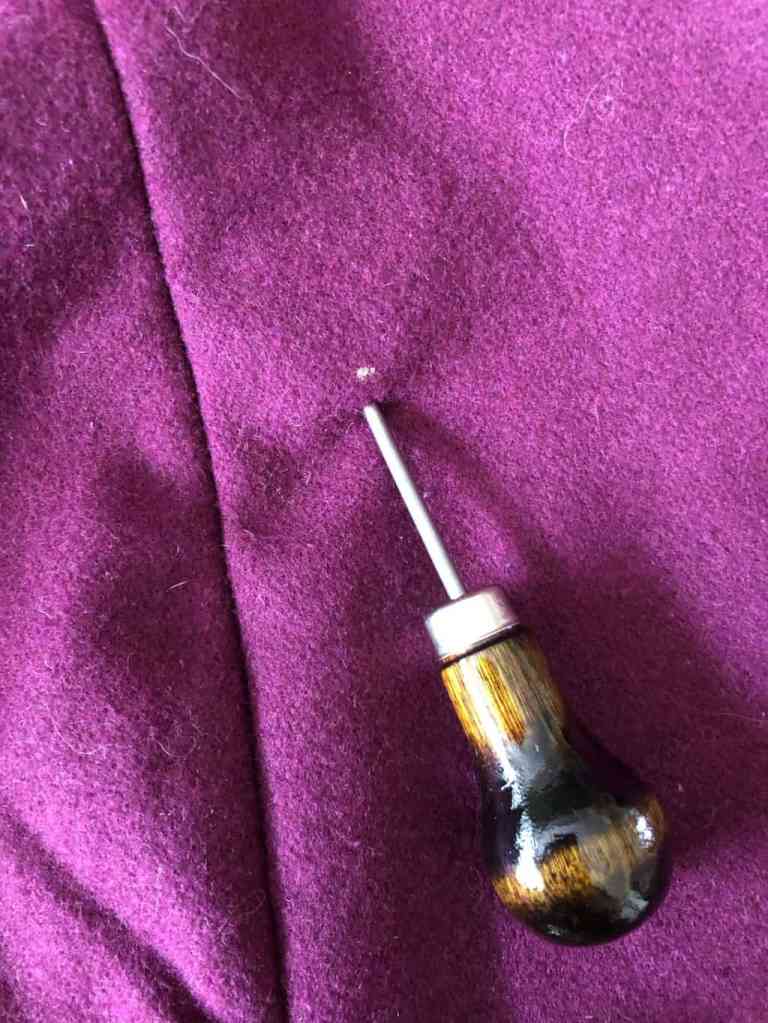
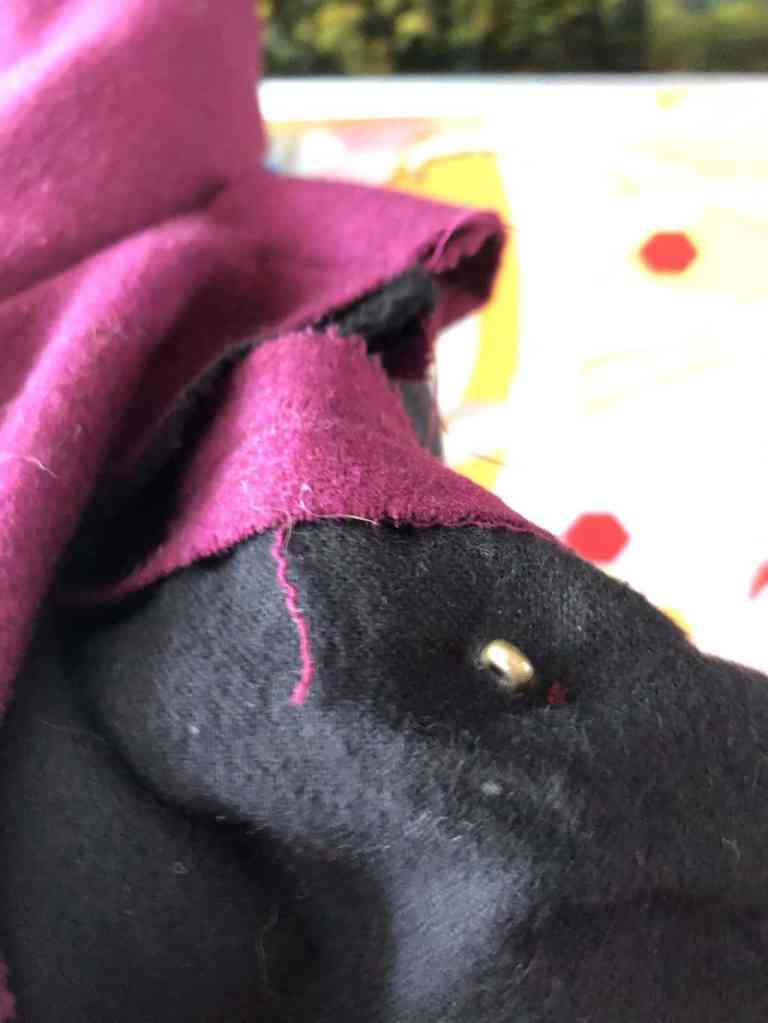
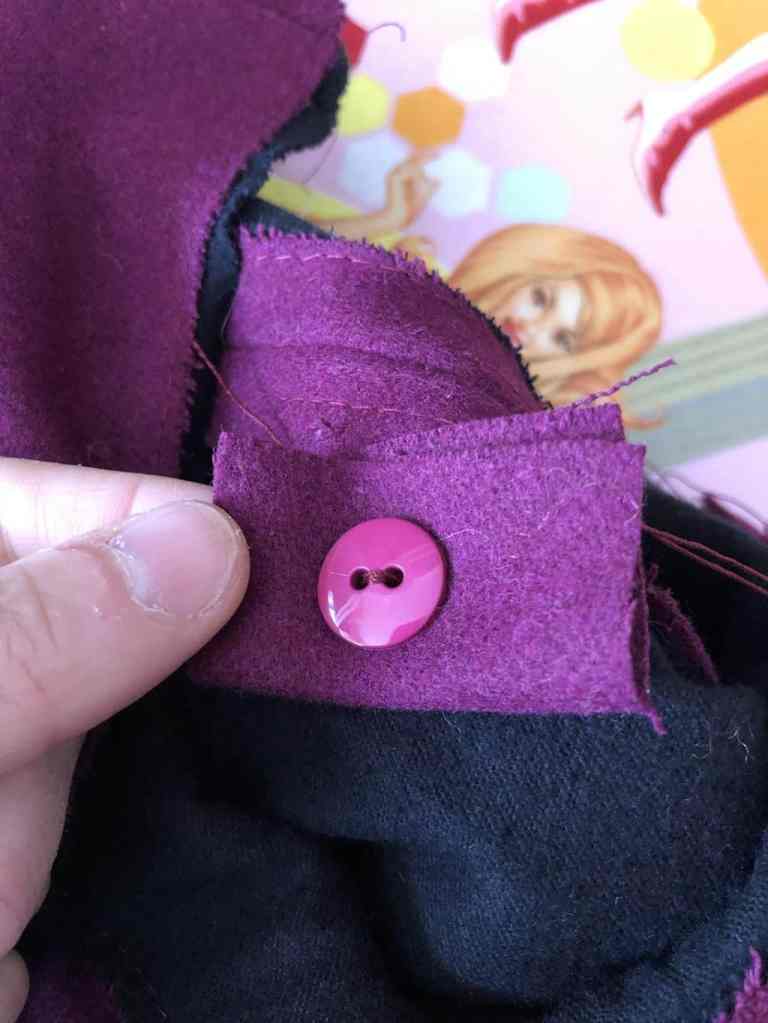
I came up with the idea of cutting a small square of fabric, and sewing the button to that (and also using a keeper button) the same way as I did with the other (functional) buttons. It worked fairly well – not too bulky, and the buttons are hardly saggy anymore. If you attempt this though, expect sore fingers. It’s tough going. A thimble is advised!
You can see the difference in the photo below: the top button is sewn on with the awl method (so, with the shank recessed a little into the fabric), and the bottom one is sewn on as a regular button, with the shank fully on the outside of the coat. DROOP ALERT! 🚨
But at least now, I won’t ever have saggy buttons again 🙌🏻
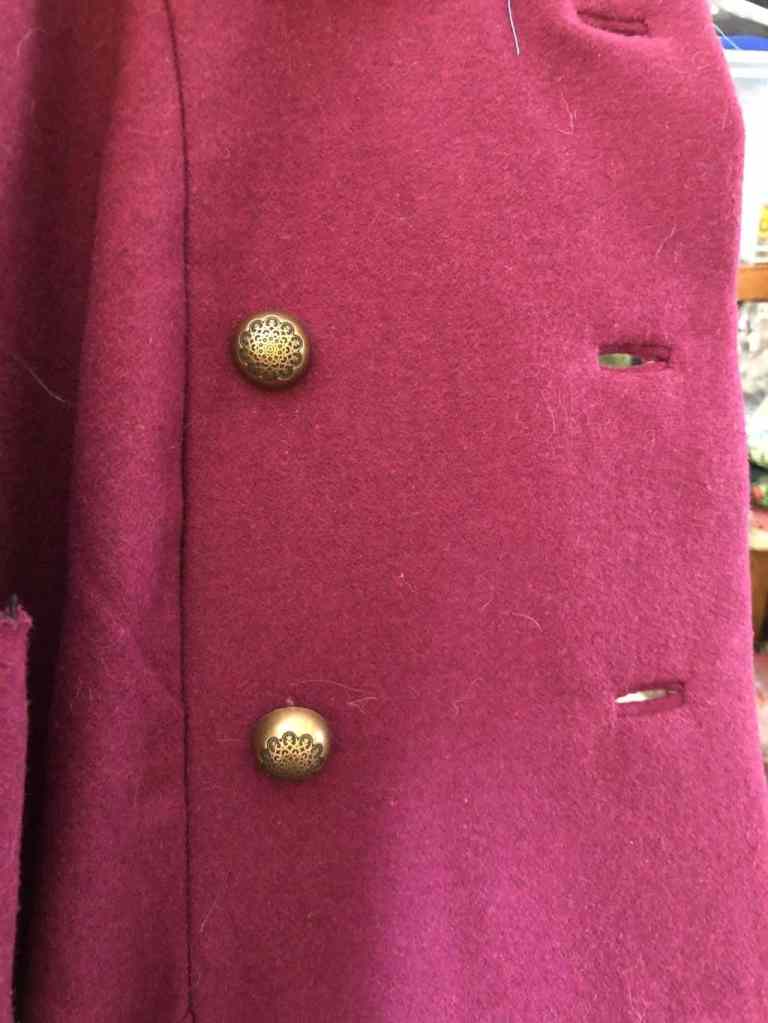
As if it wasn’t enough to make all of those bound buttonholes on the front, you also have to make one on the sleeve, which is proper fiddly to get the window on the facing sewn as it’s in the corner of the cuff. There’s also a couple on the belt too – you’re not gonna be using your one-step buttonhole anywhere near this bad boy, FYI 😂
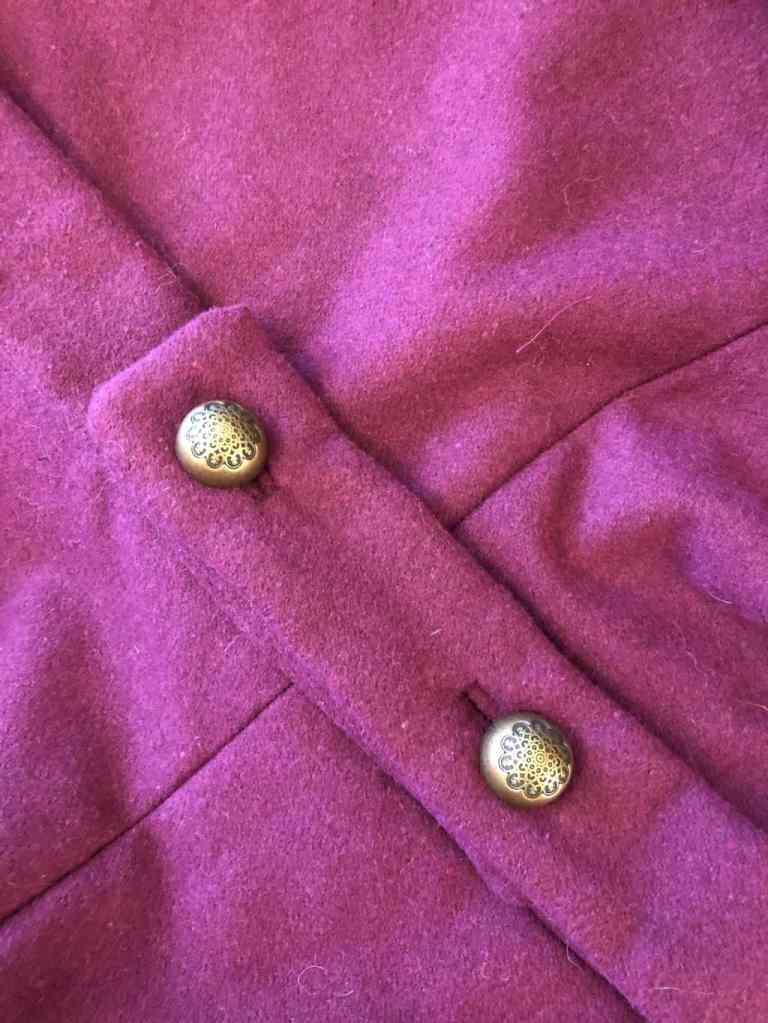
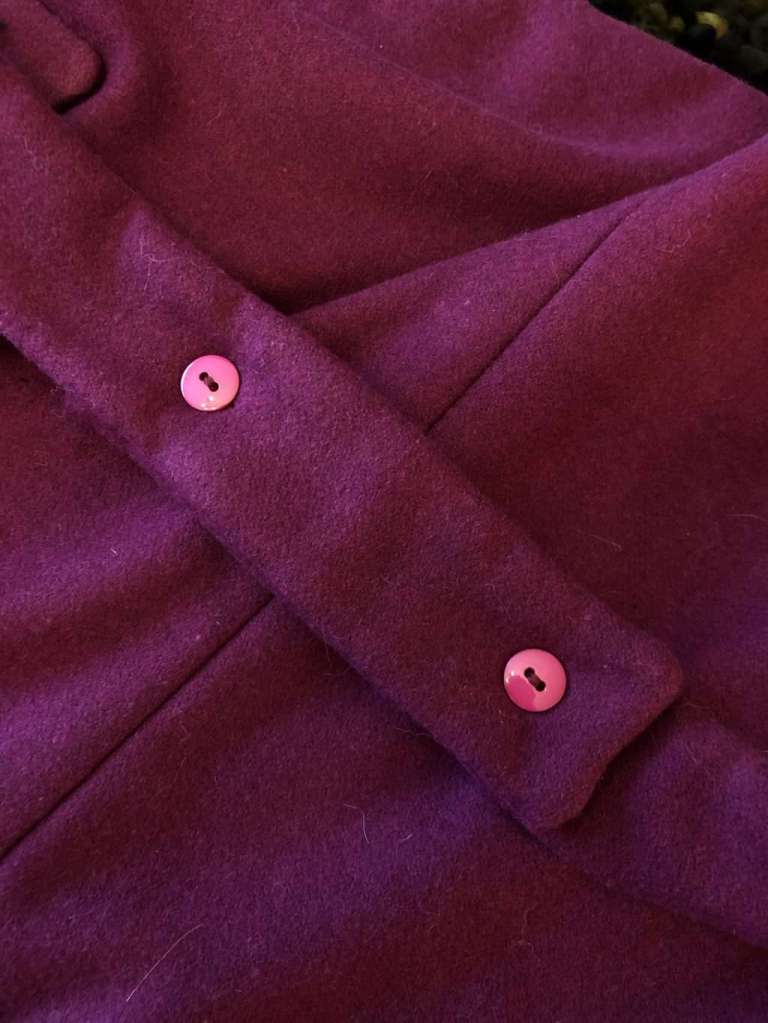
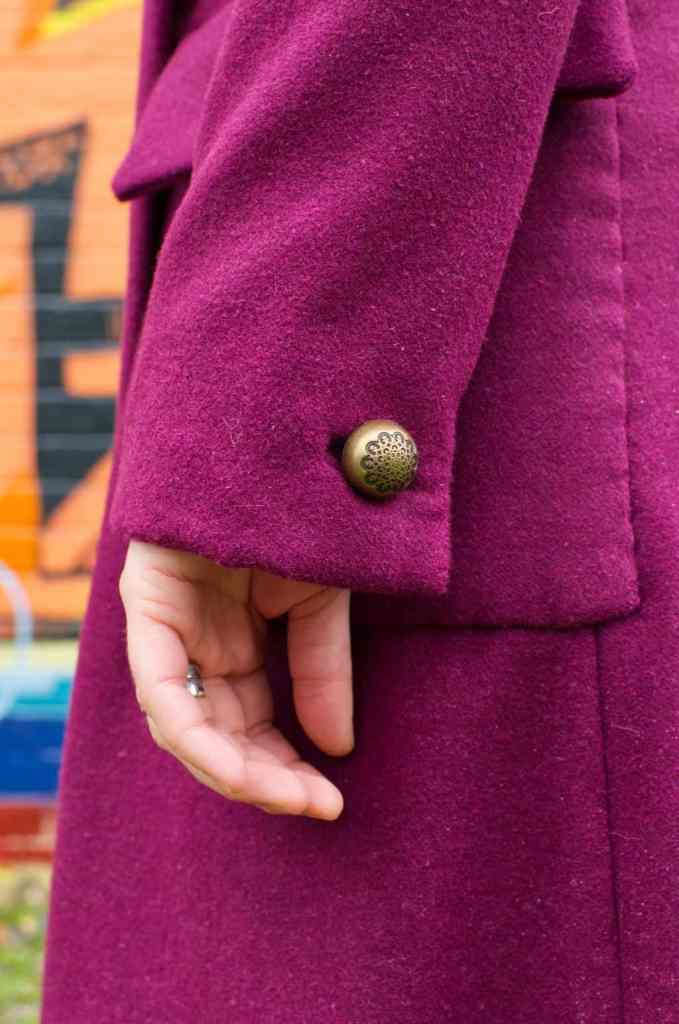
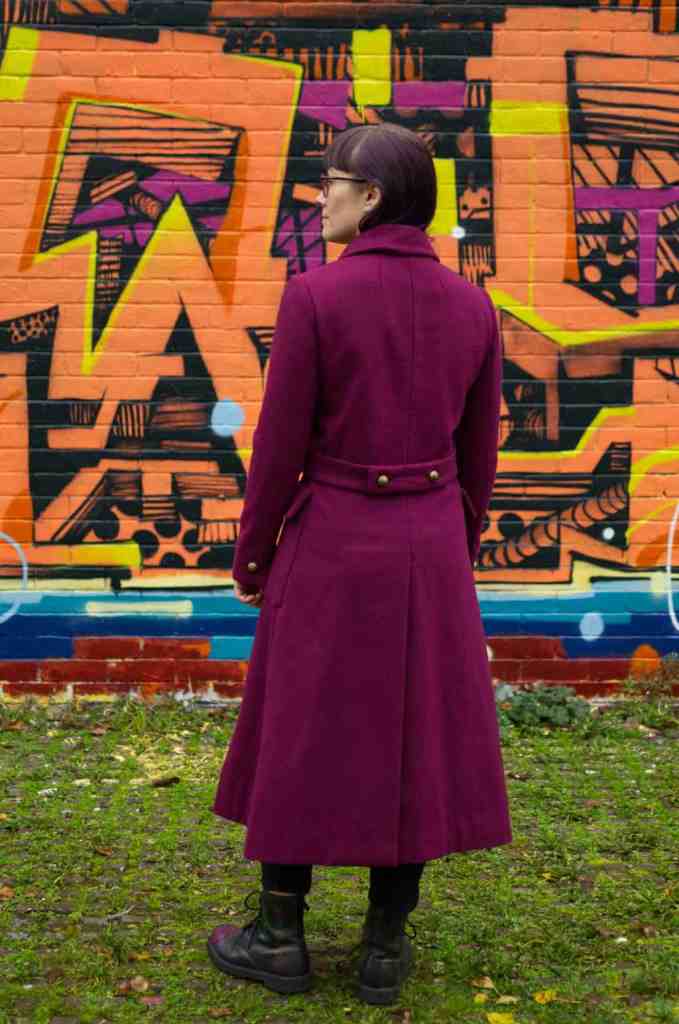
After all the button dramas, I realised that my belt is placed a smidge too high – it’s meant to intersect perfectly with that corner seam, but I’ve got it a little too high. On both sides, at least, so it’s consistently off rather than being wonky donkey across the two sides, but I’d still like to have got that right 🙄
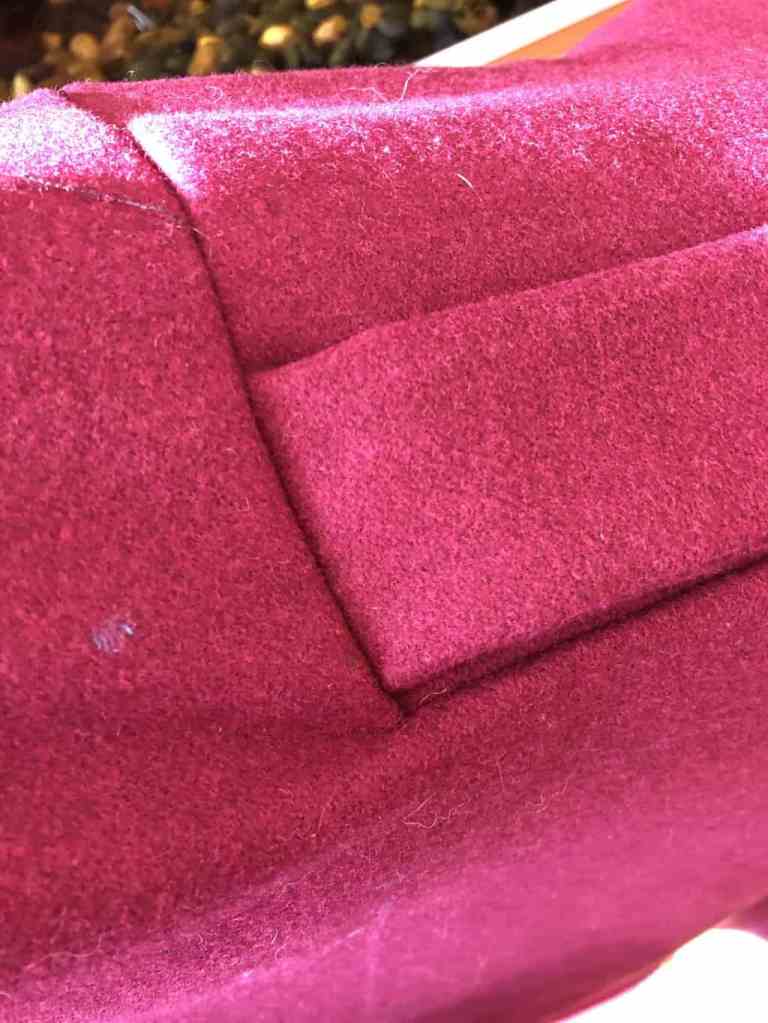
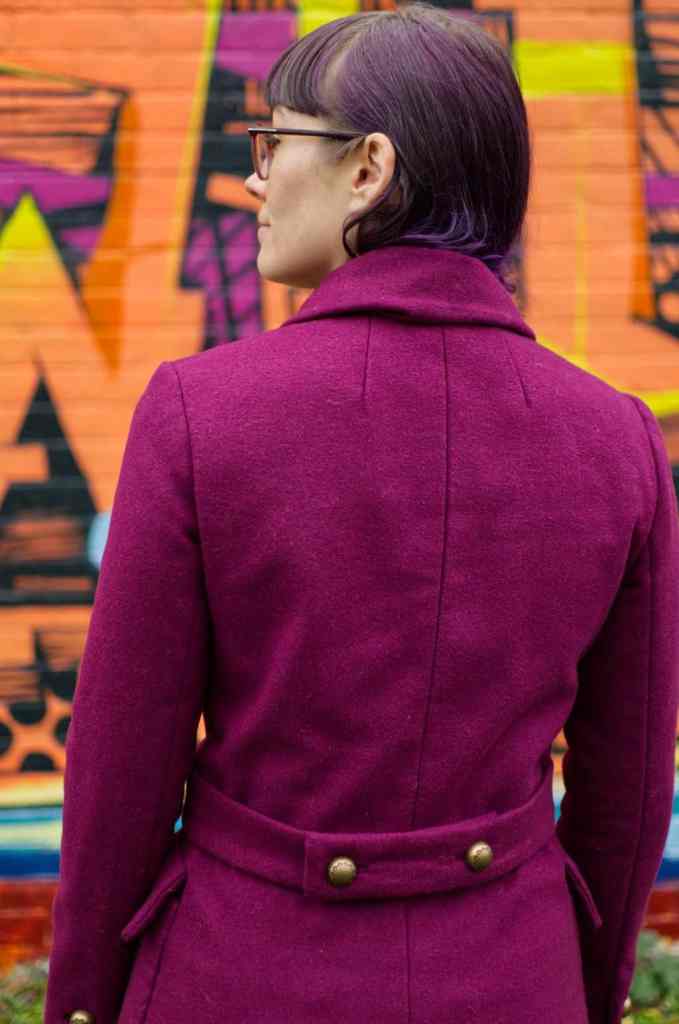
Along with the lack of piping, another thing that surprised me is that there’s a distinct lack of topstitching on this coat – instead, you’re expected to press everything into submission. I’m not sure how I feel about that – I’m really into my topstitching, especially on coats (because there tends to be so much of it and I can get a proper hit) but there’s literally NONE on this coat. Perhaps I should have pressed better, but on places like the belt at the back the fold line isn’t quite as crisp as I’d hoped (which could possibly be improved with some topstitching) but that would take away the ‘clean’ look of the coat. Perhaps it’s the fabric not pressing well, or maybe I’m just not so hot at folding it perfectly. Could literally be either 🤷🏻♀️ Plus, after the melty attitude of the collar, I was a bit hesitant to really go for it with the heat 🔥
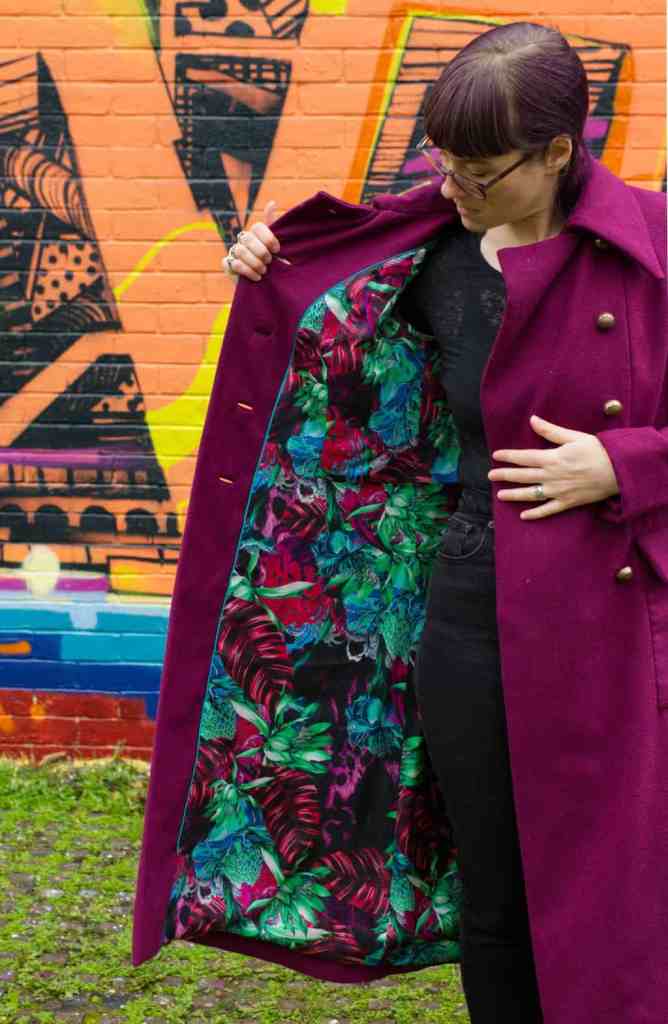
You have to mirror the panelling of the outer coat on the lining – getting those right-angled corners in neatly is bad enough in the wool but in the shifty, thin lining its an absolute mission! (they’re at waist height in the photo above – the print of the fabric almost obscures all my hard work 👀) Mine turned out not-too-bad, but it’s on the inside anyway so no one will see 👀 Keeping with the we-love-hand-stitching vibe, in true lining-weirdness you’re meant to construct the body of it without the sleeves, and then sew the raw armholes of the body lining to the armhole seam of the coat – and then slip stitch (by hand, obvs 🙄) the armhole seam of the sleeve linings which you’ve just constructed separately. I wasn’t totally convinced, so I went with my usual approach of constructing the lining as a whole and then just tacking the sleeve layers together at the underarm.
And of course, all the back vent edges are hand-stitched 😂
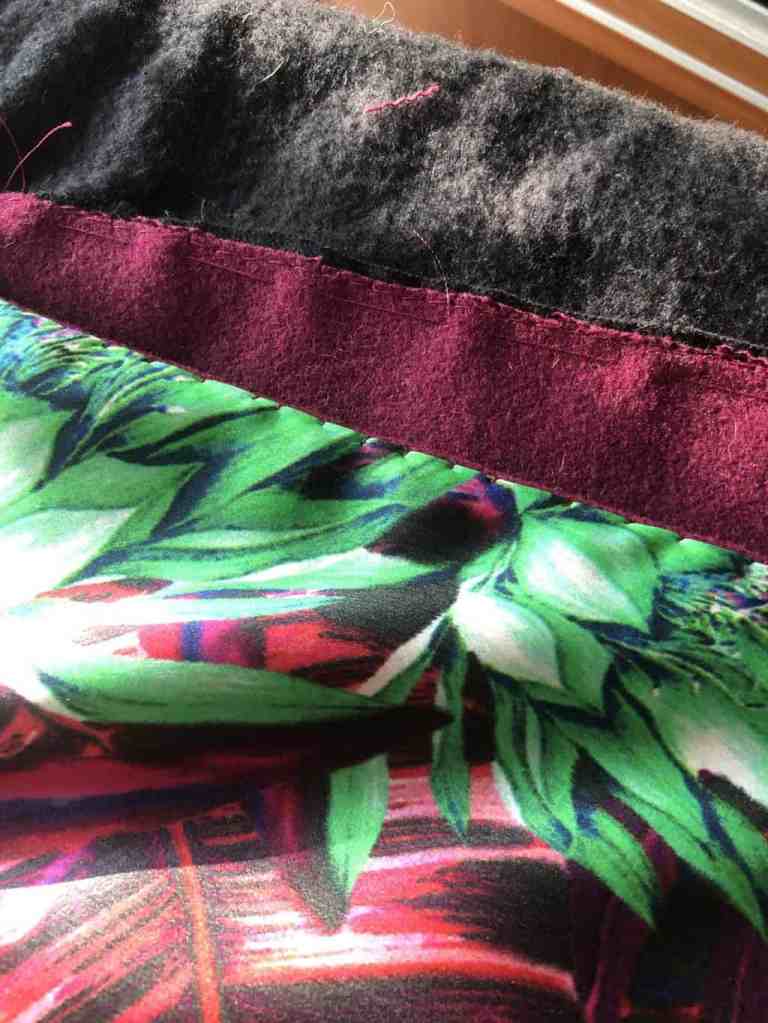
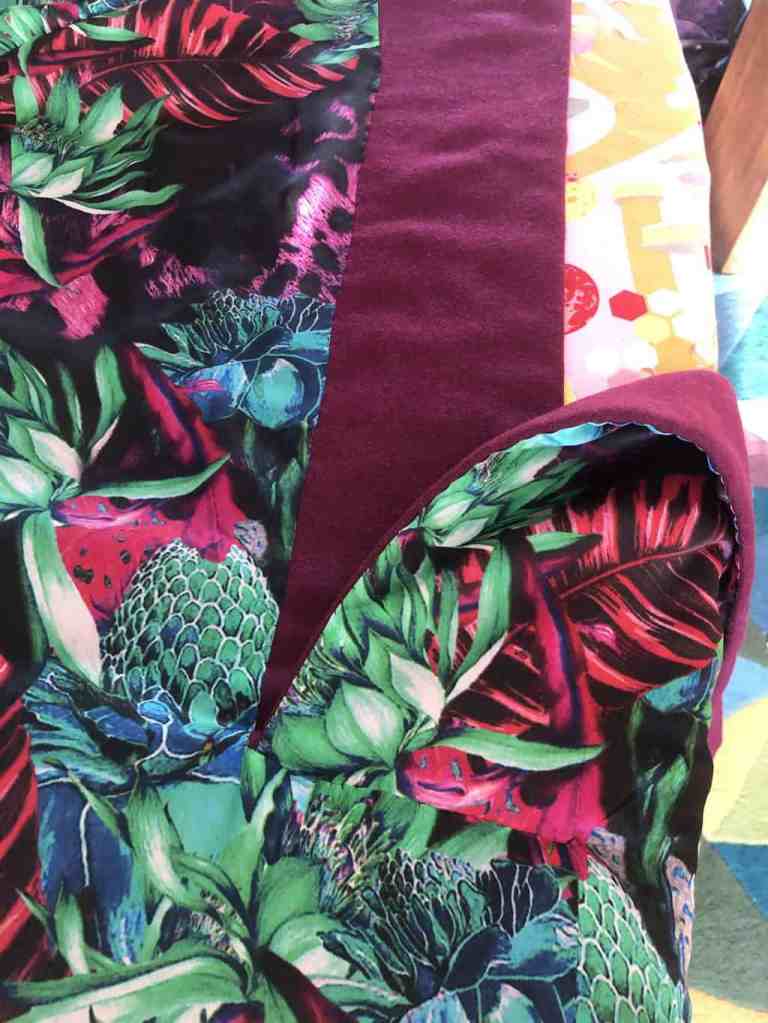
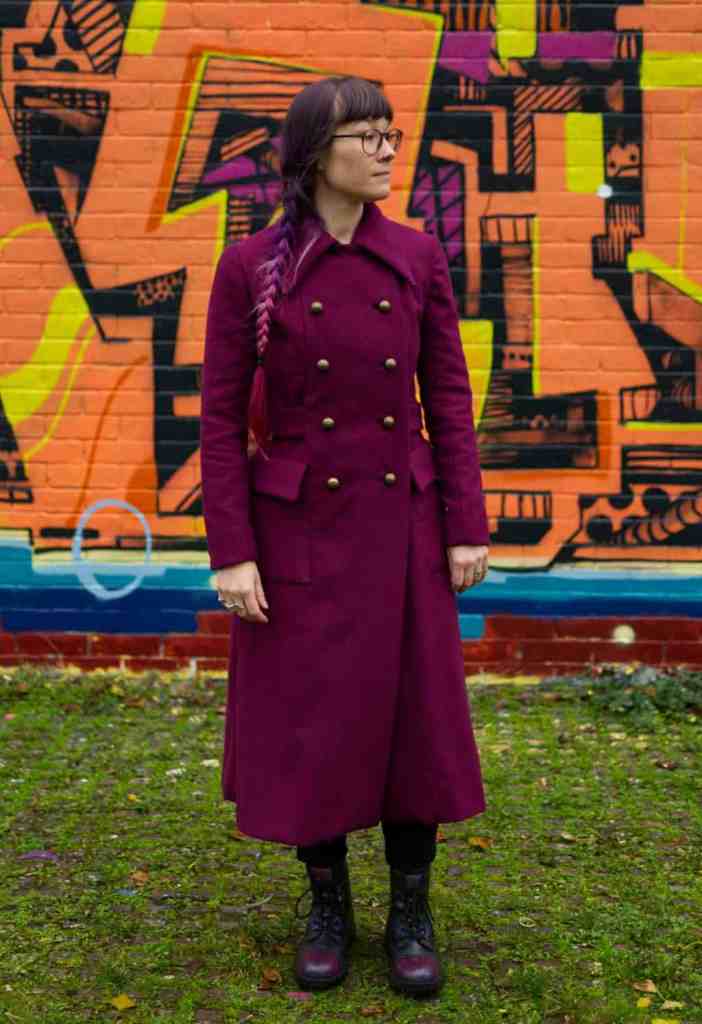
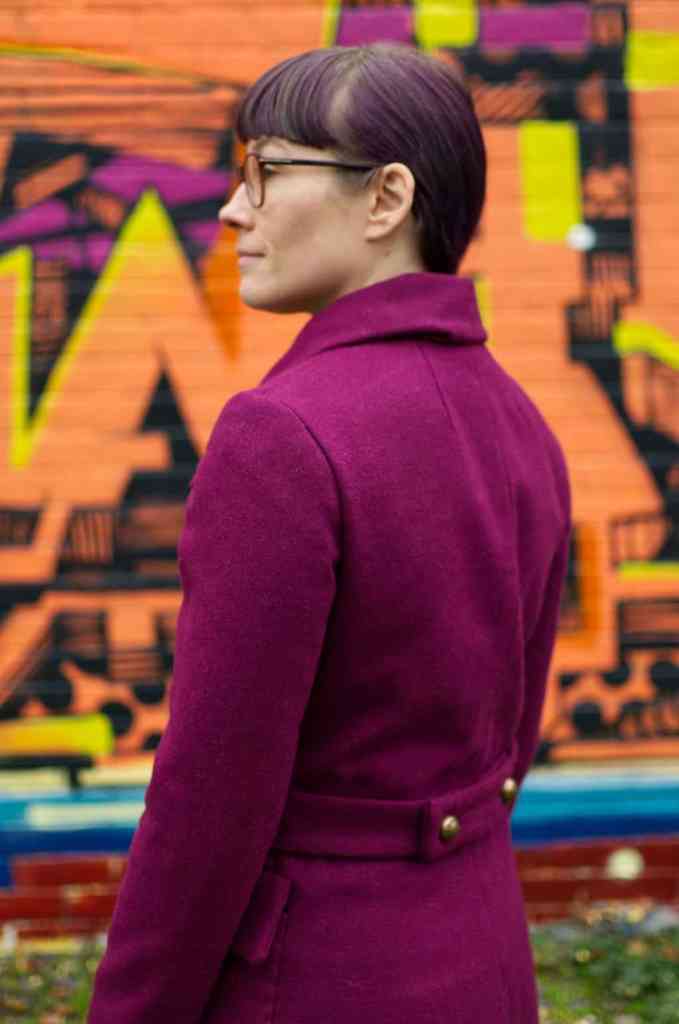
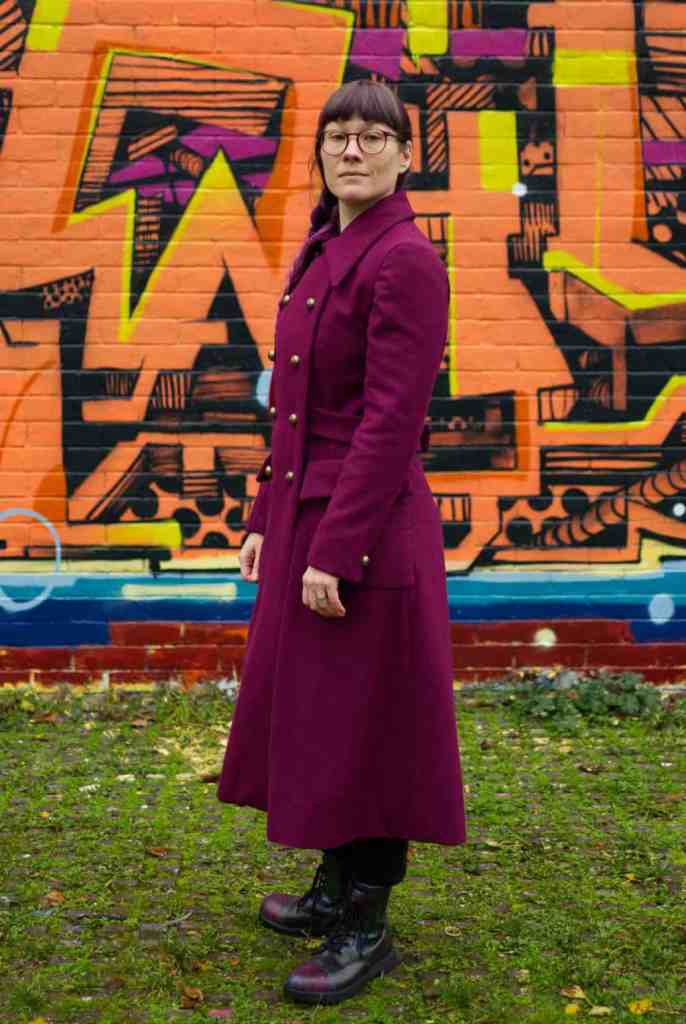
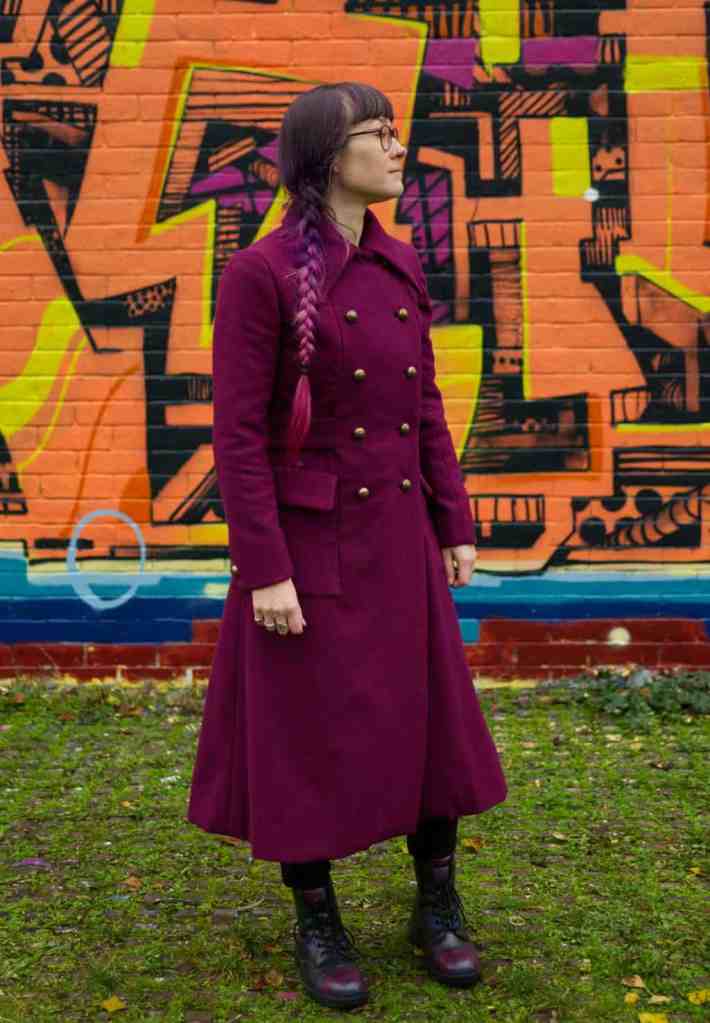
Overall, I’m pretty happy with the finished coat. I’ve got a couple of weird puckers at the bottom corners of the front panels – I think it’s to do with how I’ve fixed down the lining at the bottom of the facing. This is one area I feel like my technique could definitely be improved – every time I come across posh ready-to-wear coats in stores I look at the inside corners of the front facings to see how they are sewn 😂I feel like if the fabric was a bit thicker and a bit more stable, it might not have shown as much, but I’m clutching at straws here and it could be the fault of my stitching method. In the photos below you can really see the drape lines down the front panel and the wrinkles at the sleeve head 👀
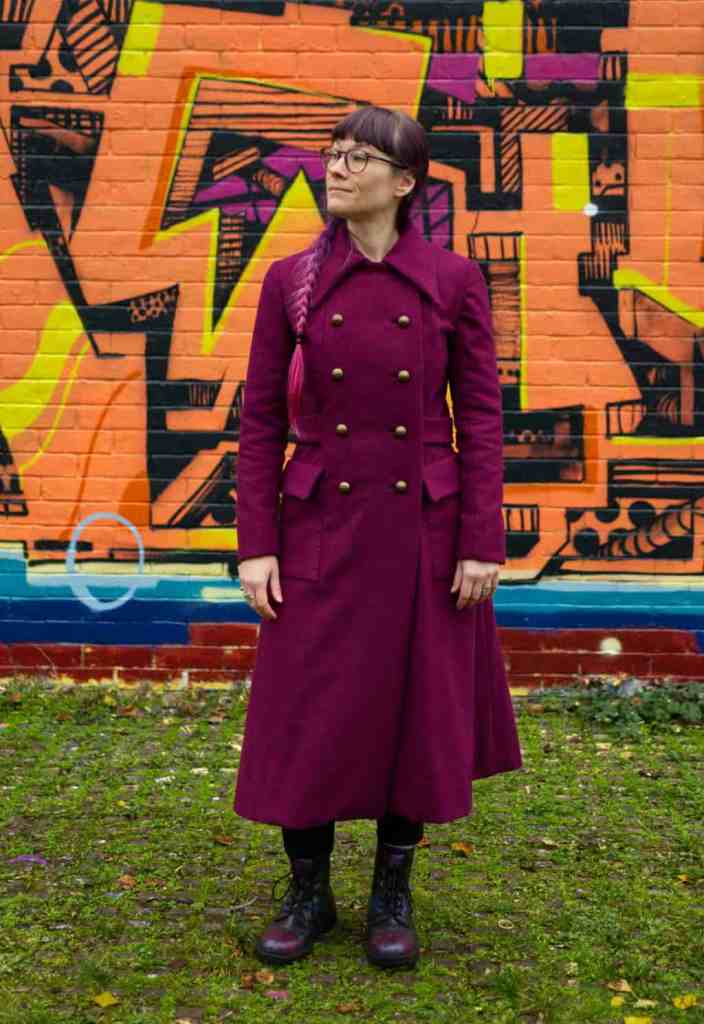

And let’s not forget the waist wrinkles 👀
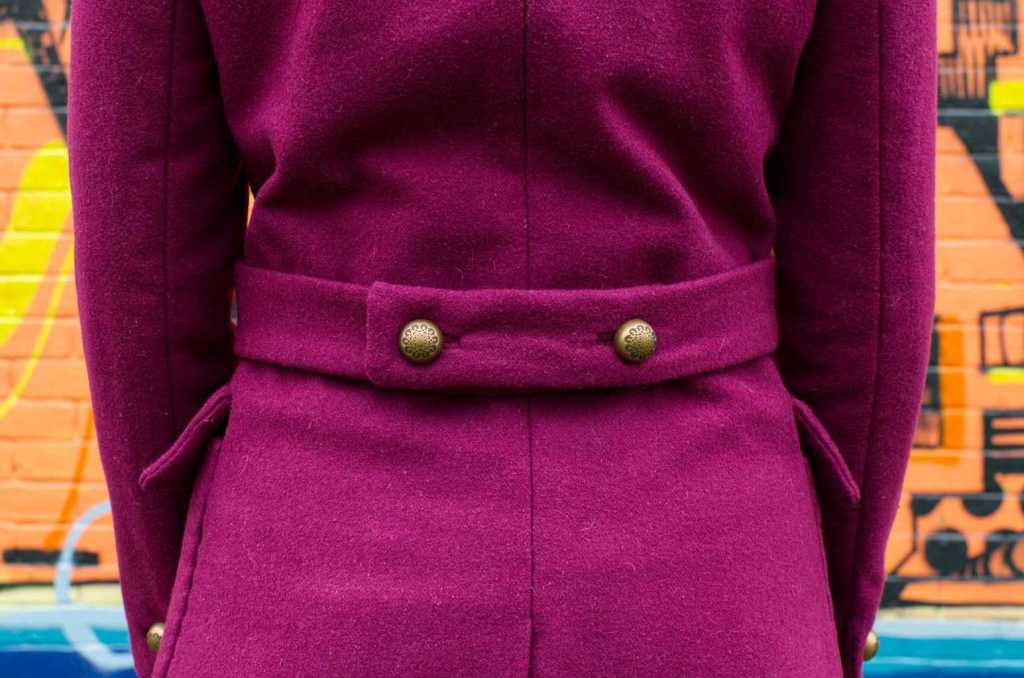
I definitely think a thicker, more stable fabric is the way to go with this coat. You know the stuff – super thick and feels like felt. That kind of fabric. Which, thankfully, my cashmere is – but we have the small hiccup of the pattern recommending three metres of fabric and my cashmere being 2.6 metres. Reckon I can squeeze it out of it? I bloody hope so…
Fit wise, they’re not wrong when they say on the envelope that the coat is designed ‘to be worn over the dress only’. I can’t get my arms in while wearing a jumper. I could probably do with a bit more room at the hips, too, because the front edges of the coat don’t hang straight down all the way – they flare out a bit because my hips push them out. Strangely though, it’s a little bit loose around the waist – the belt sags downwards a bit at the back – and I could take it in by a good inch on each side. I was expecting it to be tight around the waist, because the pattern says something properly optimistic like a 26-inch waist measurement (😂) which mine was NOWHERE NEAR at the time I made this coat, but could be getting closer towards since I’ve managed to drop a few pounds. To be honest, I should probably try it on again now anyway because there might actually be a little more breathing room around the bicep 💪🏻
I’ll probably make the hip adjustment for the next version, but I’m going to see if a more stable fabric helps the waist issue. It might not look so wrinkly with a thicker, stiffer fabric. The viscose element to the fabric I used definitely gives it a bit too much drape – those wrinkles around the waist and arms look 🤢 👀 I’ll use the horsehair canvas interfacing on the next one as well, rather than the iron-on stuff (and will obvs report back whether it’s worth investing in). Just need to find a lining fabric worthy of my cashmere now!
Despite the wrinkles and the melt-fest-fabric, this was a seriously enjoyable sew – a really in-depth, meaty make. The pattern, though expensive, was worth every penny – and you know what? People spend huge amounts on a night out drinking, or going to a football match – which I don’t do either of so I feel zero guilt about spending money on a posh pattern instead! 🤑😂
So, what’d’ya think? Do you sew vintage patterns? Or do you prefer the more modern designs and instructions?
Happy Sunday ✌🏻

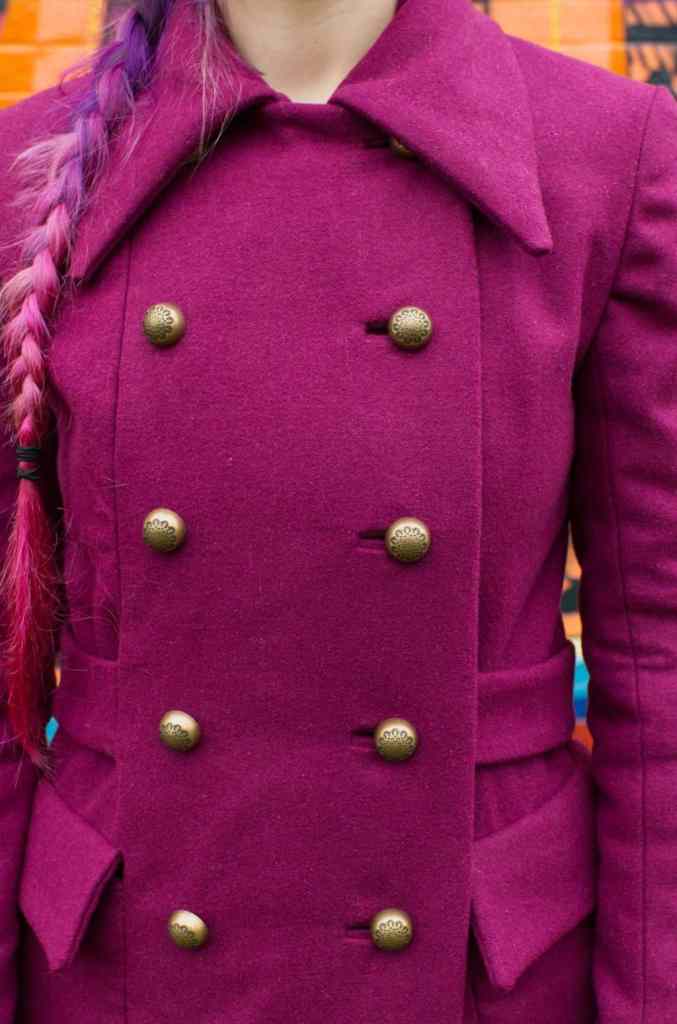
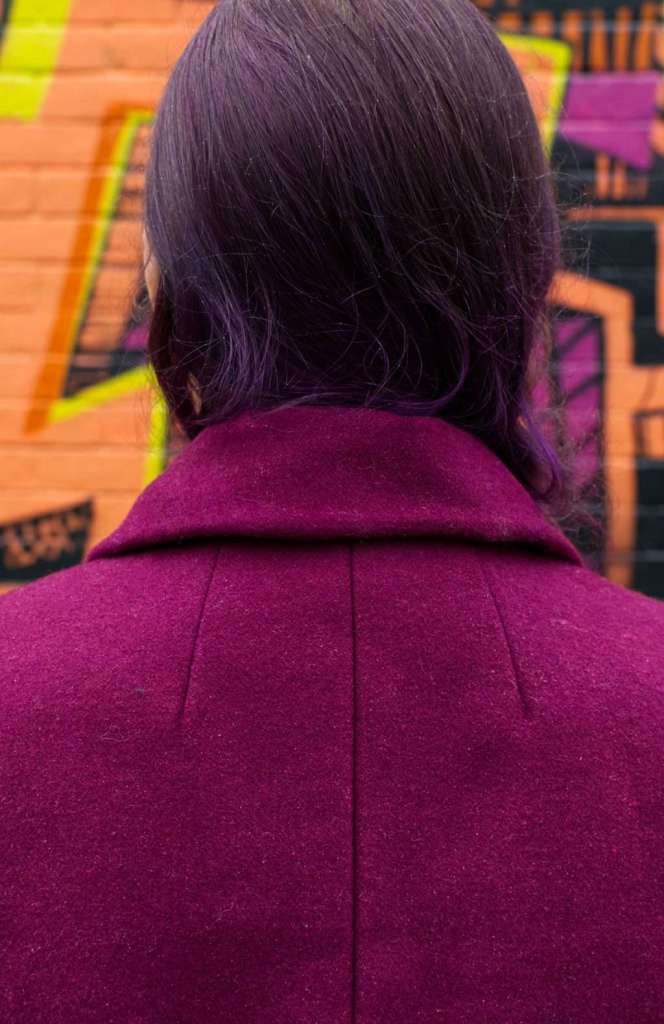
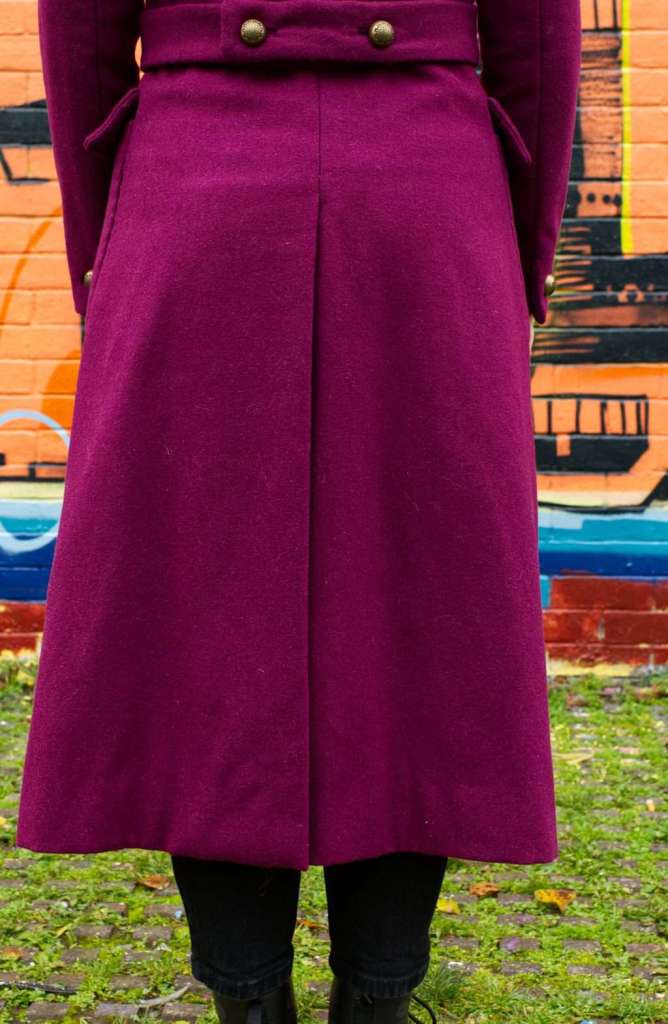
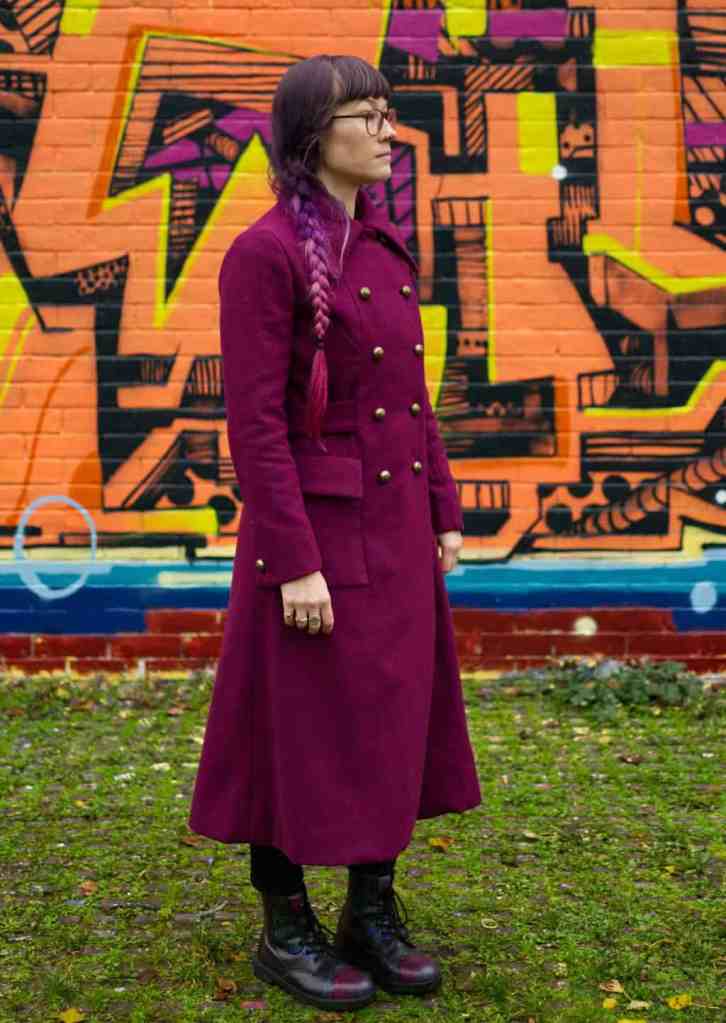

On the blog next week – I’m still experimenting with my Cricut machines, and I’ve got a handful of little projects to share with you 💜 Subscribe below to have the post drop straight into your inbox 🙌🏻
WANT TO SEE MORE?
Enter your email address below to receive fabulous new posts direct to your inbox! No spam ever, just handmade awesomeness for you to enjoy.

27 responses to “They don’t make ’em like Dior anymore”
Wow, your coat looks fabulous and I can’t see that your criticisms are justified at all. I had a coat in this style, it was green and a gift; not my colour at all, but I loved that coat. It was around 1971/2 and I was much smaller in those days, lol.
My Mum sewed me a coat when I was in my late teens, but I’ve never made one myself. I don’t have that much confidence in my sewing skills. It’s getting the fit right that bothers me and if I’d spent a lot of money on the materials, I’d be seriously concerned.
I own a lot of vintage patterns, as I don’t part with them and I’m getting on a bit, but tbh I don’t sew with them now. I should get rid, really, while I’m having a sort out.
LikeLike
Hi Bren!
Ahh, thank you for your lovely comments 💜
I find that the vintage styles of coats are just gorgeous, they don’t make them like that anymore that’s for sure. I would definitely use some ‘surplus’ wool (or something that’s not too spendy) for your first couple of attempts at coats – just while you practice. I remember my first couple of coats and they were all over the place – thankfully the fabric was quite cheap, so I didn’t shed many tears over it. The best way of learning though is by doing, so go for it – I always say that if you can sew a seam, you can sew a coat – because essentially, a coat is just lots and lots of seams 🤔
That’s amazing that you have so many vintage patterns – maybe have a flick through them, you might find something that takes your fancy? 😊
LikeLike
This is a fabulous coat. Thanks for all the construction details. I haven’t tried it myself yet, but this would be the perfect project to try this technique for invisibly machine stitched patch pockets
http://prosew.blogspot.com/2010/12/bluff-stitching-patch-pocket.html?
LikeLike
Ohhhh this is GAME CHANGING!!! I never would have even thought of doing it this way – thank you SO much! 💜 I’m definitely going to try this on the next version. I don’t think I have the embroidery foot they mention, so I might have to get one of those. I see that the pocket they are sewing is curved, whereas the pockets on this coat are square – I wonder if it would still work the same? Or maybe I’d have to sew three separate seams, one along each edge? 🤔
LikeLike
What a fabulous coat. And thanks for all the construction details. I haven’t tried it yet, but this would be a great project for trying this technique for invisible machine stitched patch pockets.
http://prosew.blogspot.com/2010/12/bluff-stitching-patch-pocket.html?
LikeLike
That coat is amazing! Fabulous colour. Makes a real statement. Looks very professional.
LikeLike
Thanks Ruth! 💜
You know I can’t resist bright pink, haha. I really love the buttons!
LikeLike
I think you’re my all time favourite sewing blogger! You did a great job on the coat. Just two thoughts here: I wonder if you cut the sleeves slightly wider on the next go round if they wouldn’t show the wrinkles? Also the hem, I wondered about putting a chain along the hem a la Chanel jacket? I did it with a coat I made that I wasn’t happy with the way the hem fell and it seemed to fix it. Just sayin’ Happy sewing.
LikeLike
Hi Susan!
Ahh thank you so much for your lovely comments! 💜 I’m so happy to hear that you enjoy the blog 😊
Do you think the sleeves are wrinkly at the top because they are too tight? I was thinking that it was just because of the drape in the fabric, but maybe that’s not it at all.
Do you sew the hem chain to the inside lining, or to the actual outer wool? I’ve never done that before, but now I’m really intrigued!
LikeLike
The coat is amazing Sarah and I love your explanations and descriptions of the work that goes into all your sewing projects. I am in awe of your commitment to solving the challenges.
LikeLike
Thank you Maureen! 💜 It really makes my day to hear that you enjoy the blog 😊
‘Commitment to solving the challenges’ is another way of me saying that I don’t like to be beaten, haha! 😂
LikeLike
You did a great job on your coat. I think it looks very nice and the fit issues you mentioned are not apparent to me.
An itchy wool collar is a perfect time to wear a silk scarf. You might be able to make one with leftover lining fabric.
LikeLike
Thanks Elizabeth! 💜 Ohhhh YES now that is an excellent idea – a silk scarf would look beautiful! And I think I remember rightly that on the pattern envelope, the model is wearing a silk scarf too!
LikeLike
Oooo scarf in the lining fabric is a great idea!
LikeLike
That coat is loely. I look forward to seeing the cashmere version.
LikeLike
Thank you! I’m gonna have to get the fabric out and lay the pattern pieces over it though because I am a few cm’s short of the recommended yardage on the envelope… I’m not sure how much wiggle room there is, so I might have to do a bit of pattern Tetris 🤔
LikeLike
That is one hell of a coat! Putting the interfacing on the interlining layer sounds a bit weird to me tbh, you’d think you want the structure and support close to the outside, especially with such a strong shaped coat! I’d give padstitching a go, if you do it right the amount of shape it gives you is insane. And as for the topstitching: I do think coats like these look amazing with little visible stitching, and plenty of steam (and a press cloth) should get that cashmere looking sharp. For pockets I would use a tiny fell stitch instead of a slip stitch, I,’ve attached some pockets on a coat like that and they held up nicely! Sleeve heads are really nice, but I always combine them with a (small) handmade shoulder pad. Both are pretty easy to make from hair canvas and batting, with the advantage of working perfectly for your coat pattern. Good luck with the big one!
LikeLike
Thank you! 💜 It definitely was a labour of love, that’s for sure! But, an enjoyable one.
That’s what I thought about putting the interfacing on the interlining… but it seemed to be what the pattern suggested 🤔 Next time I’ll fuse it to the outer fabric I think, because you’re right – the support should be on the outside of the coat. I’ve just done some research on fell vs slip stitch (because I actually have no clue what the difference is) – and now I know! Thank you for that! The fell stitch does look a lot stronger 💪🏻
I think I need to watch some Youtube videos on pad stitching, because I’m not really sure of the correct technique for it – though I imagine that it can give some pretty awesome results! I think I need to look into how to make shoulder pads too… I’m excited for all the new stuff to try! 🙌🏻
Thank you so much for sharing your knowledge 💜
LikeLike
Thanks for this Sarah, the coat is awesome and the detailed explanation really helpful.
LikeLike
Thanks Elaine! Hope you’re good 💜
Glad you enjoyed the blog post, there’s a lot of detail to take in isn’t there!
LikeLike
It’s gorgeous! I especially like the back neck darts and the super-long vent. Did you watch Next in Fashion? This reminds me of a cleaner, more wearable take on a greatcoat one designer sews.
LikeLike
Thank you! 💜 The back neck darts are one of my favourite things too – they give such good shaping. Ah, no I didn’t watch Next in Fashion… yet. It’s still on the list! It’s a very long list though, but I have a bit more free time now we can’t leave the house so I might get round to it a bit sooner 👍🏻
LikeLike
The coat is gorgeous!
You’re my girl crush, love reading the self-deprecating humor and the gifs. It is actually more enjoyable than sewing my own stuff, ha. Which
I could probably say similar things about (I’ve been having anxiety fits about a simple jersey tee for a week now, wahhh – though it has sloths printed on it and wearing it to work is my only motivation for finishing it).
Please don’t ever stop blogging!
LikeLike
I loved your post Sarah, I’m not sewing at the mo but felt like I was there with you making this! Love the colour and the lining, it looks mega. I second the suggestion for bluff patch pockets, it’s my favourite technique which I explored for the first time when I made a vintage 60s coat and covered the method here: https://songofthesewingmachine.com/2017/12/05/bluff-patch-pockets/ Hope you find it helpful, the pocket does need a curved bottom though I have wrangled a square edge in other things I’ve tried just for kicks 🤣X
LikeLike
Hey Josie! So glad you enjoyed the post 💜
Thanks so much for the link to the patch pockets – extremely helpful! I’m defo gonna try this on the next version that I make. In fact, I might even dig out the cashmere this weekend and see if all the pieces will fit on it! Are you sewing again now? I’ve done not much at all over the past couple of months, but I’ve been spending a lot of time on my knitting and I’m really enjoying it. Remember back when I was attempting to knit that first pair of socks?! Well, *those* aren’t done yet but another pair are and I’m TOTALLY hooked on sock knitting now!! xx
LikeLike
I’ve been thinking about your square pockets. Should be able to machine stitch complete length of sides, if you do them first, but have to stop 1/2″ or so short each end when sewing bottom edge, and finish with hand stitching from inside. Still going to be sharper finish than hand sewing all the way around.
There is new tutorial on this technique on
https://lasewist.blogspot.com/2020/03/design-your-own-perfect-pockets-lined.html?m=1
LikeLike
Hi Karey!
Thanks so much for the link to the tutorial – very helpful! I am more than happy to finish off that last inch by hand if it saves me doing the whole thing with hand stitching!
I wish I’d have googled different techniques before blindly following the pattern instructions 😂
LikeLike